Adding the OAuth Configuration to the solution in Jigx Management
To complete these steps, you must be an Owner or Creator of the solution in and your solution has been published at least once and is available in .
1. Log in to at https://manage.jigx.com and open your solution.
2. In the menu on the left, click on Credentials.

3. Click Add Credential on the top right of the screen.
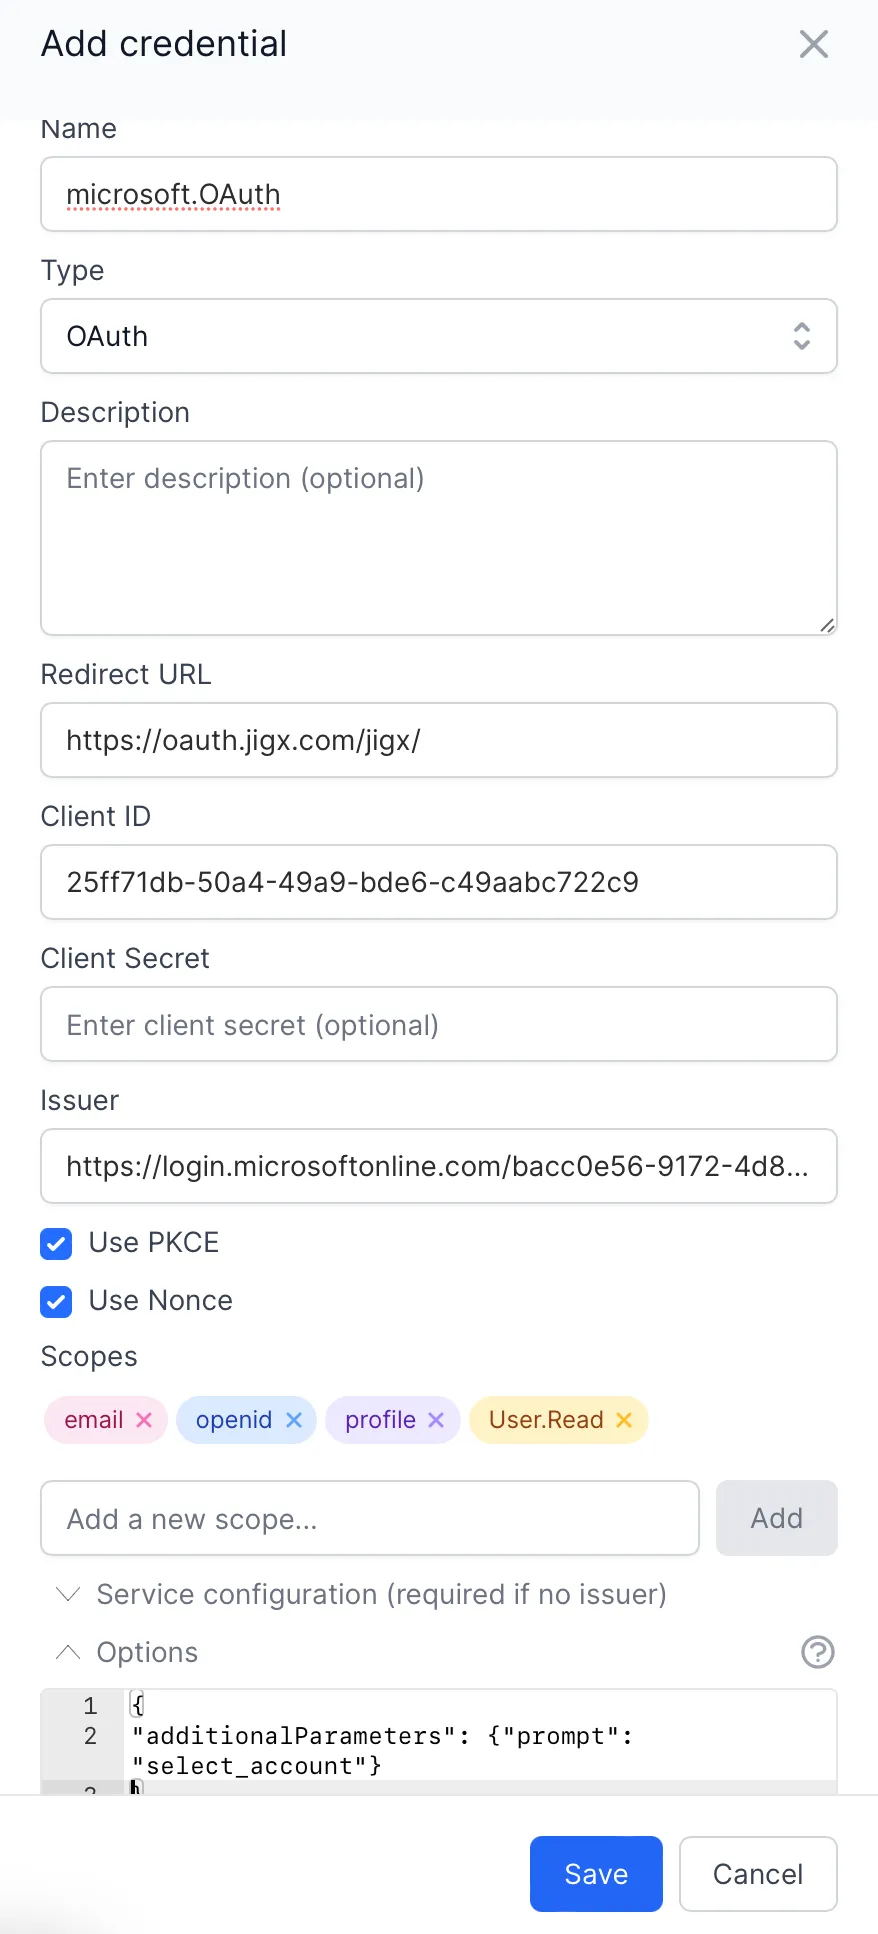
4. Enter a name for the credential, for example, microsoft.OAuth.
5. Select OAuth as the type.
6. Enter the OAuth redirect URL you specified when configuring the OAuth app in Microsoft Azure. In the case of the default app, the redirect URL is https://oauth.jigx.com/jigx/. If you are configuring this for a Branded app replace /jigx/ with the name of the branded app as specified in its app configuration. For example, https://oauth.jigx.com/nintex/
7. Enter the Application (Client) ID copied from the Azure OAuth configuration in the Client ID field.
8. Leave the Secret field empty for Microsoft openid-based OAuth.
9. Enter the portion of the URL copied from the OpenID Connect metadata document field in Azure in the Issuer field.
10. Add the scopes selected when the OAuth application was defined in Azure. Note that scopes are case-sensitive.
11. To allow a user to switch accounts when they are prompted during the OAuth loop, expand the Options section and replace the {} with the following: {"additionalParameters": {"prompt": "select_account"}}. The completed configuration should be as follows:

12. Click on Save to store the credential.
The credential is now ready for use in a function in a Jigx mobile app to prompt the user for their OAuth credentials when an API in Microsoft Graph is called.

