Data
The Data tab allows you to manage all the Dynamic Data tables and table contents used by the solution. All changes made in will be synced bi-directionally with the devices in real-time.
Although the User Interface of the Data tab presents all data in a two-dimensional table layout, the underlying data store (Dynamic Data) is a NoSQL store. This means that each record can have its field structure, and you can add or remove any fields on a per-record basis. Only the rid column is a system column and cannot be changed/removed from the record.
Use Row Level Security to protect and secure your dynamic data by determining the operations users can perform on the database, such as creating or deleting records and controlling users' access to the data records in the tables, for example, the ability to see sensitive information.
- Data policies - get set on the solution level and determine who can CREATE, READ, UPDATE, and DELETE records in a table.
- Authorized users - restricts access on a granular level and determines the exact data records in a table users can see.
Tables will only show if the solution is published in includes Dynamic Data table definitions.
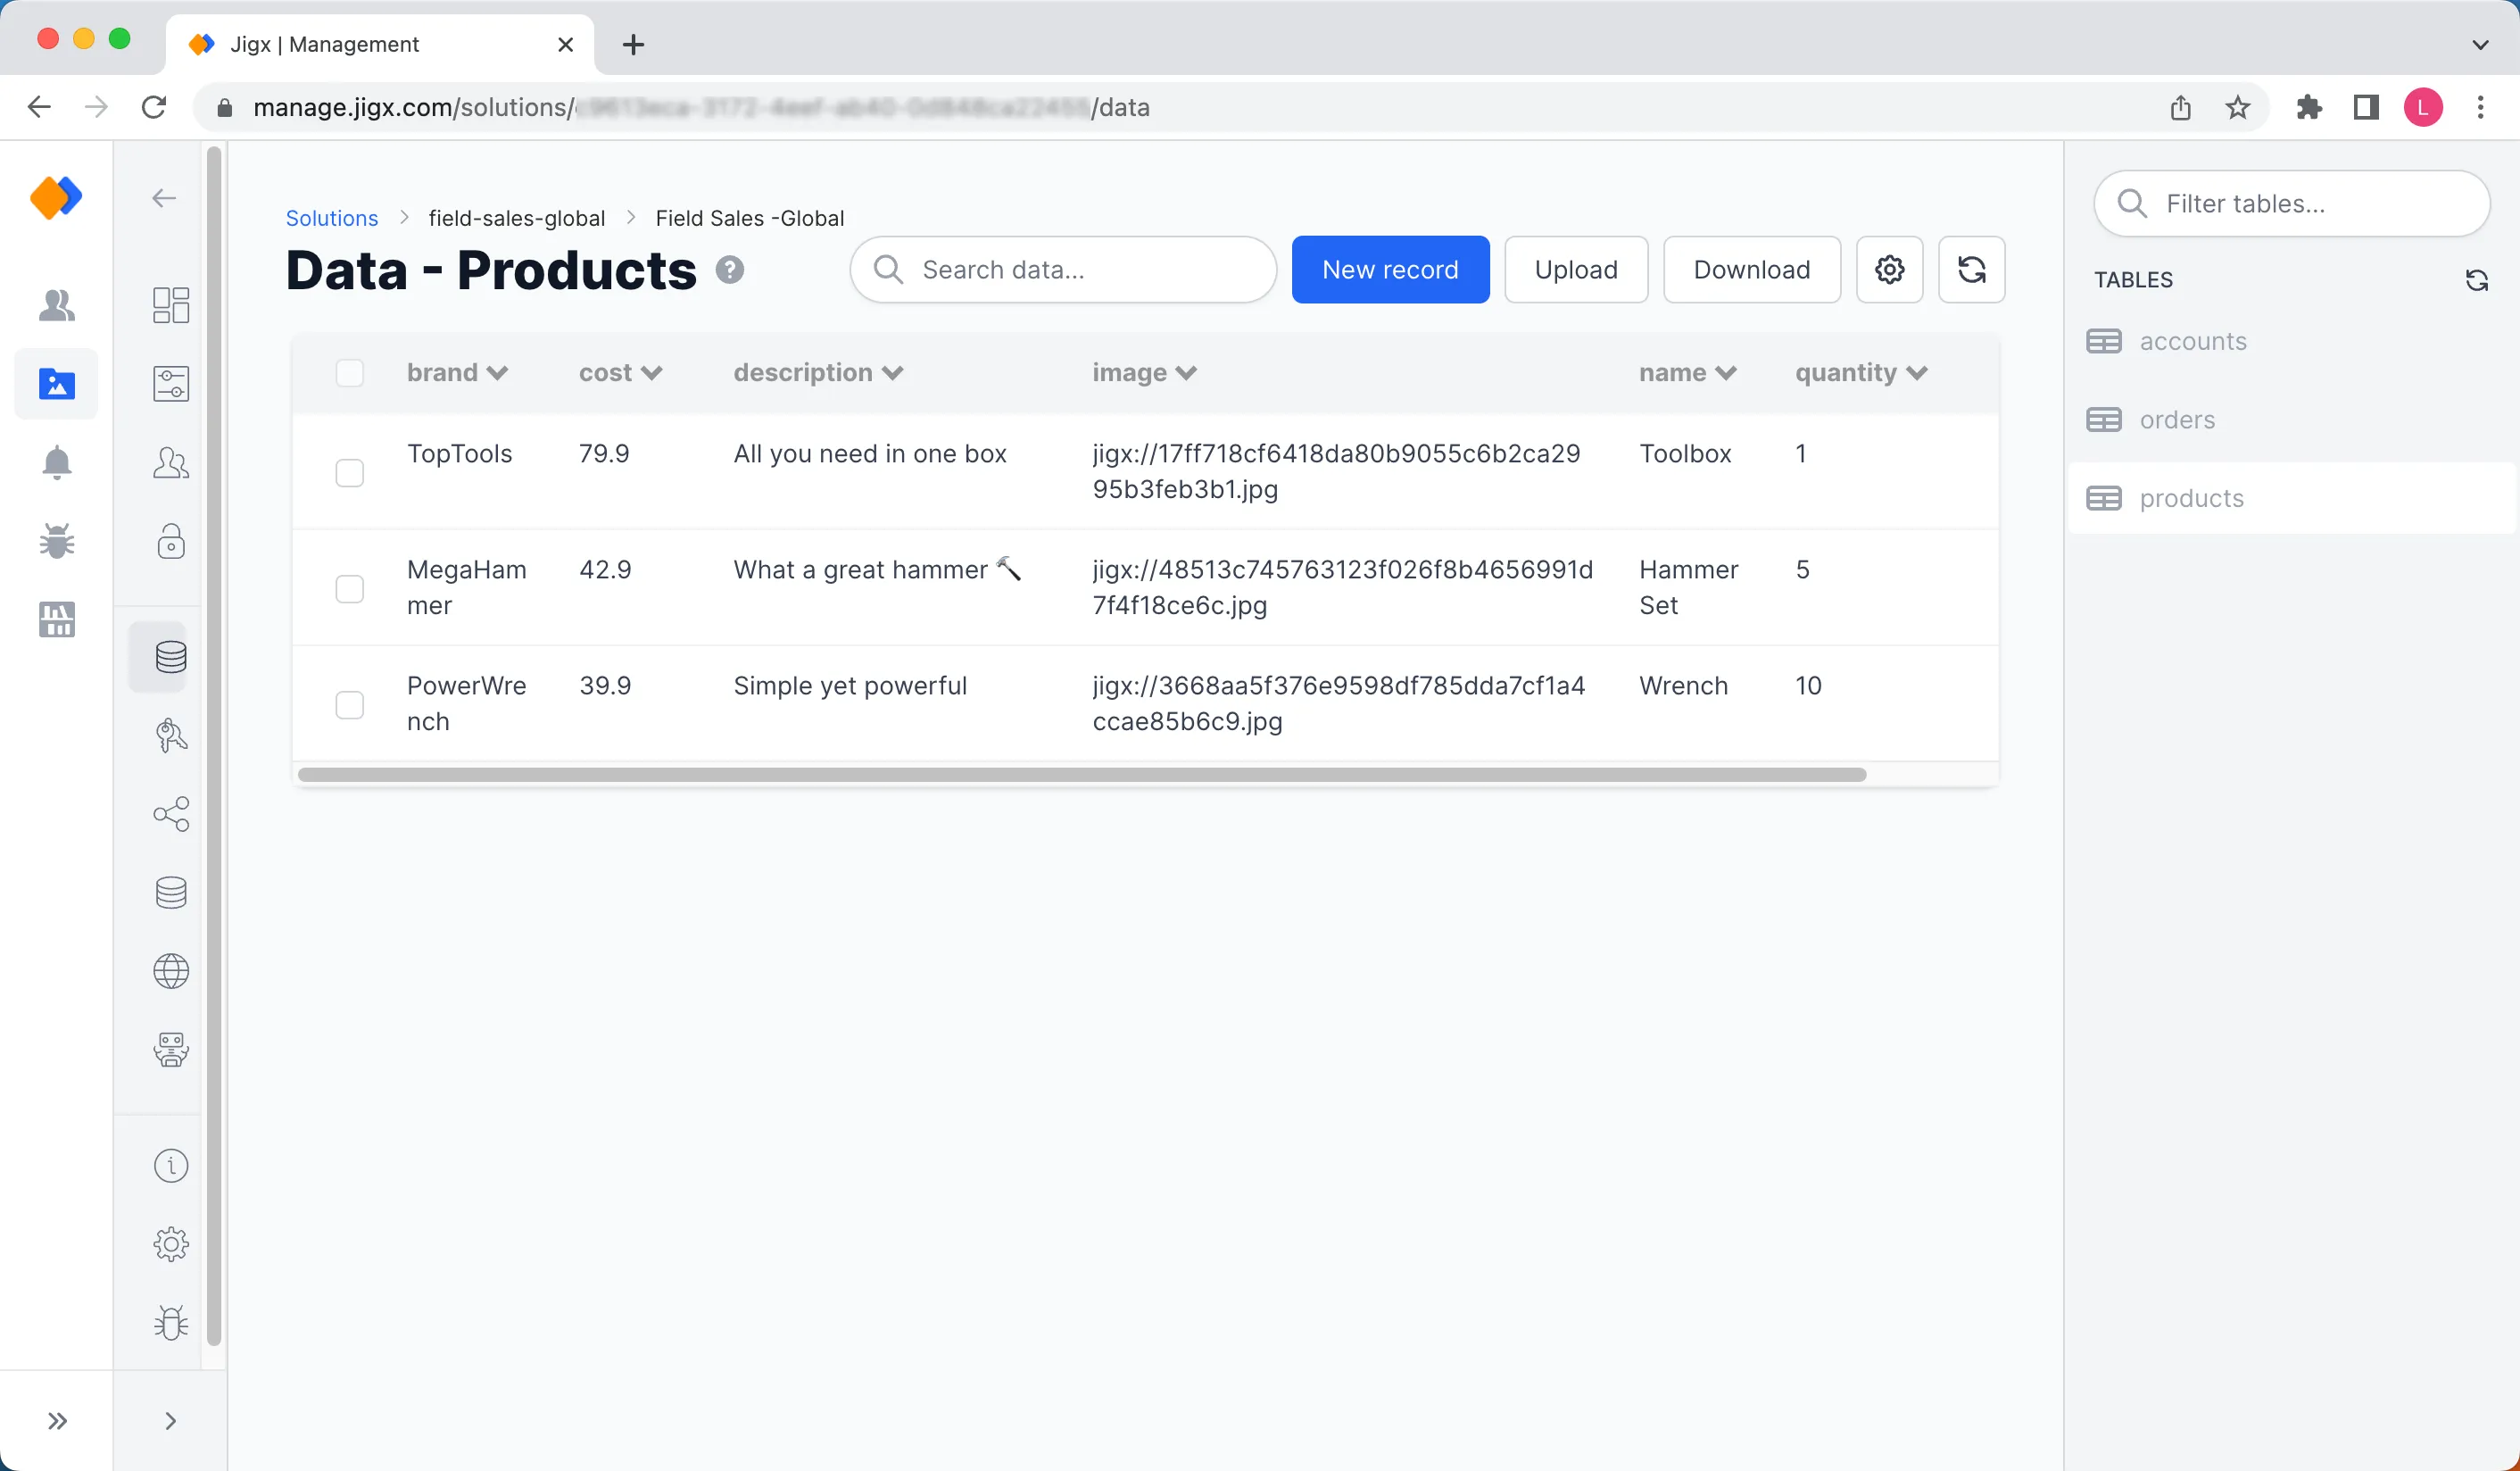
You can add records to a data table manually or by uploading a JSON or CSV file to populate the records in the columns in the table. To manually create a record:
- Click on the table you want to add a record to in the right-hand Tables pane.
- Click on the blue New record button. If you already have records in the table, you will see all existing columns of all records.
- In the New record pane add the data values for each column.
- Add new columns to your record by defining a column name and clicking on the + button right next to the new column name. As you add data the field displays the type under the entry, such as number, string or boolean.
- Once you set the data values of the fields you want to include in your record, click Save.
Edit an exisitng data record by:
- Clicking on the table in the right-hand Tables pane that you want to edit a record in.
- Click on the record entry to be updated, the Edit record side pane with the record's fields displays.
- Update the data values as required.
- Add a new column to your record using the + button at the bottom if required.
- Click Save, the record will be updates to the table and synced to online devices instantly.
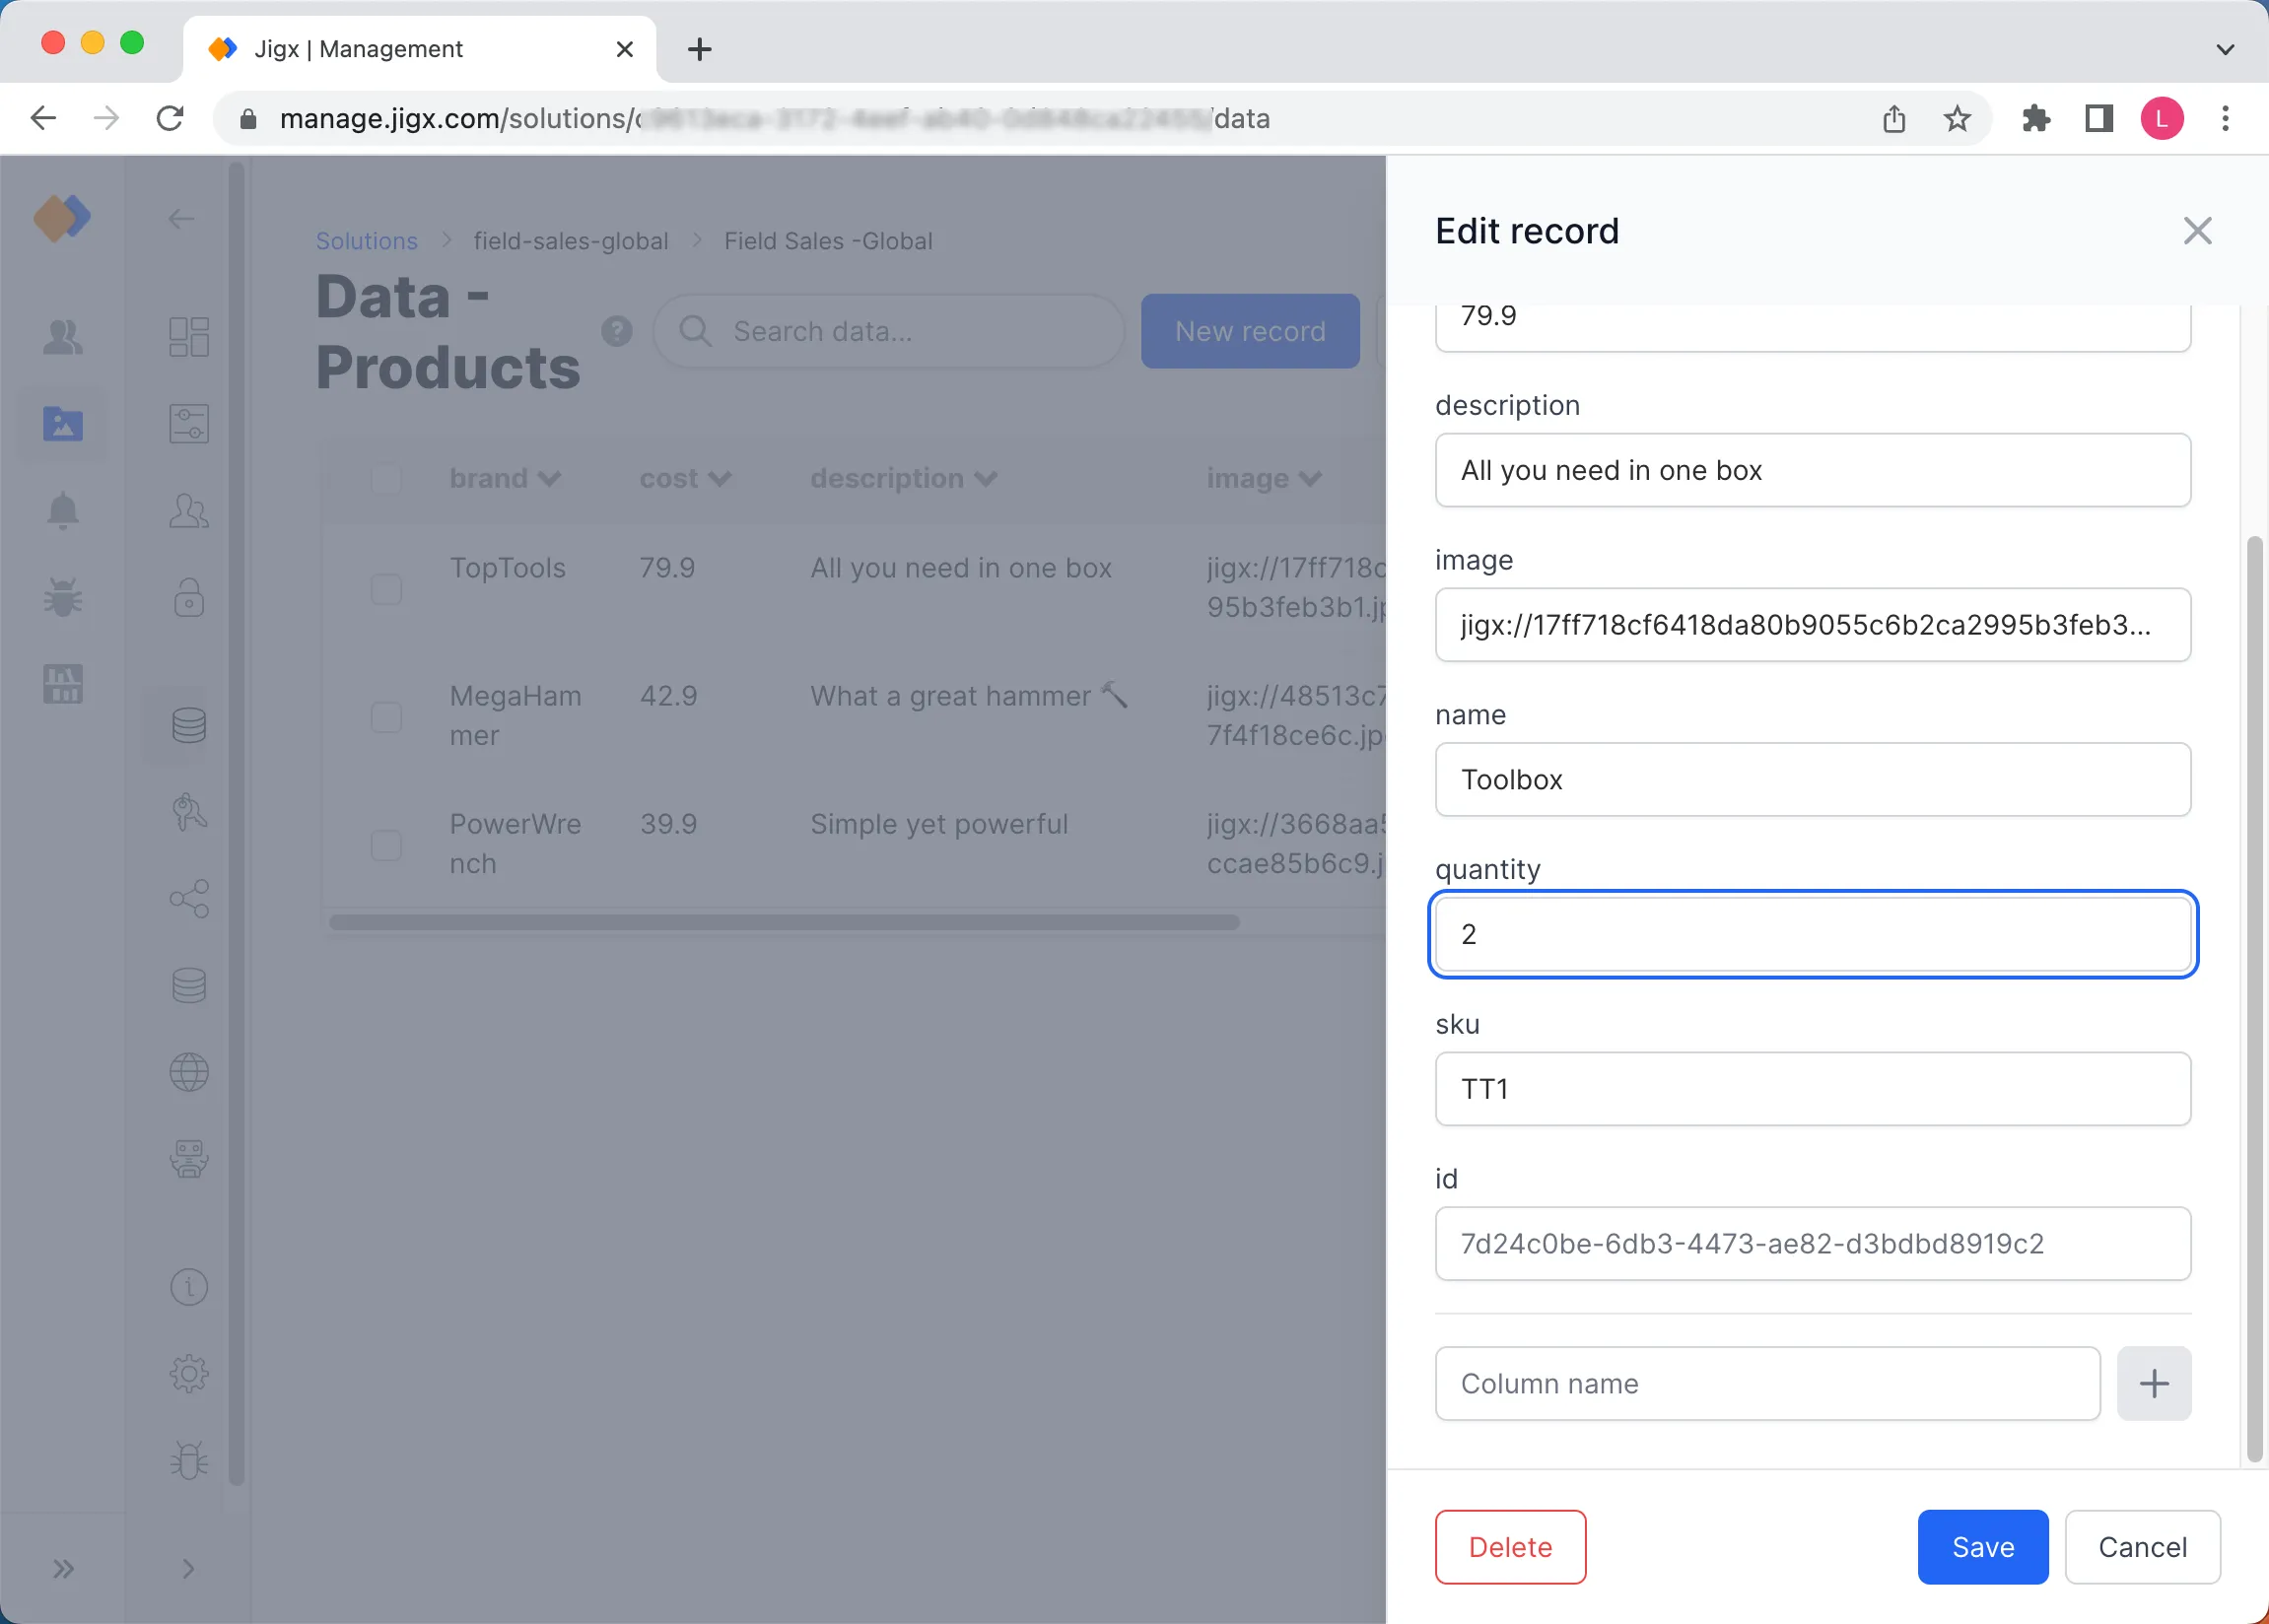
You can select single or multiple records to delete in the table by:
- Delete a single record - click on the record and select Delete at the bottom of the side pane (as shown in the image above).
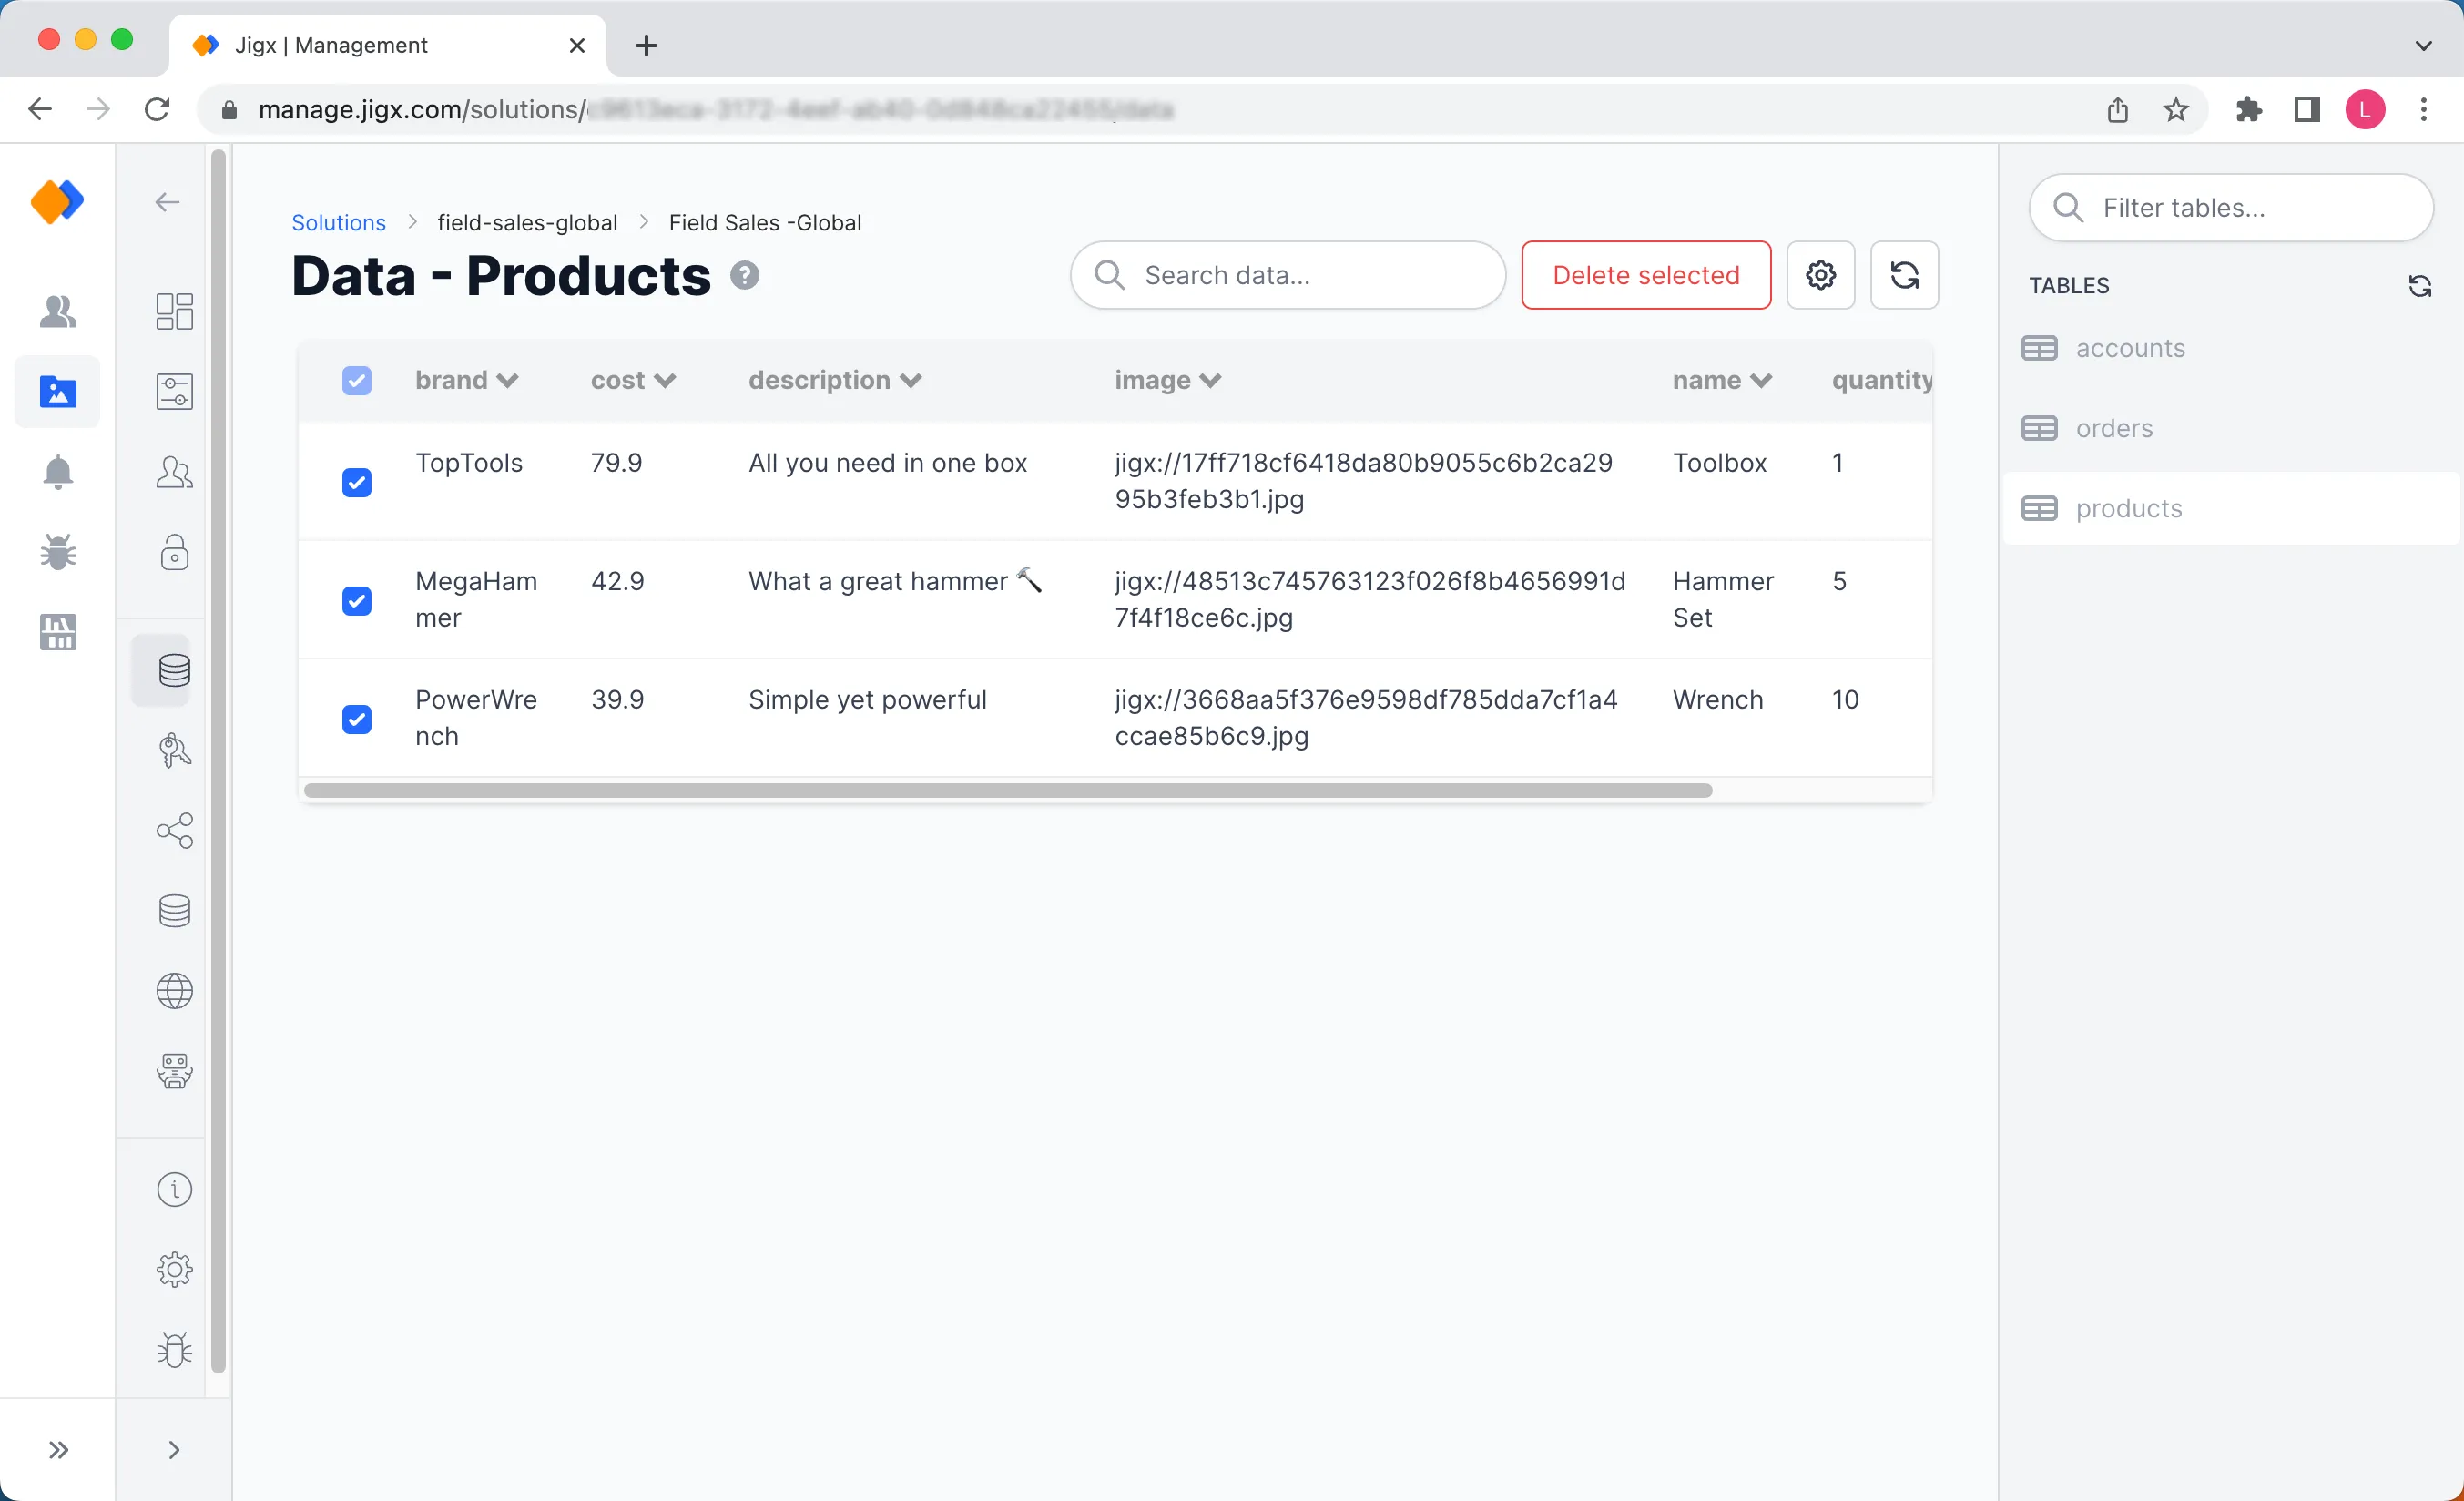
- Delete Multiple records - select the checkboxes next to the records you want to delete. Then click the red Delete selected button at the top of the screen. The records will instantly be removed from the Cloud store and online devices.
The gear icon at the top of the screen allows you to configure the columns in a table. The columns displayed in the Column settings side pane are the aggregated set of all columns for all records in that table. The rid and Authorised Users column are system columns, which are not shown by default.
- Visibilty - check the checkbox next to the column you want displayed in the table records. Similarily uncheck the column you want to hide in the table records. The rid and Authorised Users column is hidden by default. You can select to show the id if required. Click Apply at the bottom of the pane.
- Column order- change the order of the columns in the table by grabbing the hamburger icon on the right of the column name and drag it to the required position in the table.
You might require the data from the table for various reasons such as reporting or to backup the table before you delete it. Use the Download button at the top of the screen to download the data into a JSON file.
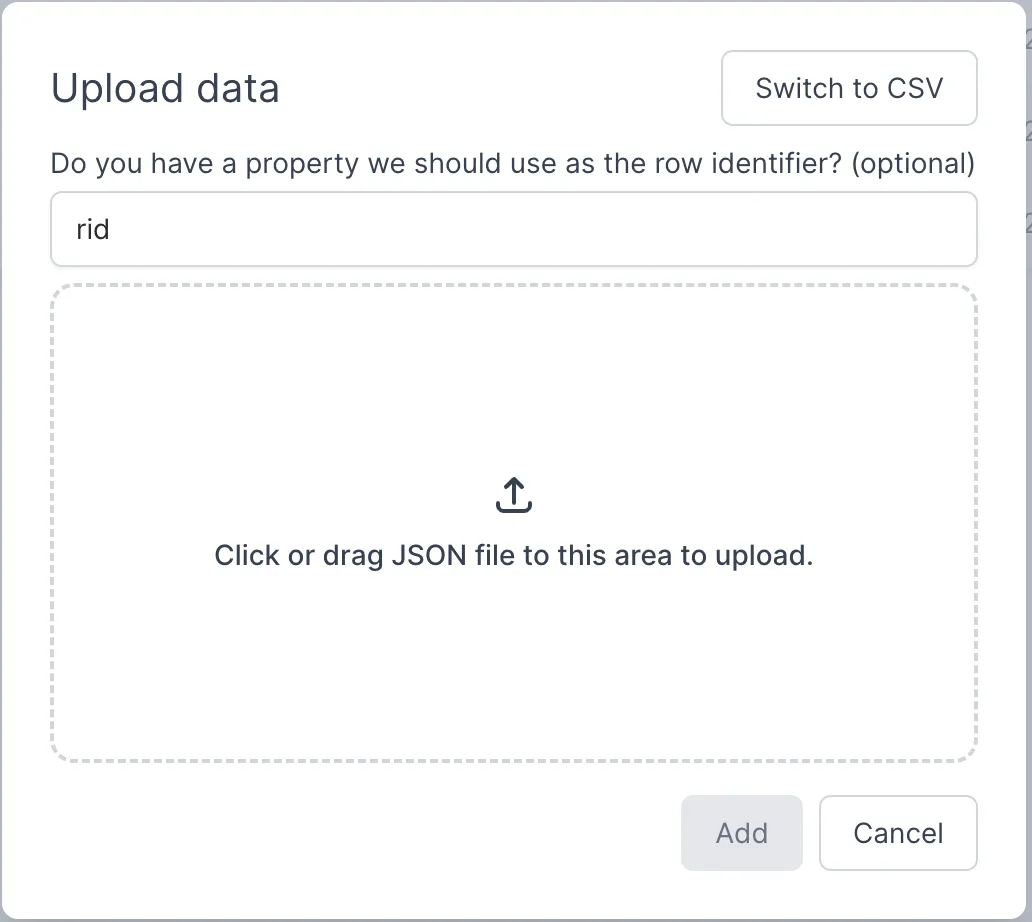
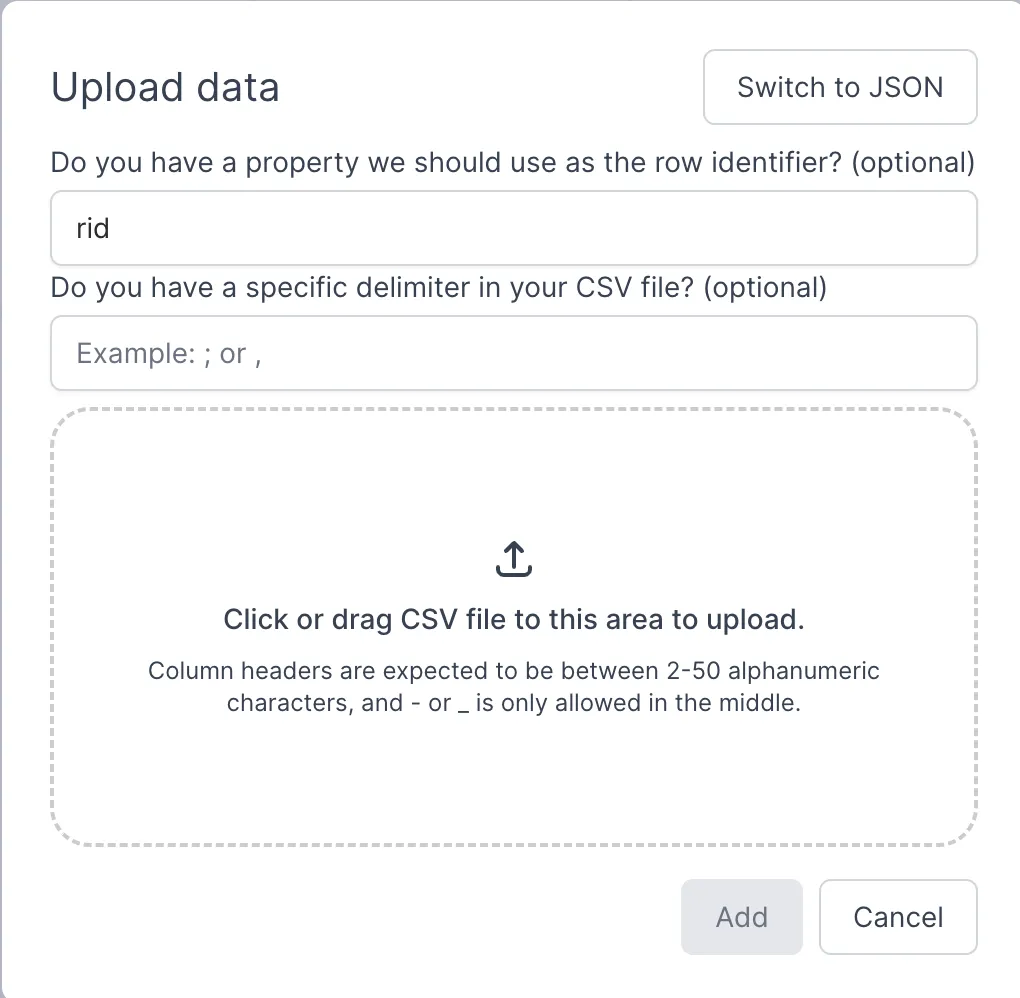
If you have multiple records to add to a table you can import the data by uploading a CSV or JSON file that will populate the records in the columns in the table.
- Click on the Upload button at the top of the screen.
- By default the JSON upload window is shown. You can switch to upload CSV using the Switch to CSV button in the top right. Provide the property name for the unique identifier otherwise by default the rid property is used. Drag and drop the file in the designated area.
- For CSV uploads select the type of comma-delimited used in the CSV file. Drag and drop the file in the designated area.
- Click Add.
- This will add new rid records to the table or update existing rid records in the table.
See Authorized users for more information.
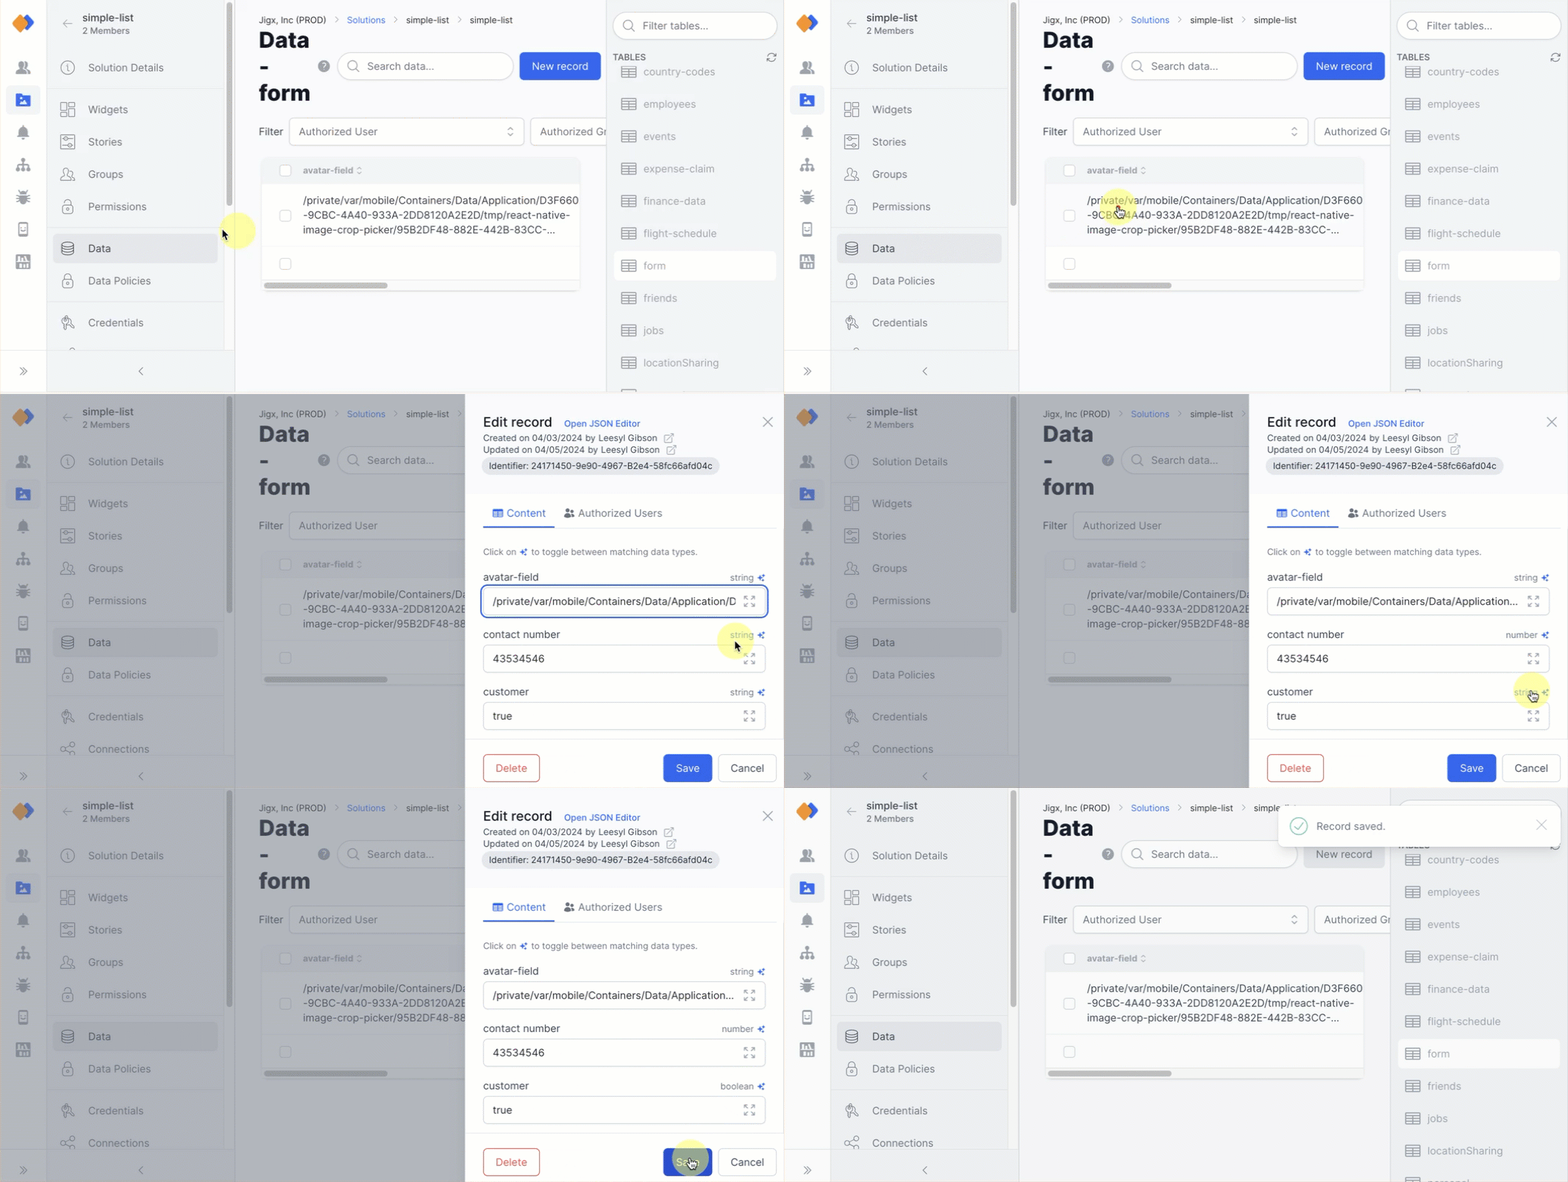
In each data record's field in a table has a type, such as string, number, boolean. You can toggle between data types using the sparkler on the right of each data field and then saving the record. Each data record must be edited manually to toggle and save the data type.

