Permissions
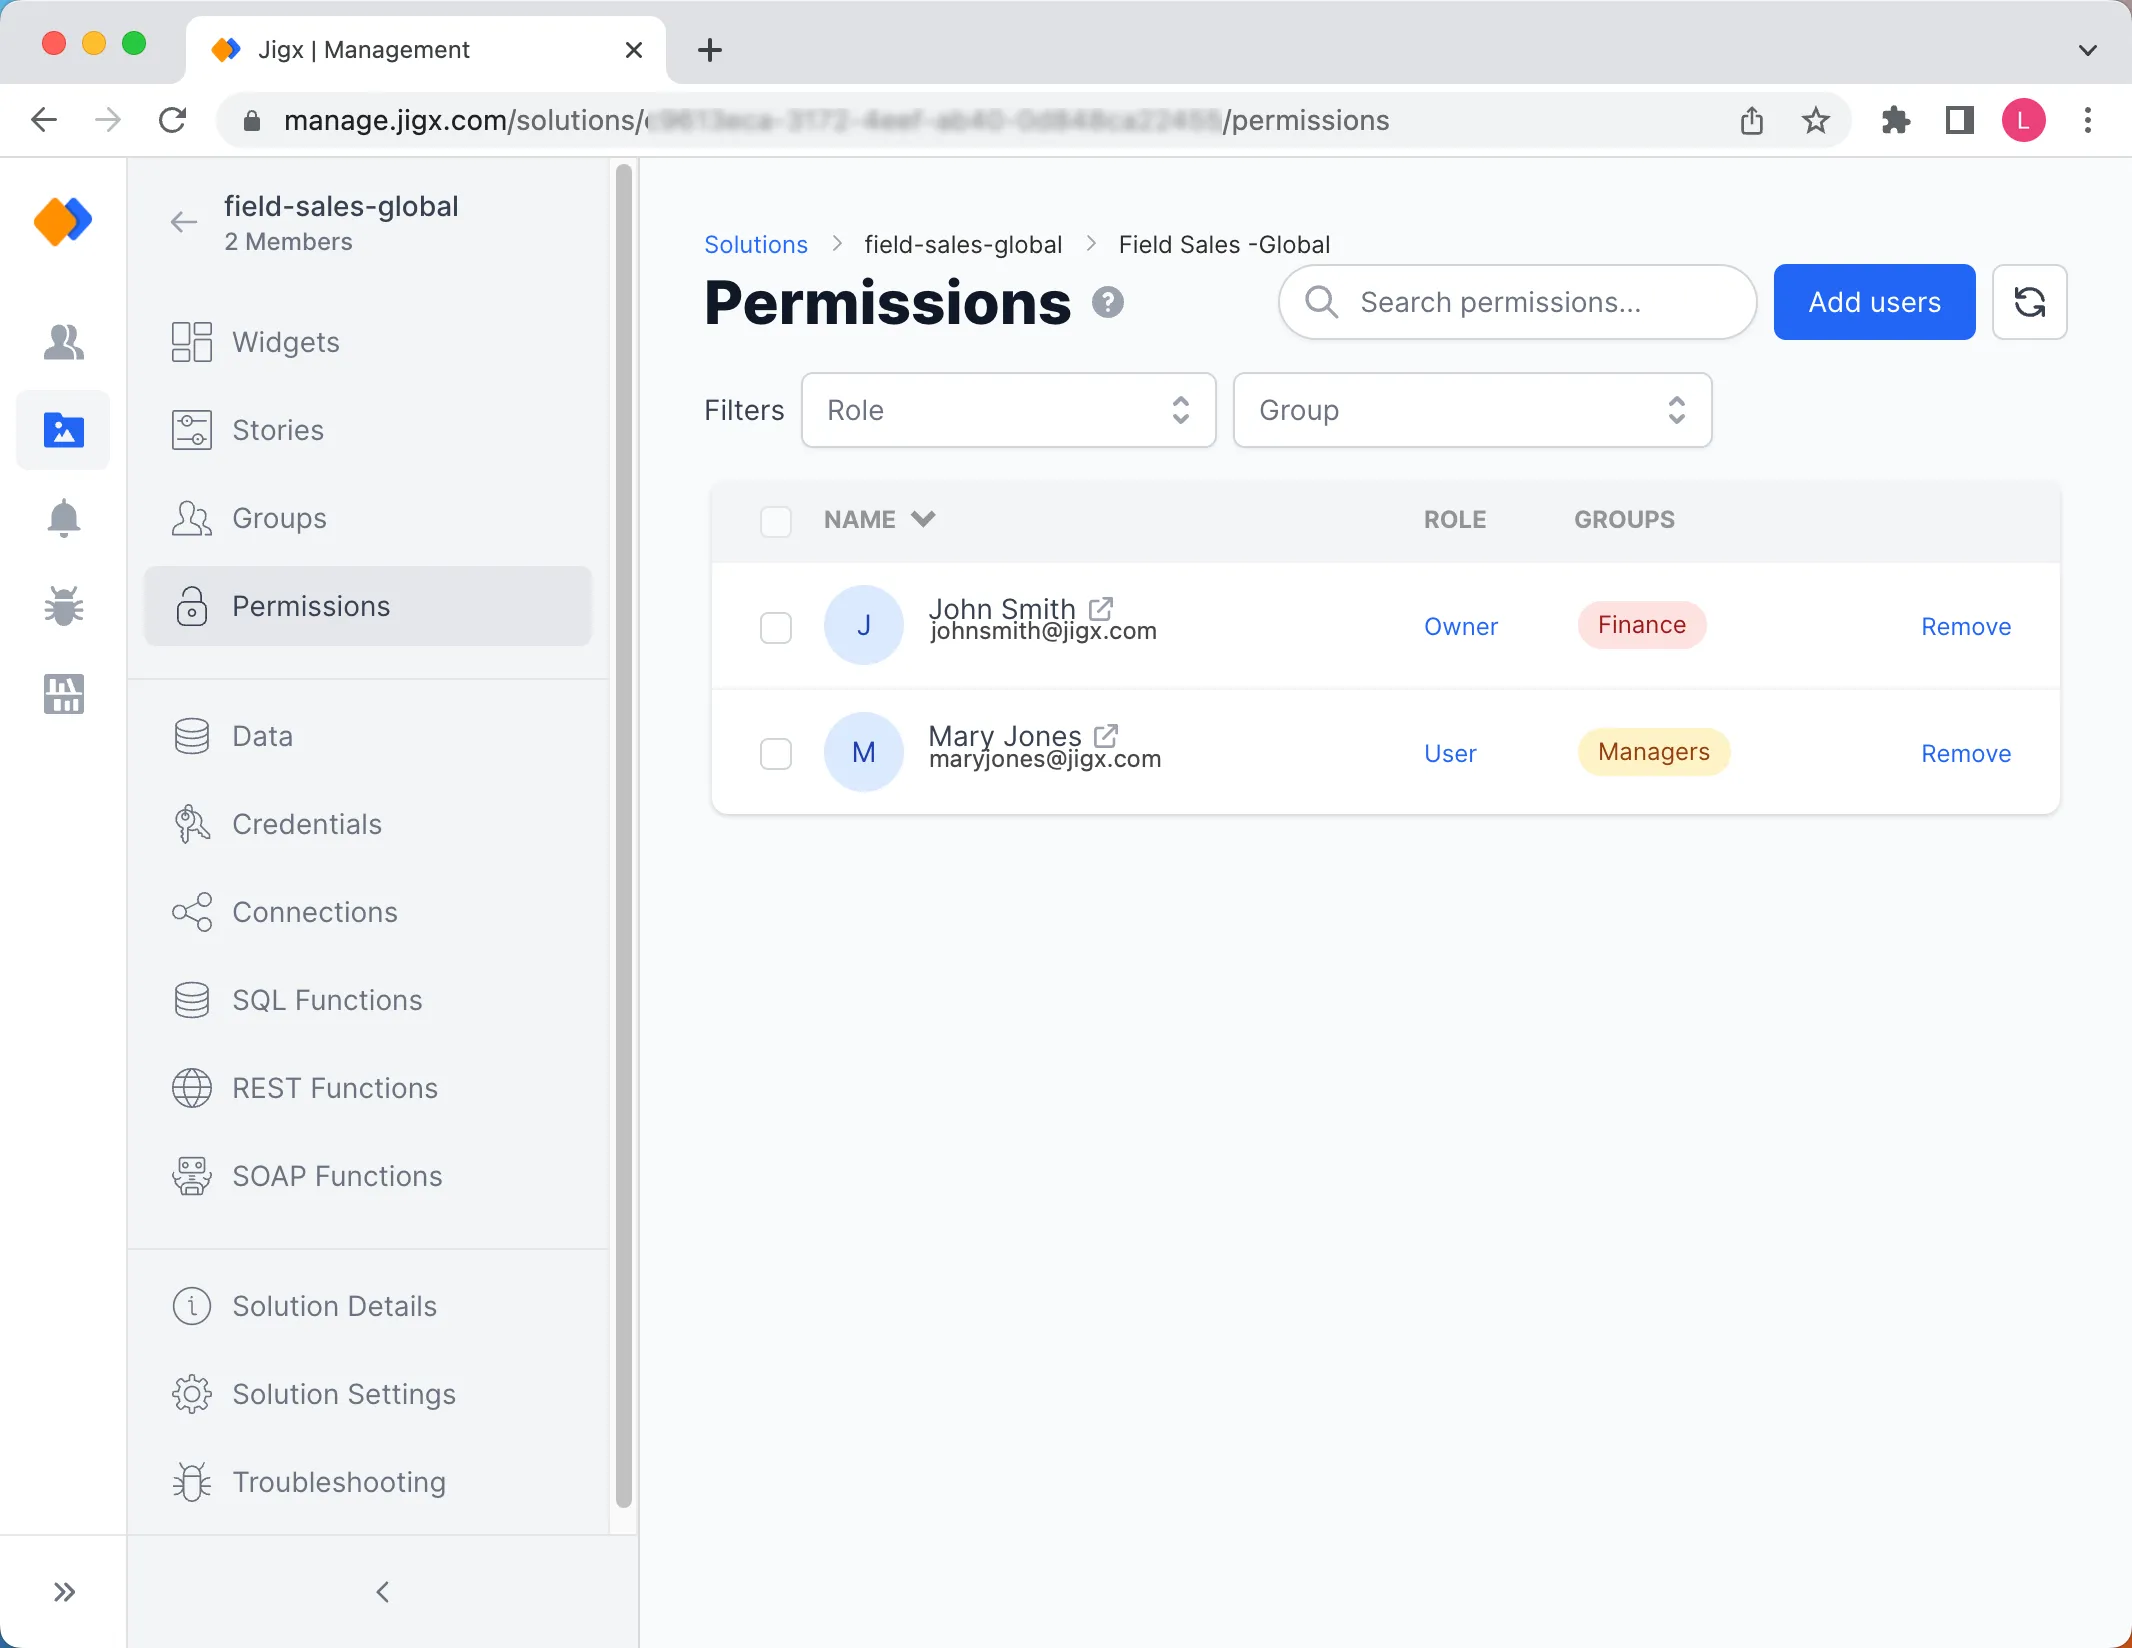
Access to the solution is managed on the Permissions tab. Here, you can give users access to the solution, define their role in the solution scope, and assign Solution Group membership for the visibility of Widgets.

- Click on Add Users in the top-right of the screen to see a list of users from the organization's global user list. Users that don't have access to the solution will not appear in the list.
- Select the users you want to give access to.
- Click Apply.
To remove user's access to the solution:
- Click on the Remove link in the last column next to the user you want to remove.
- Click the red Remove selected users button in the top-right of the screen.
- Click Ok to the message.
- The user is removed from the list and no longer has access to the solution. The user will only be removed from the solution, but remains a user in the organization's global user list.
Bulk remove users by selecting multiple users, then click the red Remove selected users button at the top-right of the screen.
If you are using the Everyone Organization Group for Widgets, the removed user will still have access to certain widgets although solution access has been removed for that user.
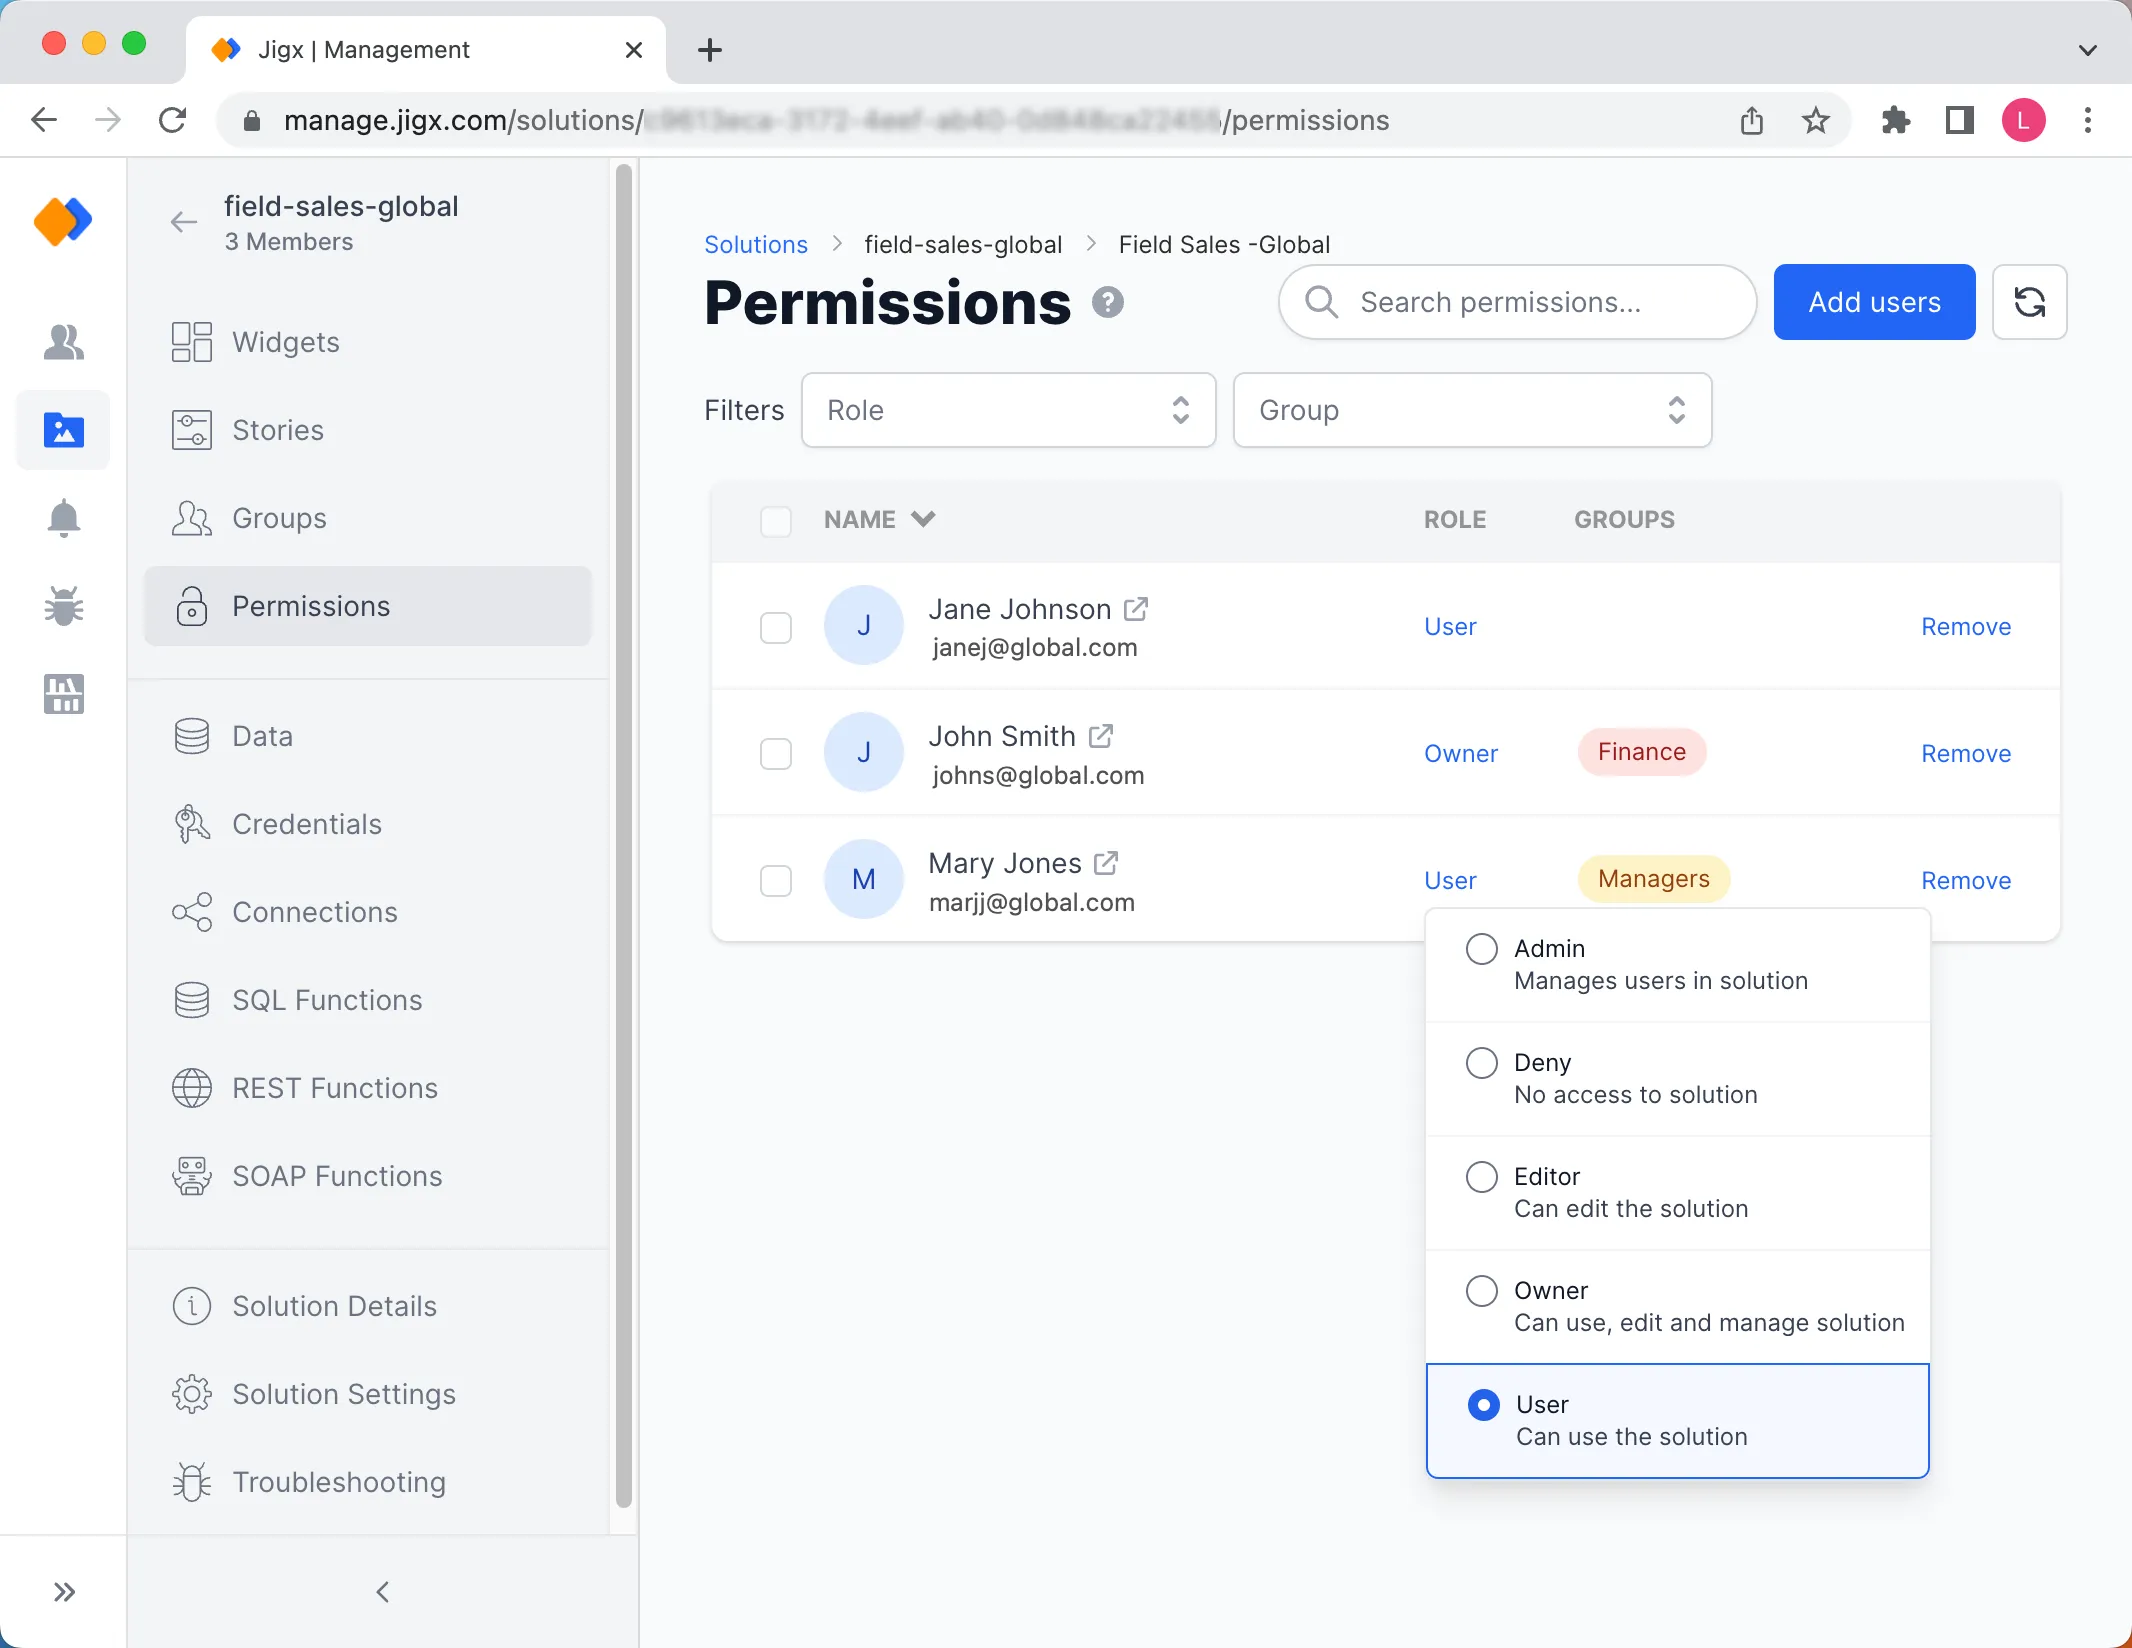
By default a new user of the solution will be assigned to the USER role. See Permissions - User Roles to learn more about the different roles. Role assignments are instantly reflected for the user. You can elevate a role by:
- Clicking on the User link in the Role column.
- Select the new role to assign to the user. If you want to disable access for a user temporarily, select DENY.
If you want to give a user the ability to publish updates to the solution using , assign either the OWNER or EDITOR role.

Once you assigned a user a group you have to use the groups when assigning permissions for widgets. For example, if you assign the Finance group to users all other widgets also need to have groups, like Manager, assigned.
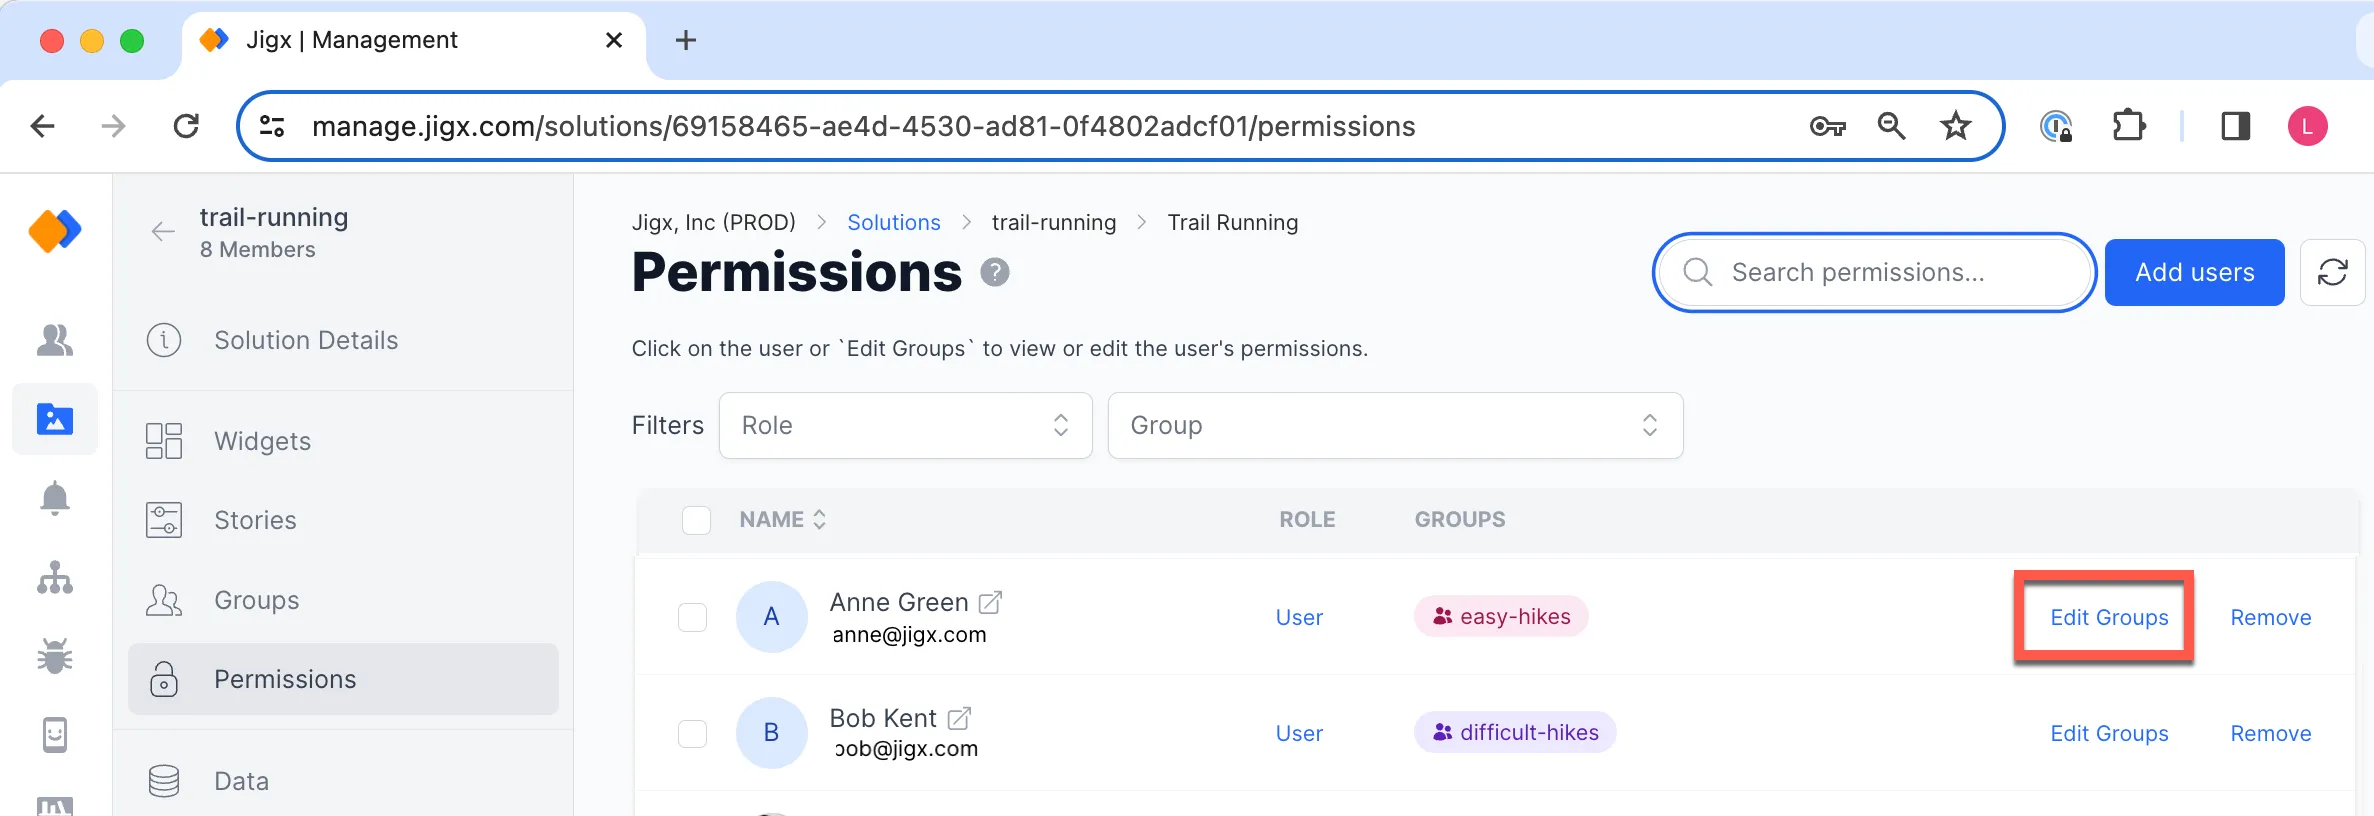
If you want to assign users to Groups in your solution that will be used for toggling visibility of Widgets:
- Select the user to assign to a group.
- Click on the Edit Groups link on the right.
- In the group membership pane select the group(s) the user will be in.
- Click Change.

