Invites
When you create an organization in , a default invite is automatically set up for the organization. To see what the invite looks like, click the Preview link in the invite template section. This will open an HTML view of the template in a new tab.
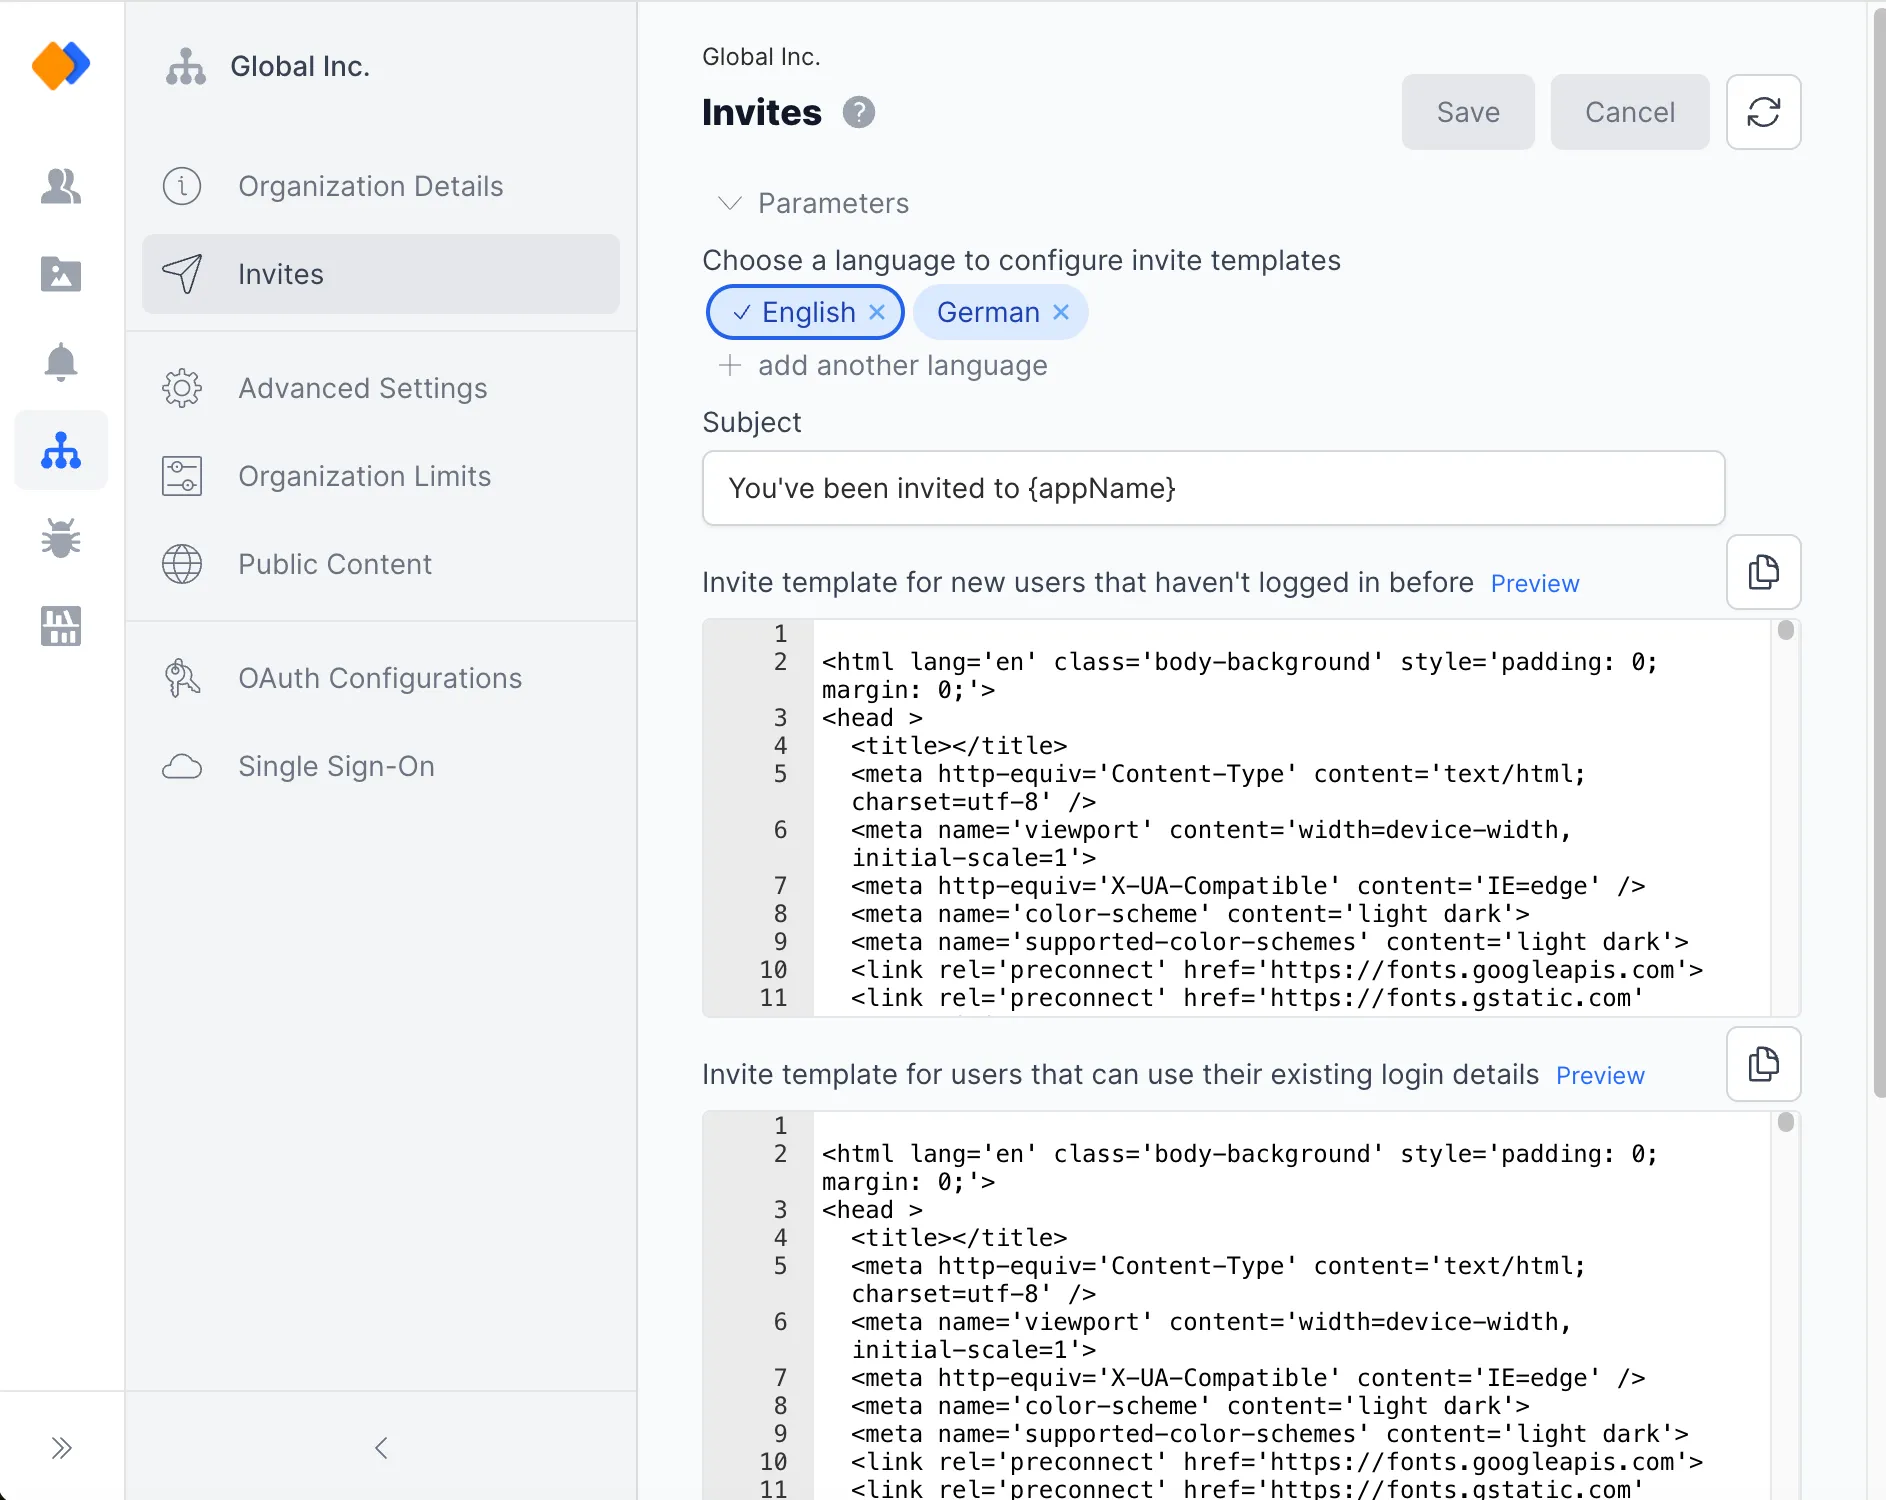
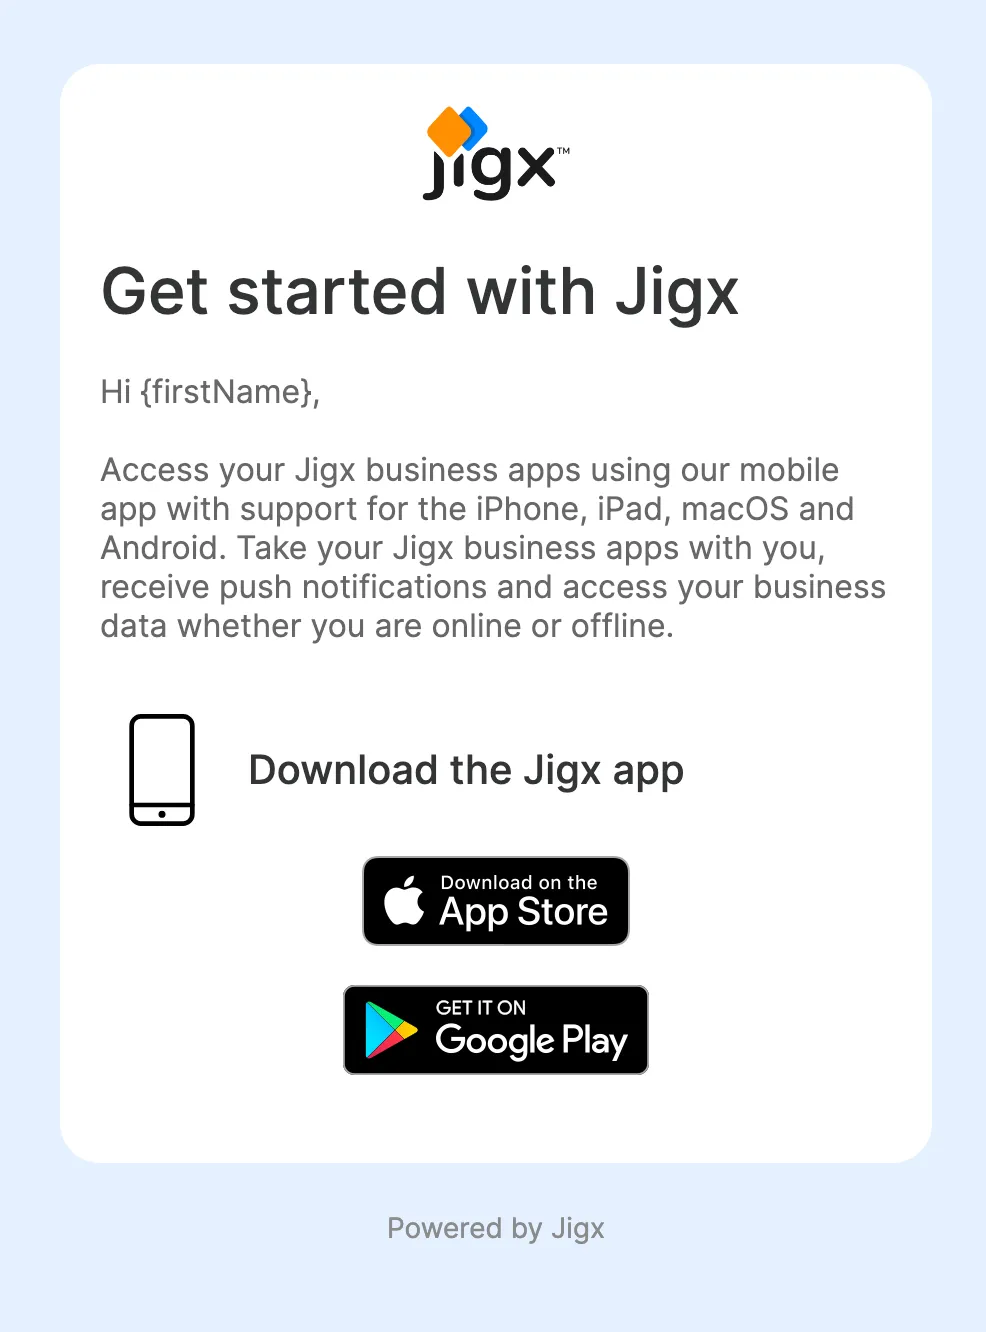
The invite email template can be customized to reflect your brand's identity and style. There are two methods described below.
By editing the parameter settings you can change the logo, colors, text, icons and provide the URL to your branded app in the Apple and Google stores.
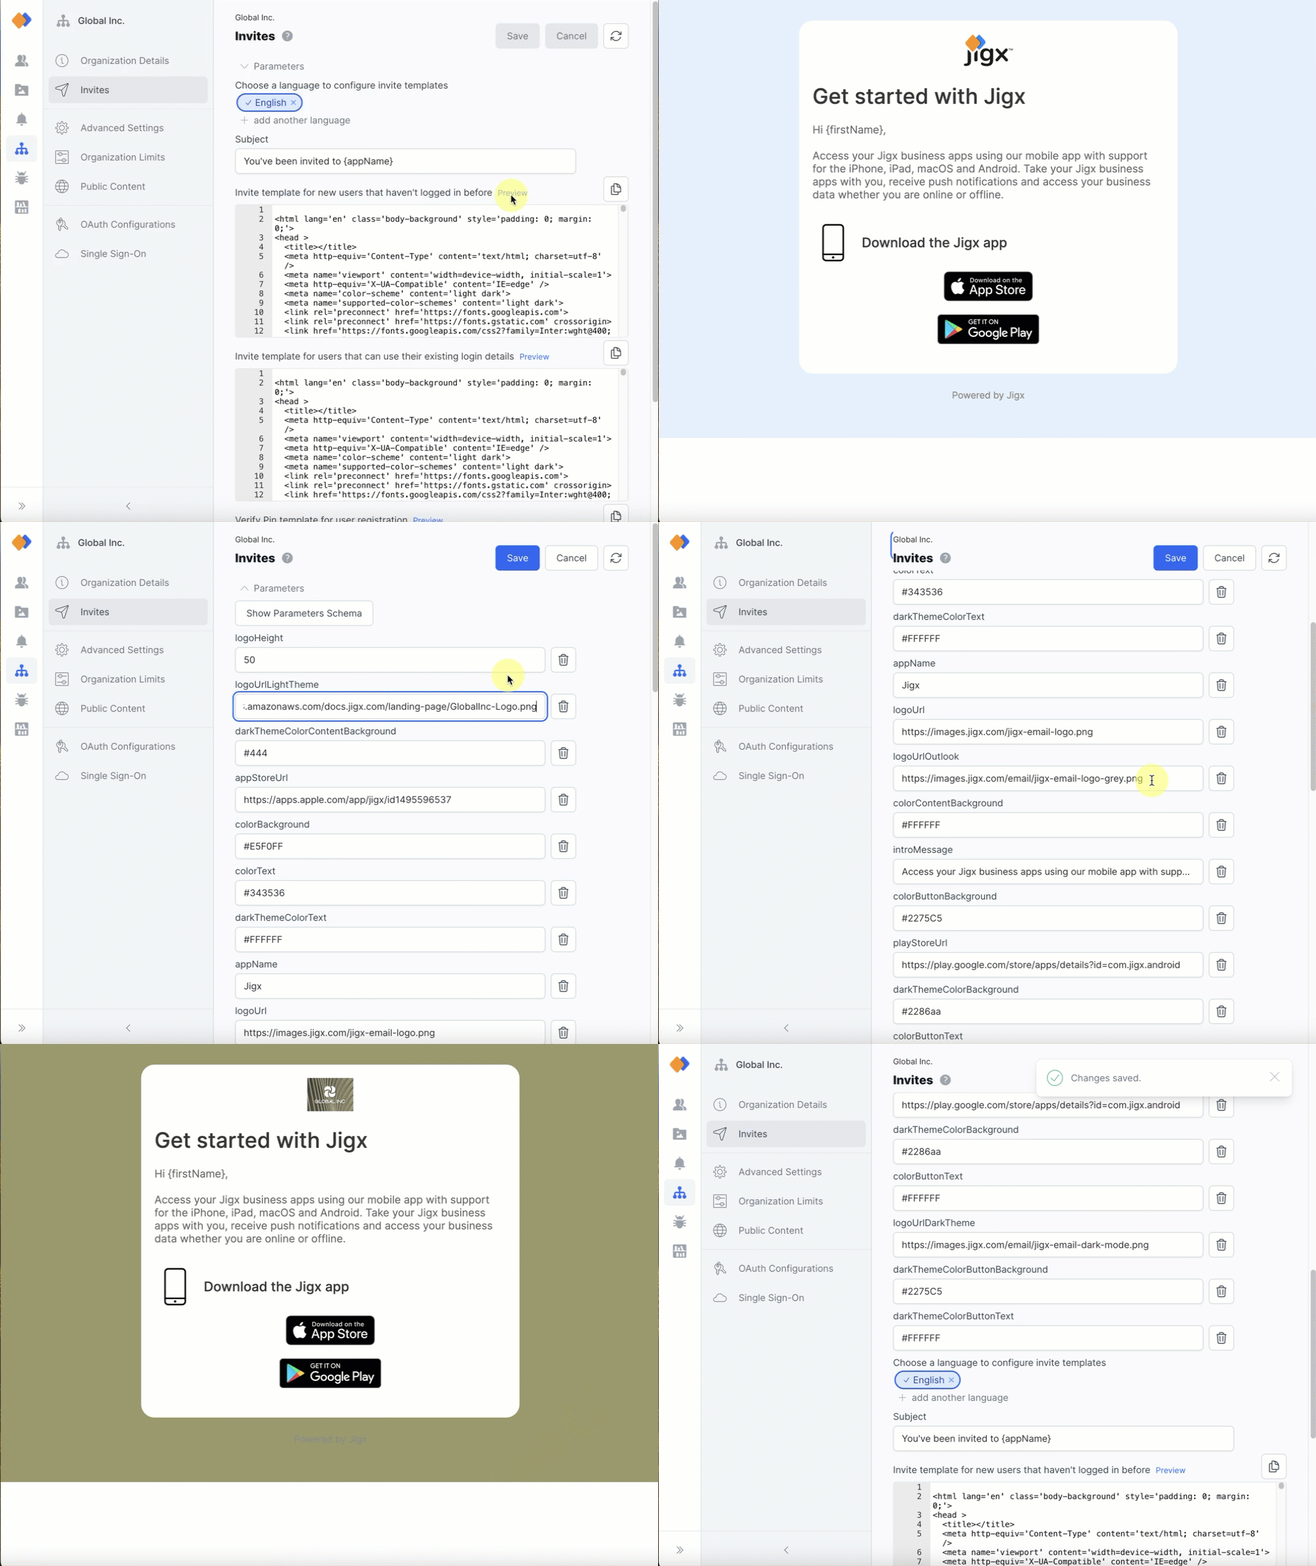
- At the top of the invite screen, expand Parameters.
- Edit the parameter fields as required, or use the Show Parameters Schema to edit the raw HTML.
- Before saving the changes, test the template by clicking on the Preview link next to the invite template. This will open an HTML view of the template with the updated parameters in a new tab.
- Once you are satisfied with the edits and customizations to your email template, click Save.
- Copy the raw HTML from the template using the copy icon.
- Paste the code in an HTML editor and make the required changes.
- Replace the existing HTML with the updated HTML.
- Before saving the changes, test the template by clicking on the Preview link next to the invite template. This will open an HTML view of the template with the updated HTML in a new tab.
- Once you are satisfied with the edits and customizations to your email template, click Save.
Invites can be sent out in multiple languages which is helpful if your organization has multiple regions in multiple countries.
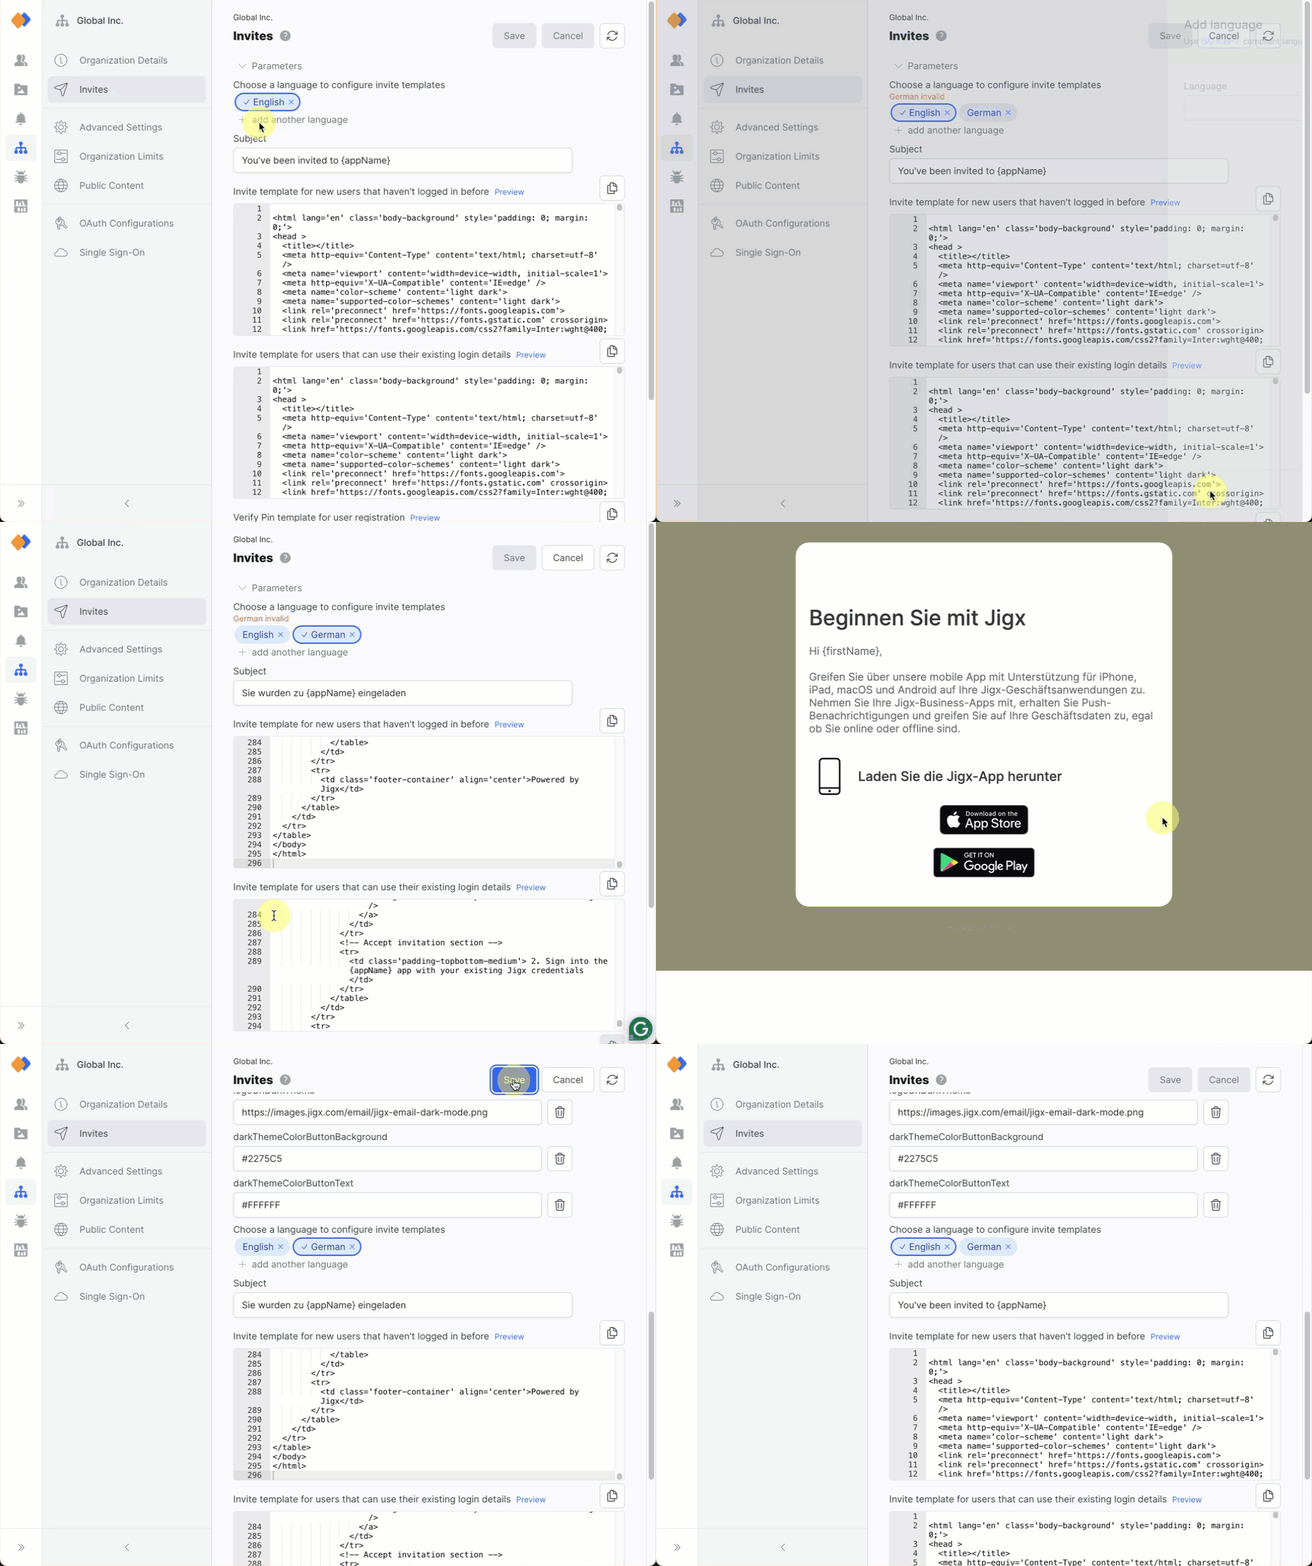
- Click on the + add another language under Choose a language to configure invite templates.
- Click Add.
- Select the language tag. The pane toggles to the template for the new language.
- Use the HTML from the English pane as a base to translate the HTML to the new language you have specified. Add the HTML in the invite template sections and add a subject. Note: The {introMessage} parameter translation must be made in the raw HTML and not in the parameter fields at the top of the screen.
- Before saving the changes, test the template by clicking on the Preview link next to the invite template. This will open an HTML view of the template with the updated HTML in a new tab.
- Once you are satisfied with the edits and customizations to your new language email template, click Save.
When sending out invites to users to join your organization and access your app, you can determine which language the invite must be sent in provided you have created an invite template in that language.
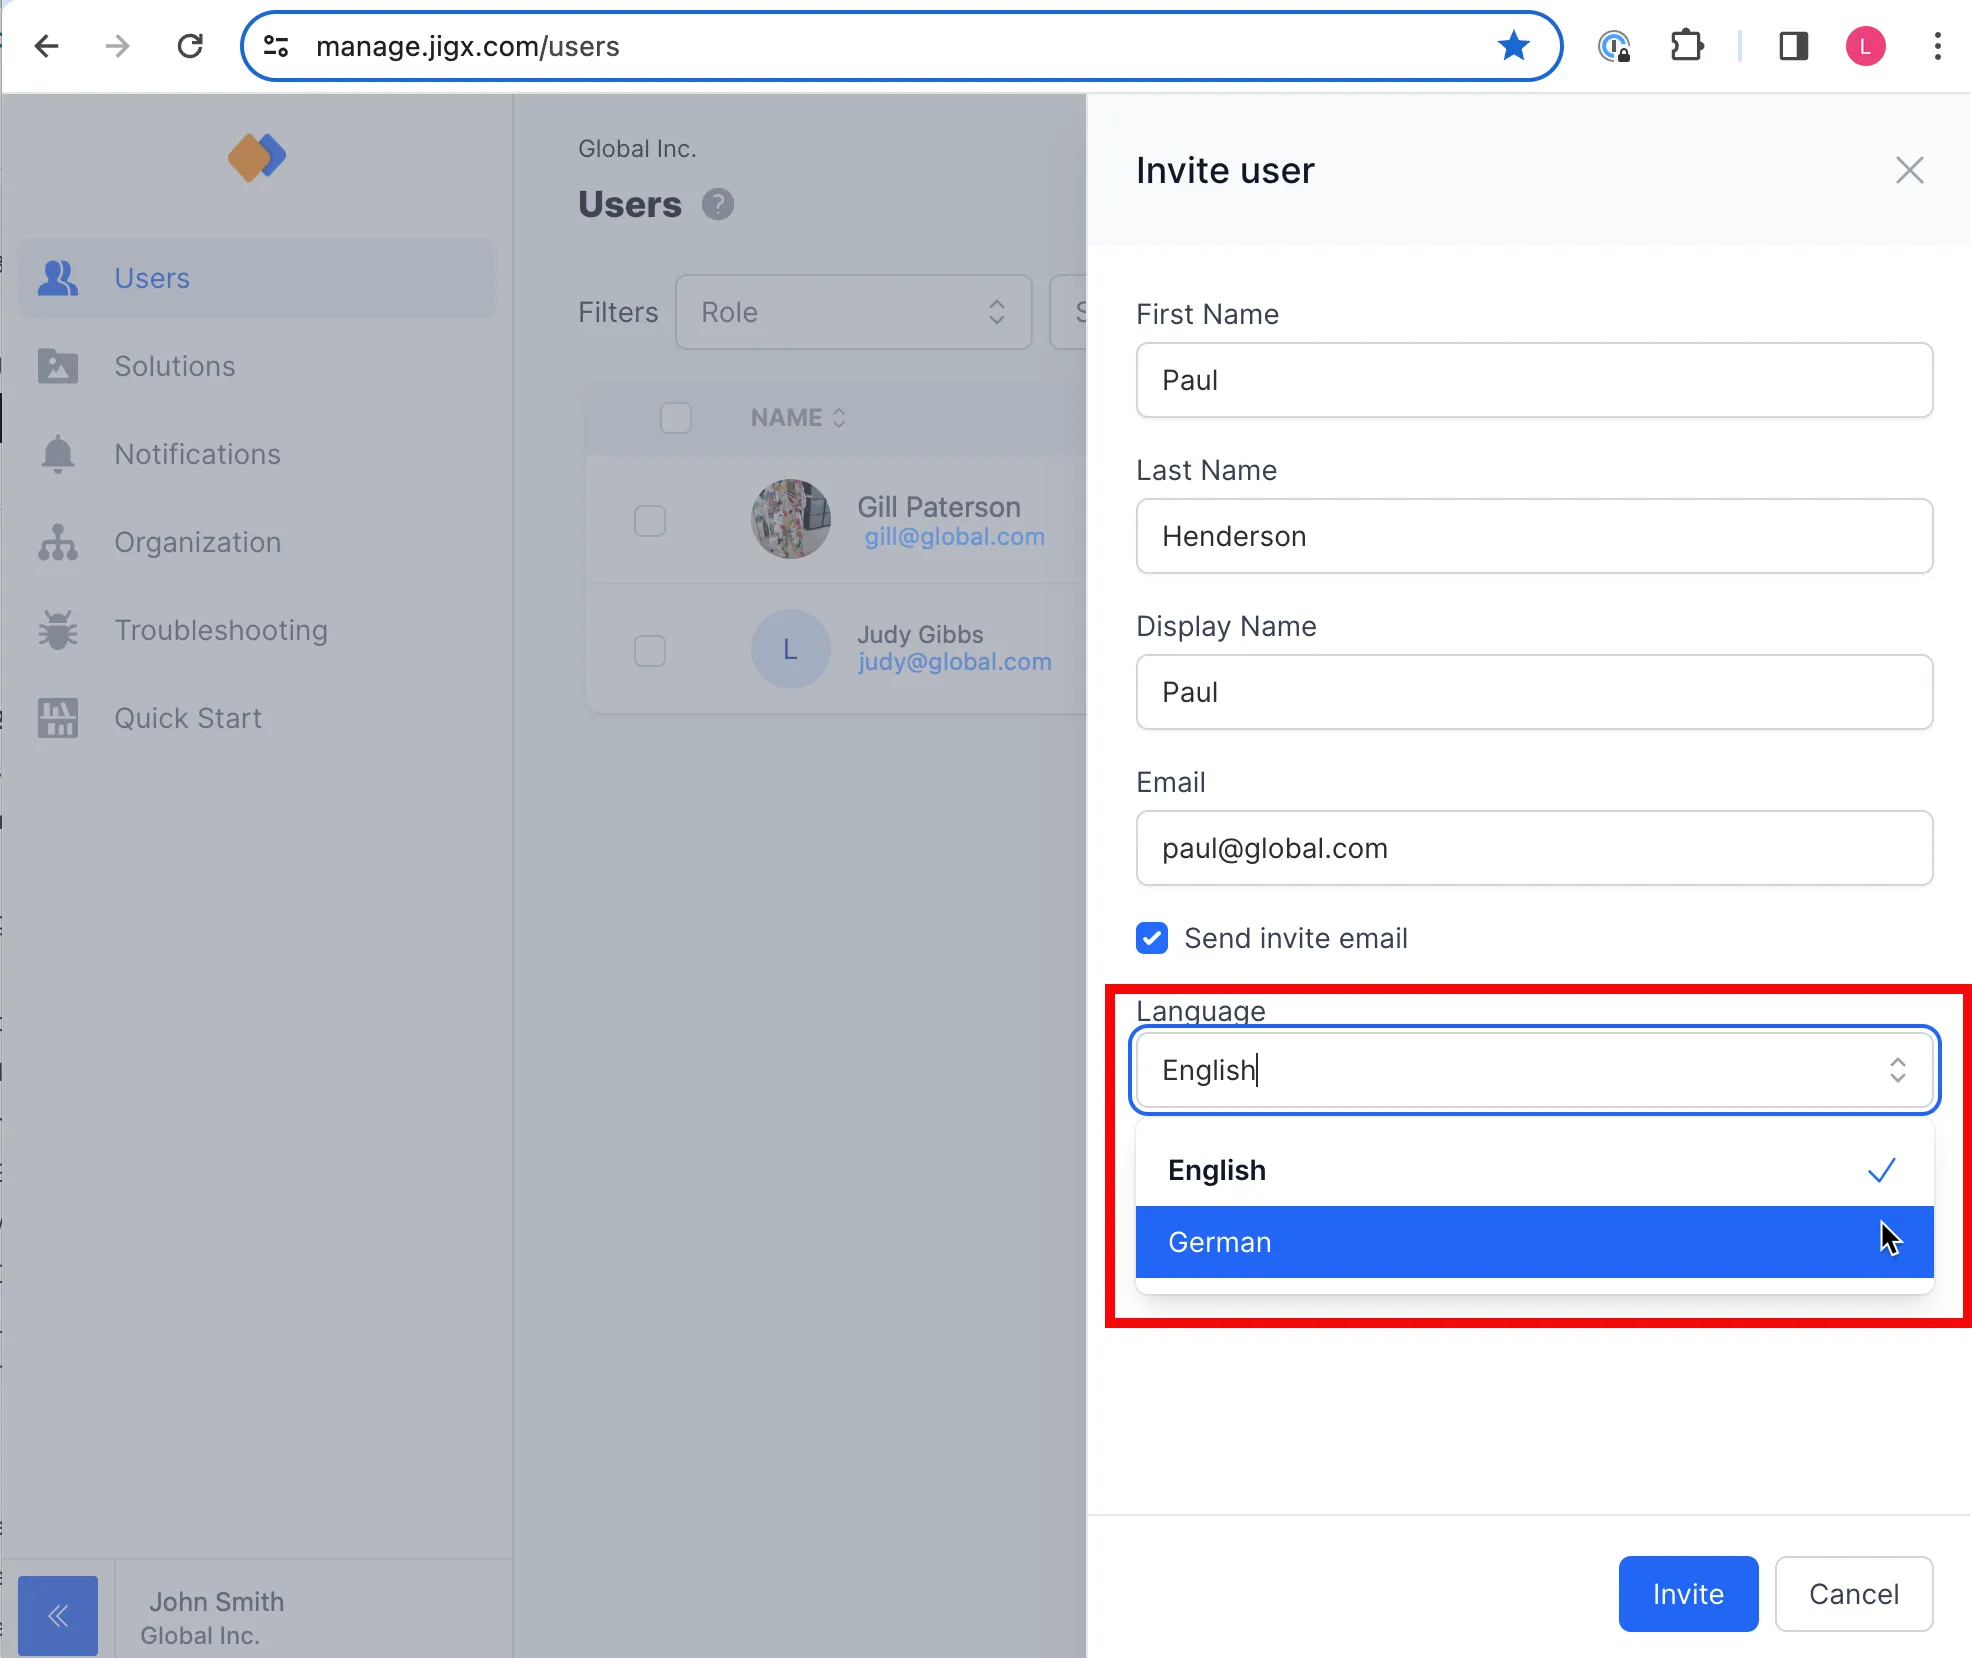
- Navigate to the Users menu option.
- Click the Invite user button in the top right of the screen.
- Add the user's details.
- Under Language select a language from the dropdown list.
- Select the user's role and click Invite.
