OAuth Configurations
Add an OAuth configuration at the organizational level to provide with secure delegated access. OAuth configured in provides the authentication requirements on mobile devices, APIs, servers, and applications with access tokens. Setting OAuth at this level allows you to use it in multiple scenarios requiring Authentication. For example:
- By multiple branded apps within an organization
provides a secure credentials store in the cloud that can be used to connect to remote APIs from your solutions. OAuth configuration is referenced within your function's definitions via Token properties and is used at runtime to inject the OAuth token into the request.

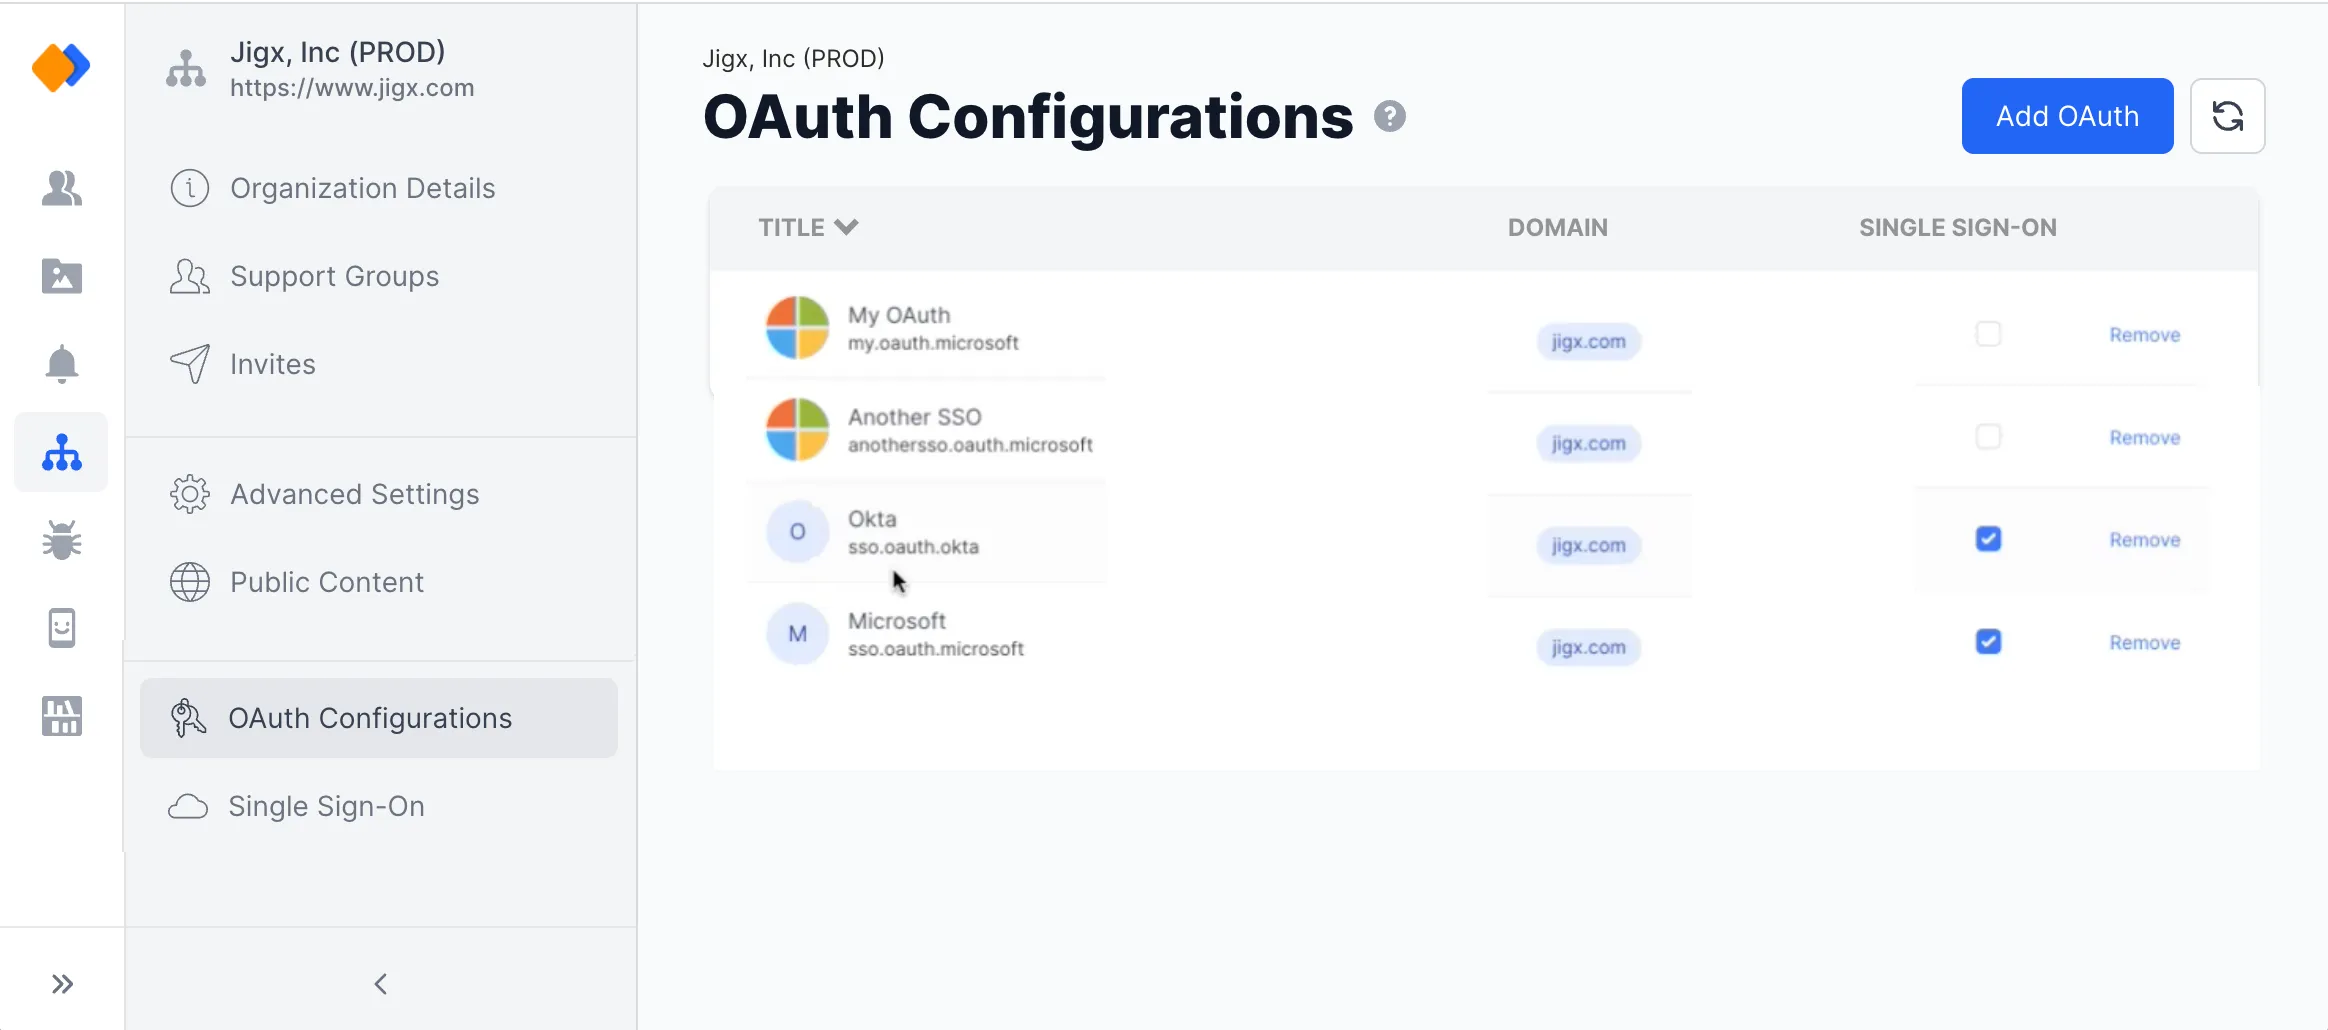
- In under the Organization icon, select the OAuth Configurations option. You require ADMIN or OWNER permissions to see and access the organization settings.
- Click on the Add OAuth button at the top right of the screen.
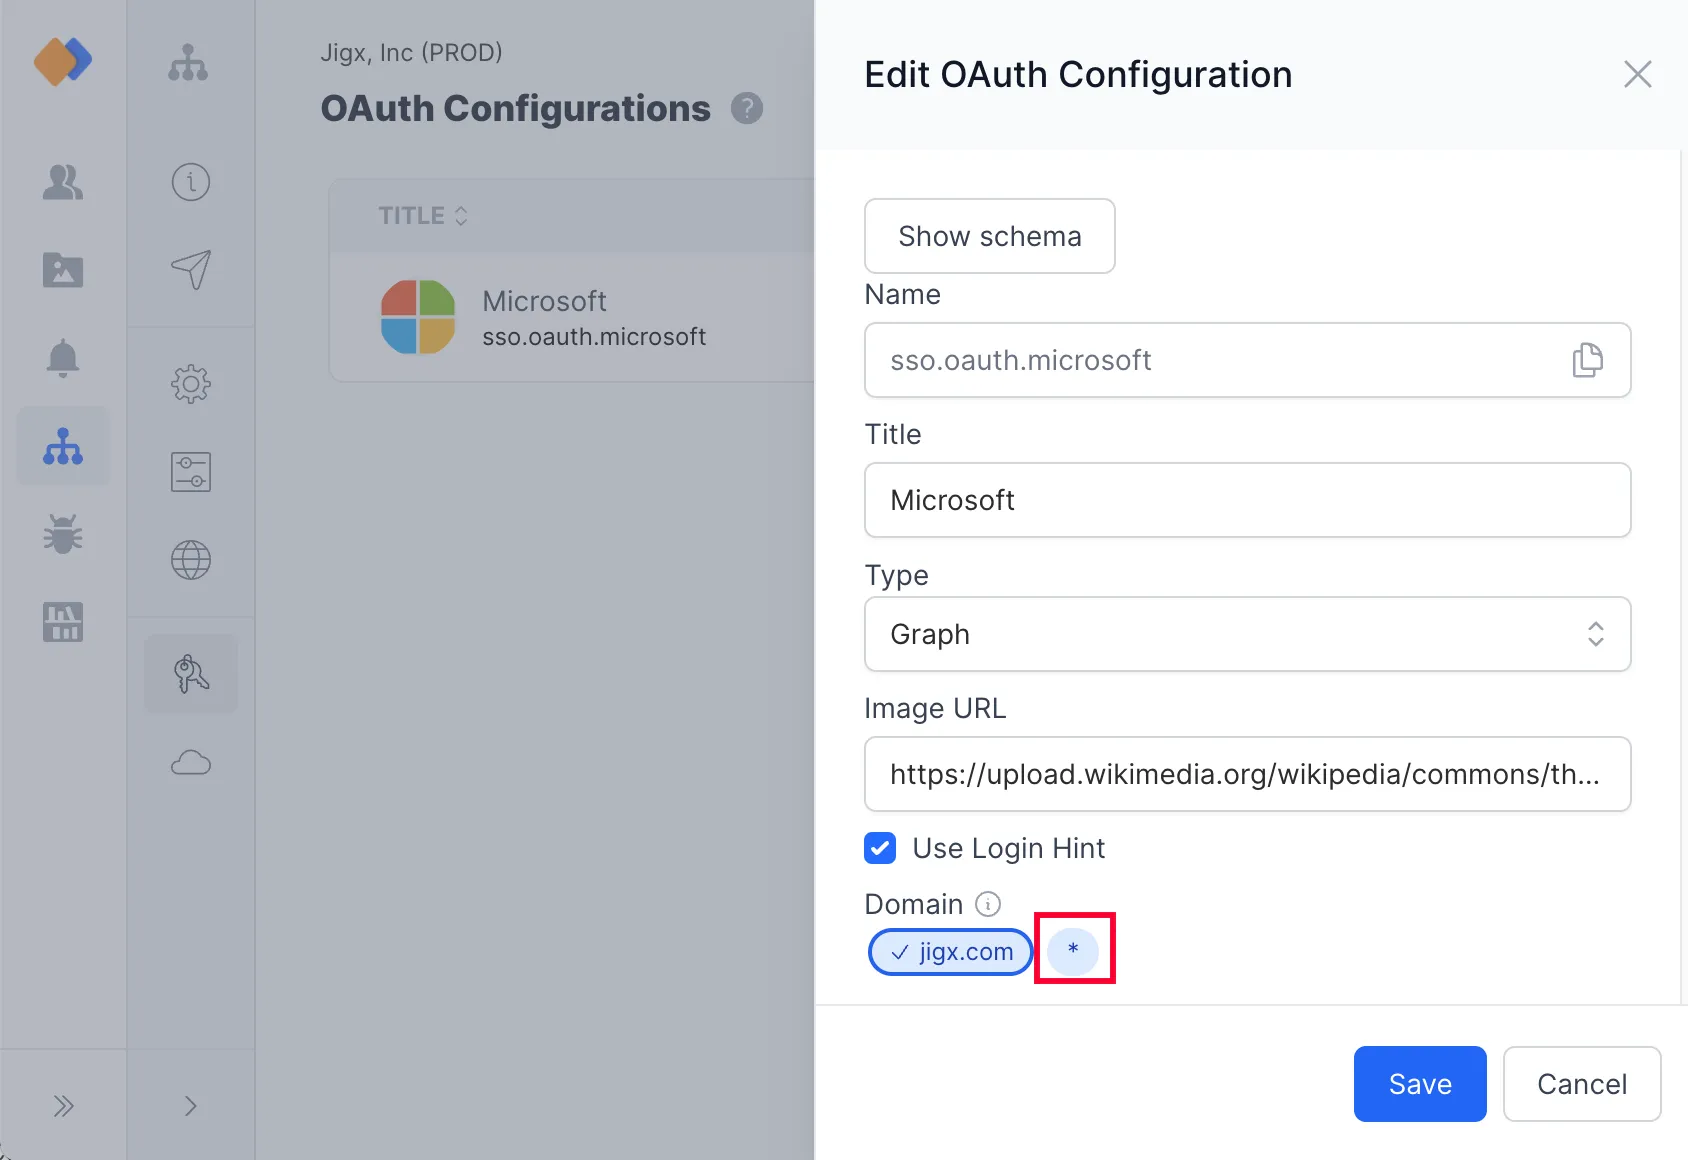
- Fill in the fields or click on Show schema to add the raw JSON configuration object.
- Enter a descriptive name for the OAuth setting. This name is visible to the user on the device when SSO or secondary credentials are configured.
- The Title is the actual token that will be referenced from within the function definition of the solutions, best practice is to give it a descriptive name, for example, called jigx.organizationName.oauth.token.
- Select the type of OAuth credentials required. There are three available types:
- Graph
- Okta
- OpenID
- Auth0
- Image URL - this OAuth field is optional.
- Use login hint - this field is optional, add a login hint parameter in the format required by the 3rd party identity provider.
- All the organization's domains set up at registration are listed under Domains.
- To add additional domains, contact support@jigx.com.
- To accomodate for unknown domains not associated with the organization use a wildcard (*) in the OAuth configuration. See Set up a domain wildcard.
- Redirect URL - Add the redirect URL, you can add multiple URLs. Redirect URLs must match the configuration of the Client app on the 3rd Party IDP.
- Enter the Client ID, and Client Secret. These are optional.
- Enter the Issuer. If you use the Service configuration endpoints, then Issuer is not required, but if not, then Issuer is a required field to complete the configuration.
- By default, the Use PKCE and Use Nonce are selected, you can deselect these if not required.
- Add scopes that define the specific resources or actions that the application is allowed to access on the user's behalf.
- If no issuer is provided, complete the Service configuration endpoints.
- Click on the OAuth's name in the list.
- The OAuth settings display in the side panel, make the required changes.
- Click Save.
Click on the Remove link in the last column of the record to remove the credentials. Be aware that functions in the solution referencing the OAuth configuration will stop working as they can no longer connect to the remote API.
Before removing the OAuth configuration, check where the OAuth key is referenced. Removing the key at an organizational level could break solutions using the global OAuth token.
When your app has multiple users that register and log in from external sources for example a retail app, you do not know the domain they using, however you want the domain to use the OAuth configuration you have set up. Simply set up a wildcard (*) in the domain setting in the OAuth Configuration, which will include all domains.

- You can create multiple OAuth configurations.
- You can assign multiple OAuth configurations to be used with Single-Sign-On by selecting multiple checkboxes in the Single Sign-On (SSO) screen. This is useful if multiple domains are used for different people, for example, internal users, vendors, or partners.
OAuth configurations can be reused in Solution OAuth credentials. In the Solution Credentials page in , select the OAuth Alias option under the Type dropdown and select the organization's global OAuth credentials in the OAuth configuration dropdown to map to.
- The Title field in the OAuth configuration settings is the SSO name that users will see when logging into the app. It is important to give the Title a meaningful name.
- The call to the OAuth configuration for authorization is made when the index.jigx () loads on the app.
- The OAuth token's lifetime is 15 minutes.

