Administration

Users

12min

In the Users area, you can manage all users in your organization. All users who can log in to your organization's mobile app are listed here. You can only assign Solutions to users, who are in this list.

User Overview

In the Users list, you can view each user's current organizational role, assigned solutions, and their invite status (Active vs. Invited). Click on a user's name to see the user's details, manage the user's solutions and change their role for each assigned solution. You can also filter the user list by organizational role, invite status, and solution assignment.
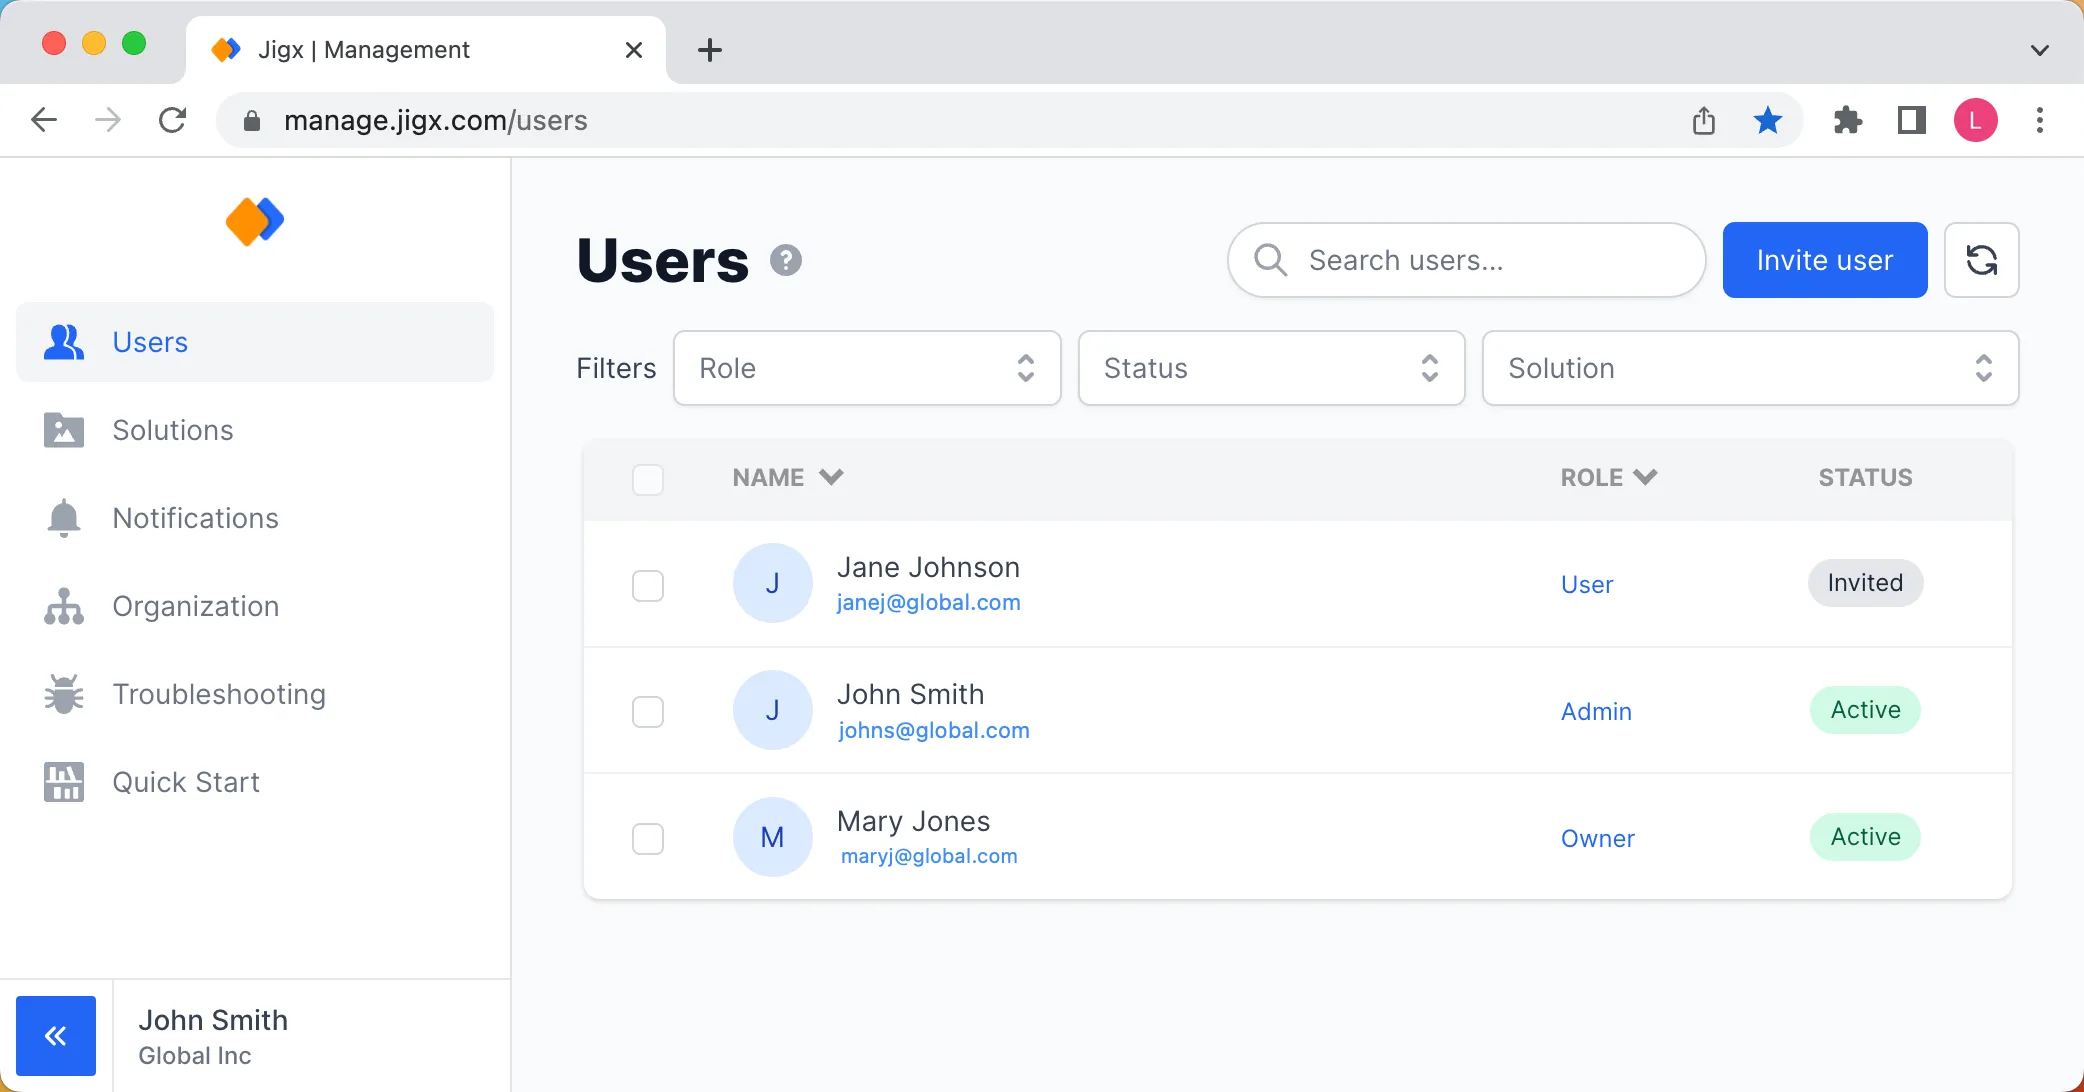
Managing Organization Users


Inviting Users

Before you can invite users to your organization via email, check the Invites setting in Organization Settings. The language-specific invite templates have to be set up before you can start inviting users. At least one language and the corresponding invite template setup is required.

To add users to your organization, you need to invite them. Click on Invite User at the top right of the screen to open the side panel. Fill in the user's details, select a default language to be used for the invite email, and click Invite. Next assign Solutions to the invited user by clicking on the user's name in the list and then navigating to Solutions. Click on Add solutions at the top right of the screen to open the side panel. Select the solutions you want to assign to the user and click Add solution.

The user will receive an invite email with instructions on how to onboard. Once the user onboards successfully, the invite status will change to Active in the user overview.

To bulk invite users, contact Jigx support at support@jigx.com.
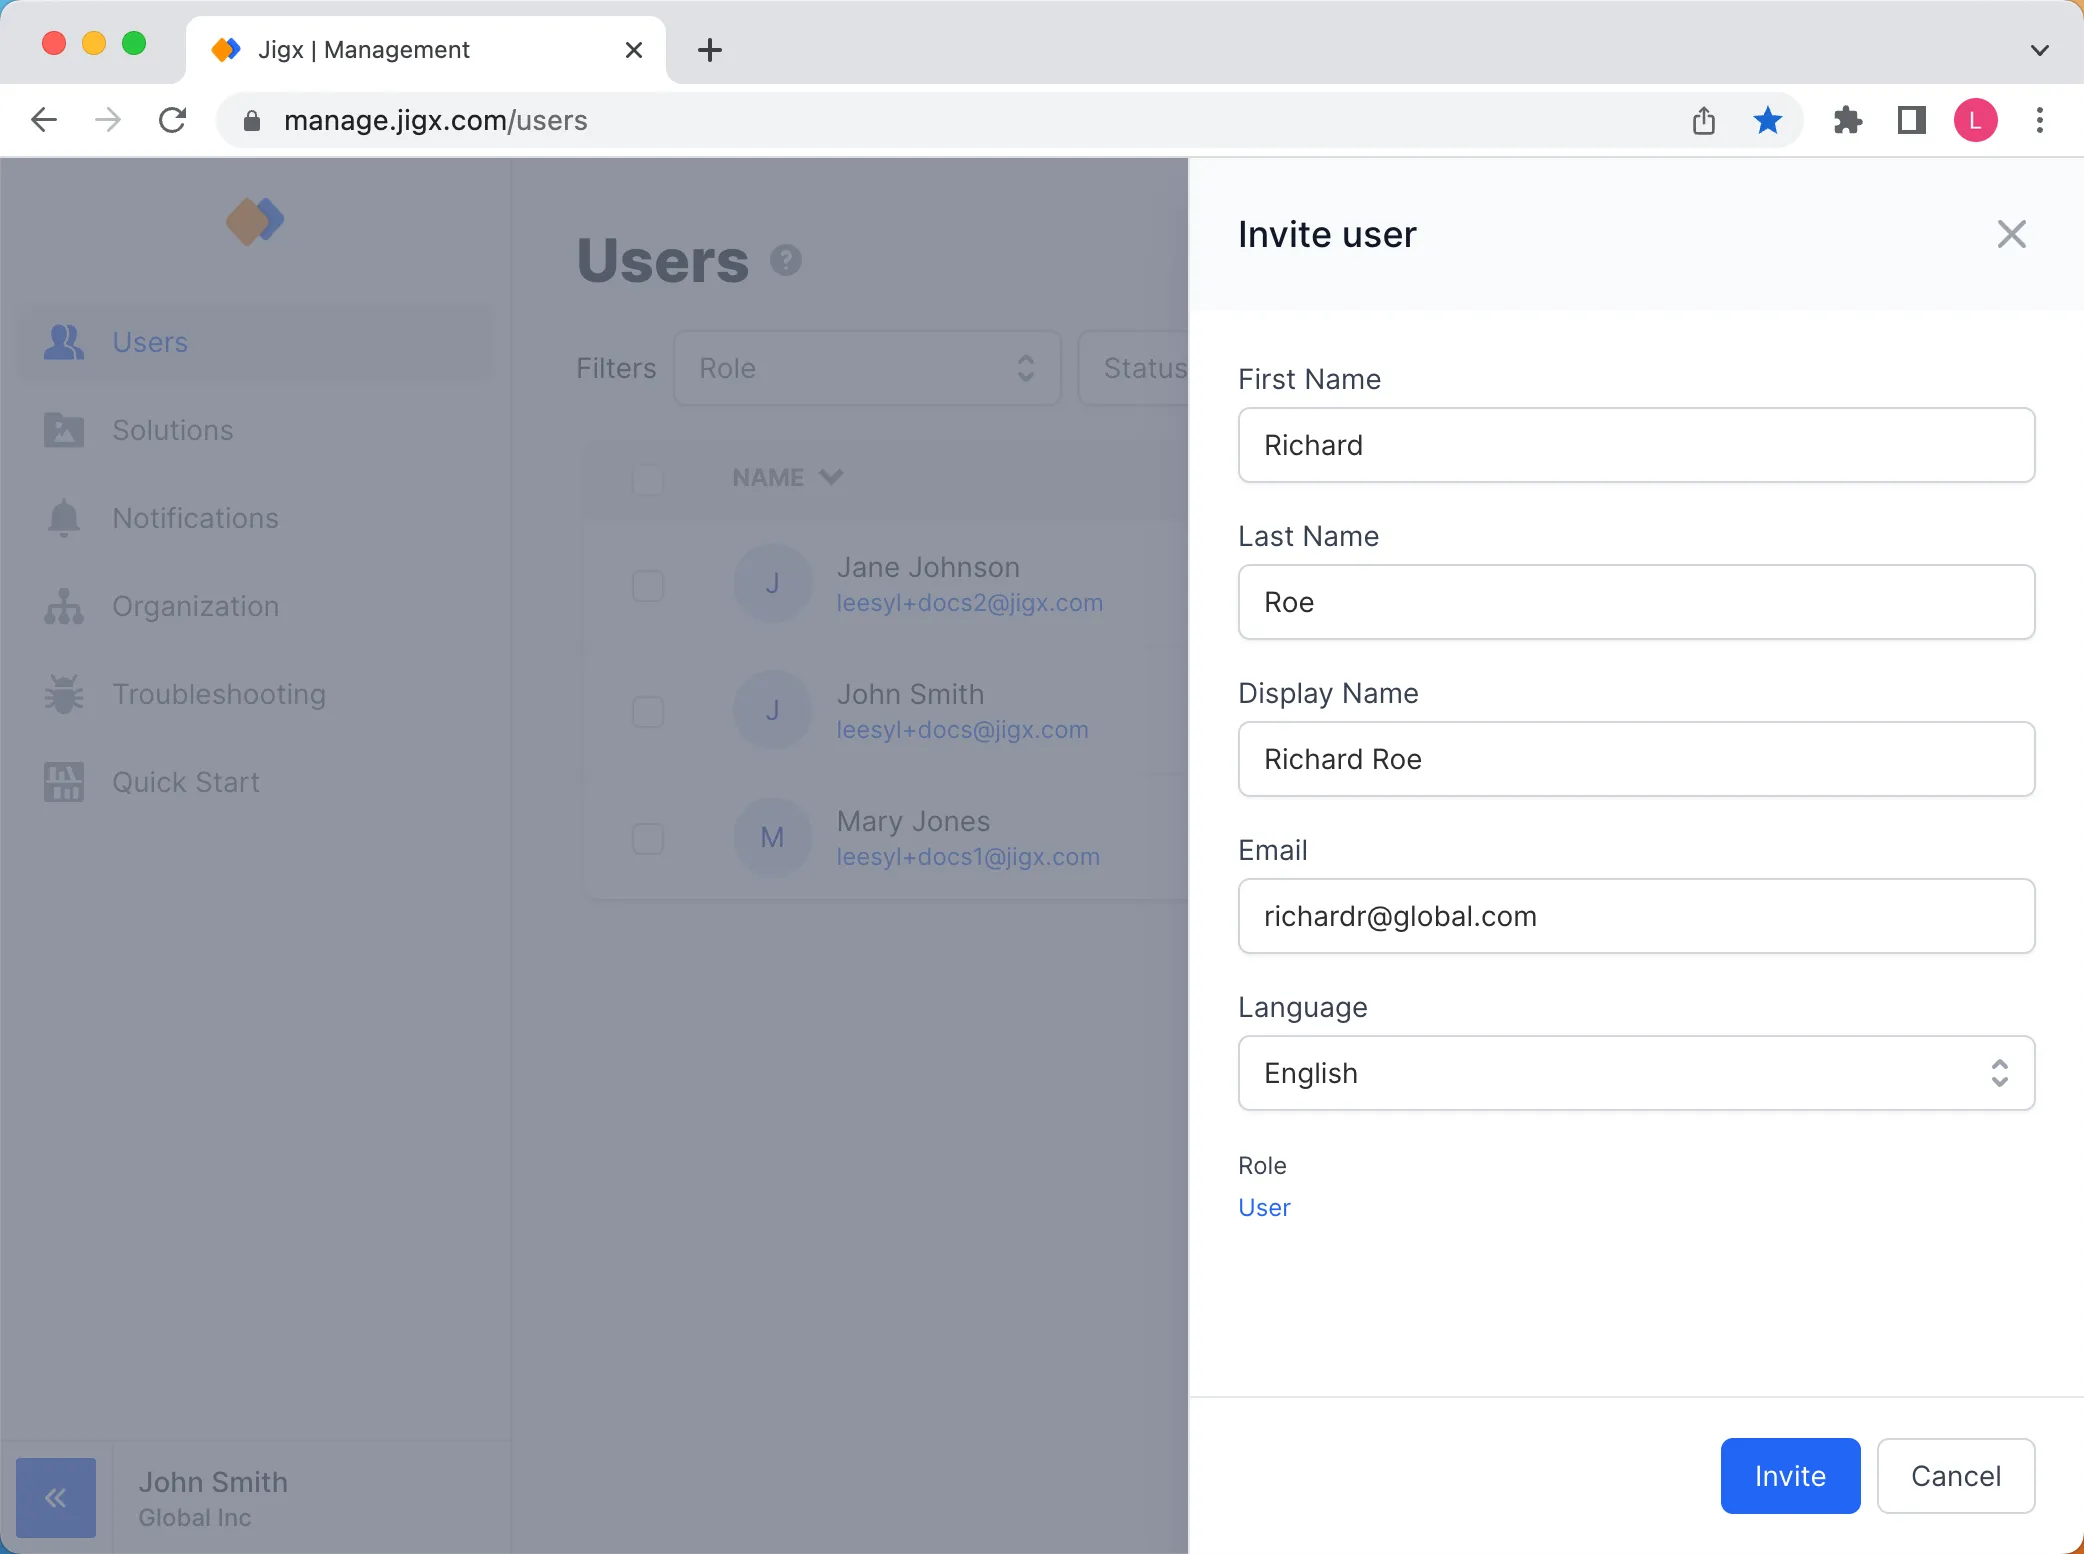
Inviting Users
Inviting Users


Re-inviting Users

If you want to re-invite the user because they did not accept your invitation or an error occurred, click on the user's name and click the Resend invite link at the top of the page. Next, select a language for the invite, a message displays stating that the invite has been sent.

If users don't receive the invite emails, ask them to check their junk or spam email folder.

Assigning Solutions to Users

Click on the user's name in the list and navigate to the Solutions menu option by clicking on the solution icon in the left navigation pane, Click on Add solutions at the top right of the screen to open the side panel. Select the solutions you want to assign to the user and click Add solution.
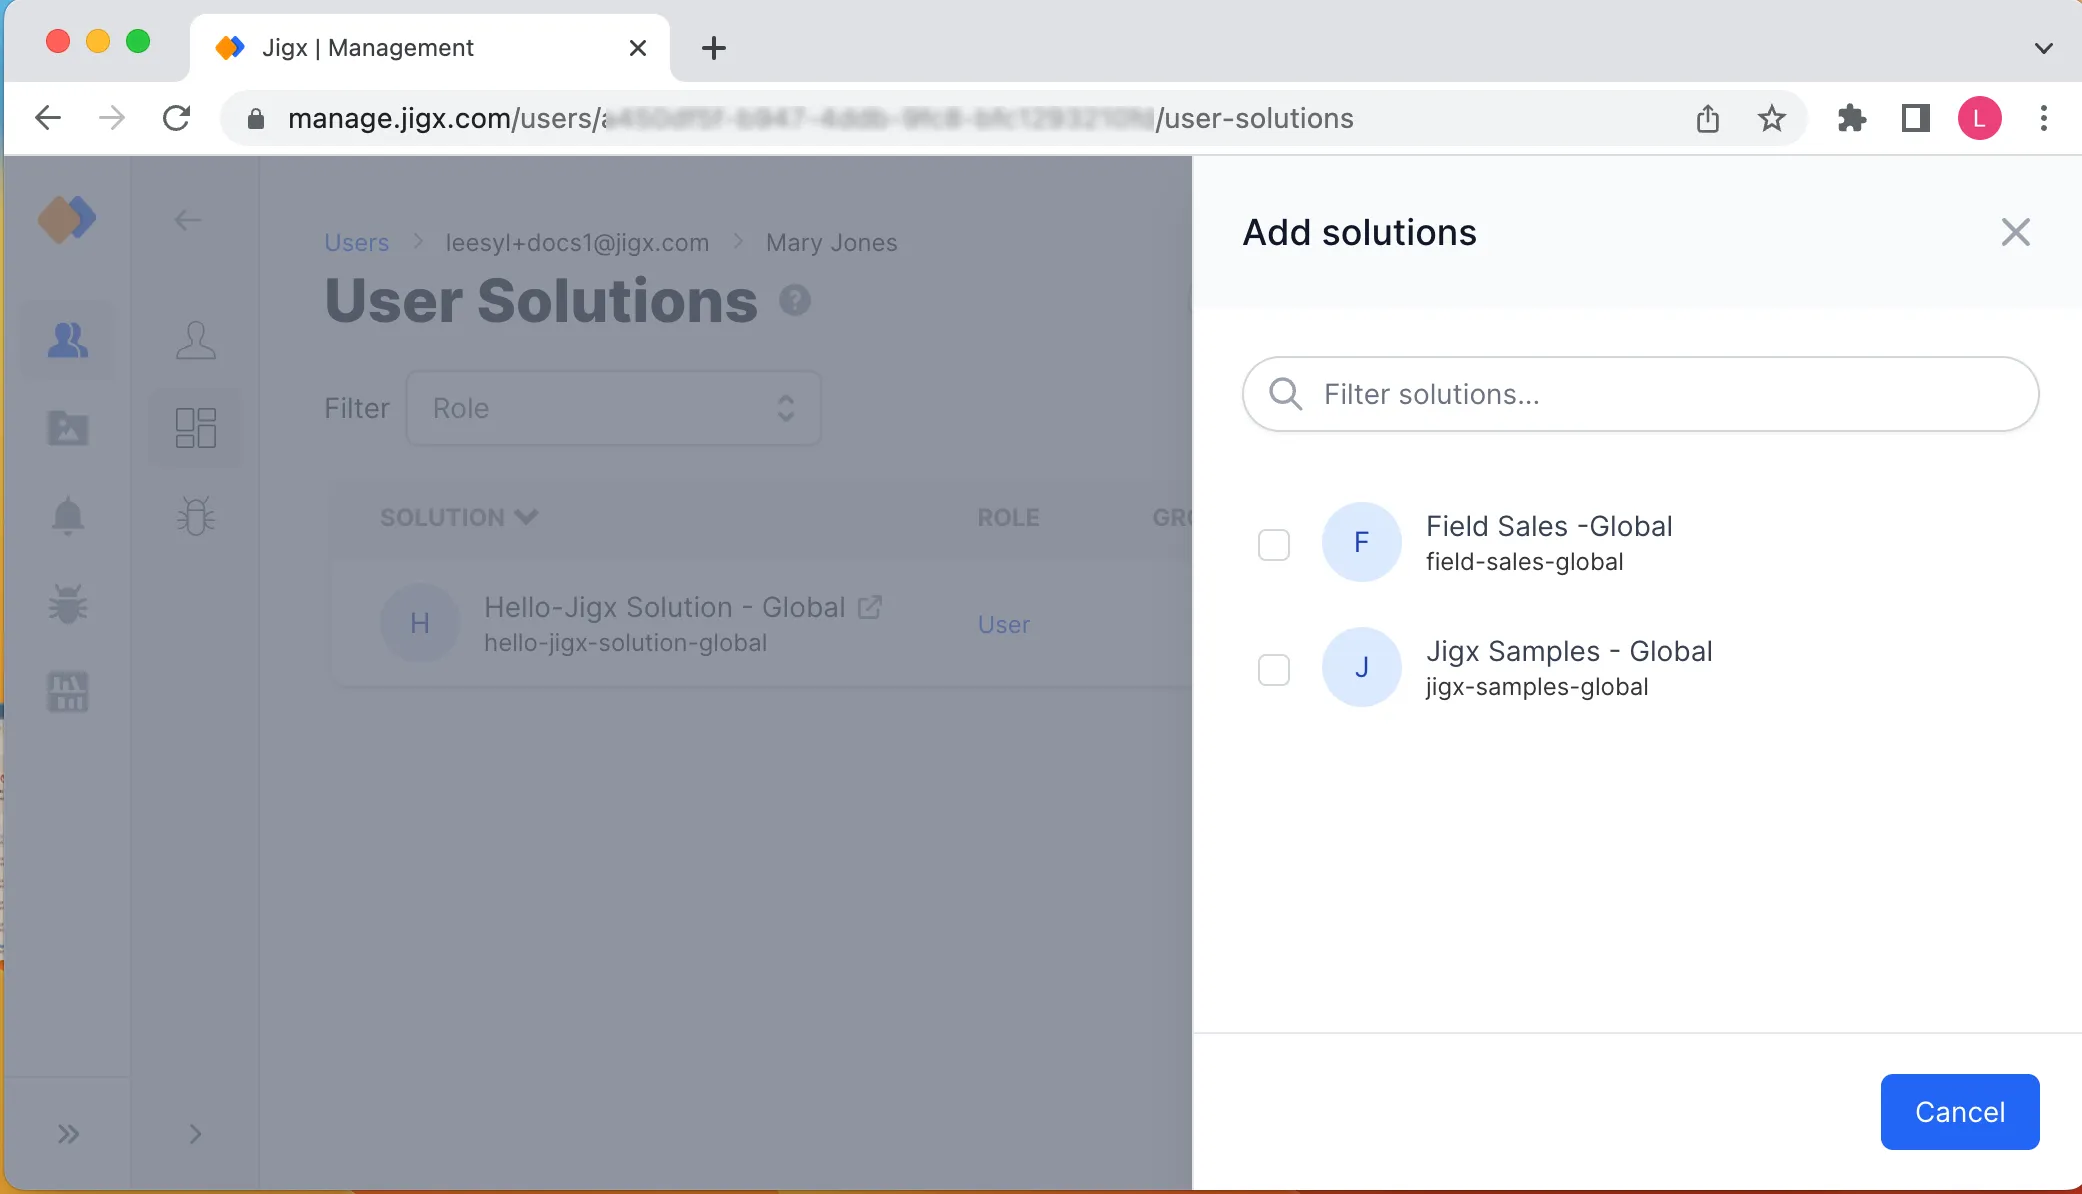
Assigning Solutions to User


Assigning an Organization Role to Users

Each user in the user list has an organization role assigned. When you invite users, their default organization role is set to User. You can change the user's organization role by clicking on the Organization role in the user's profile. All changes made to the organization's roles take effect immediately. Refer to Permissions - User Roles to get a detailed overview on the roles used in an organization and solutions-level.
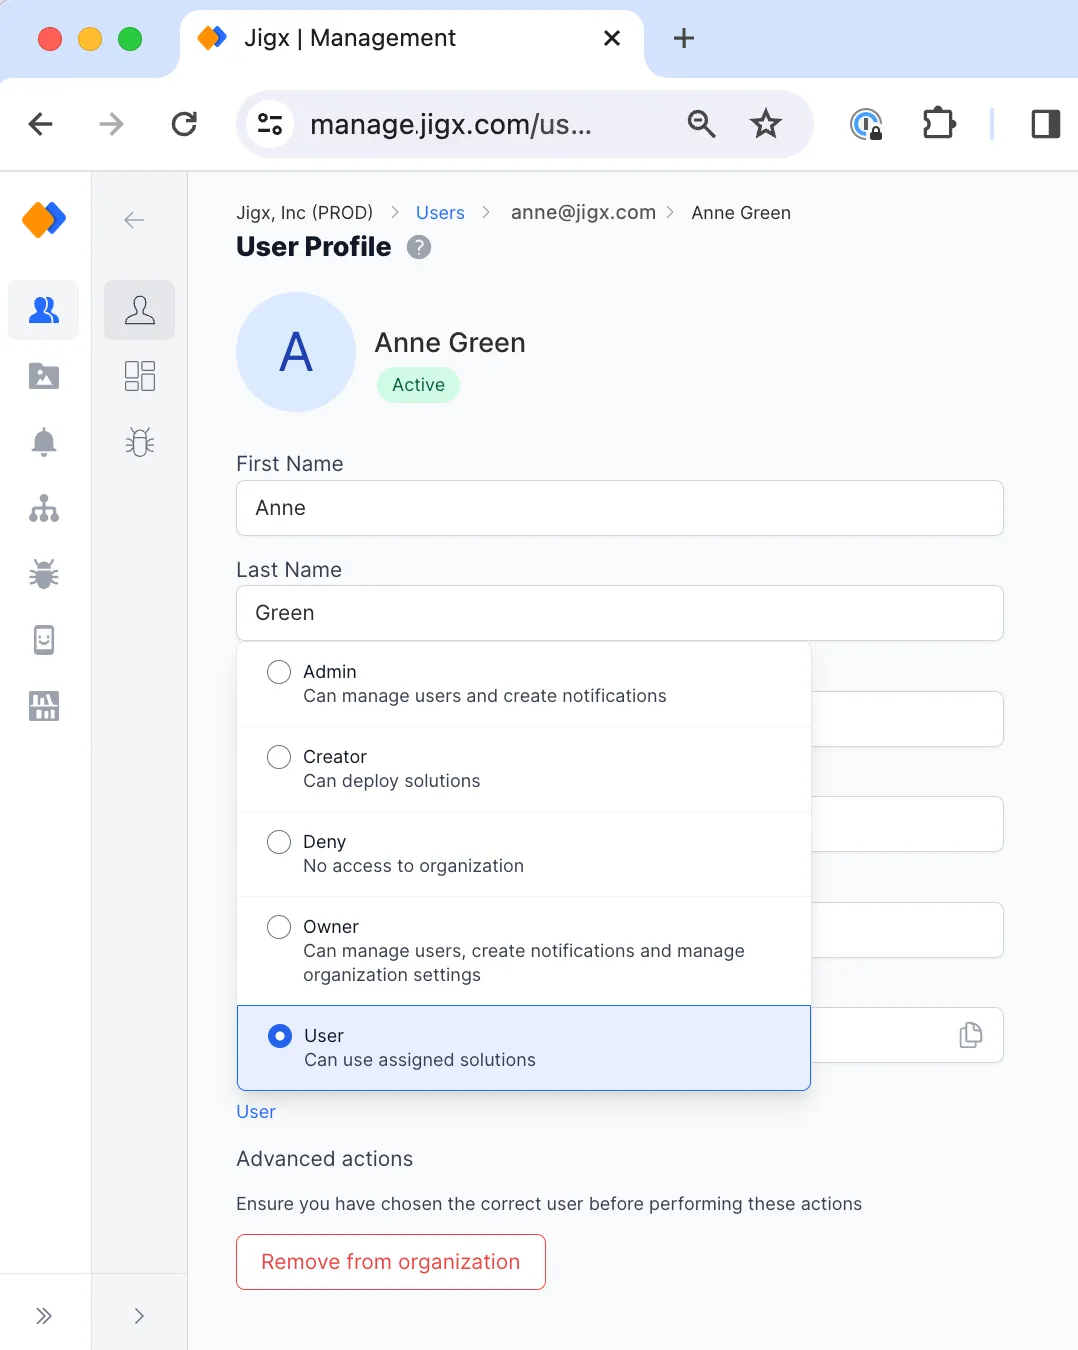
Assign organizational permissions


Assigning a Solution Role to Users

Each user in the user list is assigned a solution role. When you invite users, or add solutions to users their default solution role is set to User. You can change the user's solution role by clicking on the role in the Role column. All changes made to the solution role takes effect immediately. Refer to Permissions - User Roles to get a detailed overview on the roles used in an organization and solutions-level.
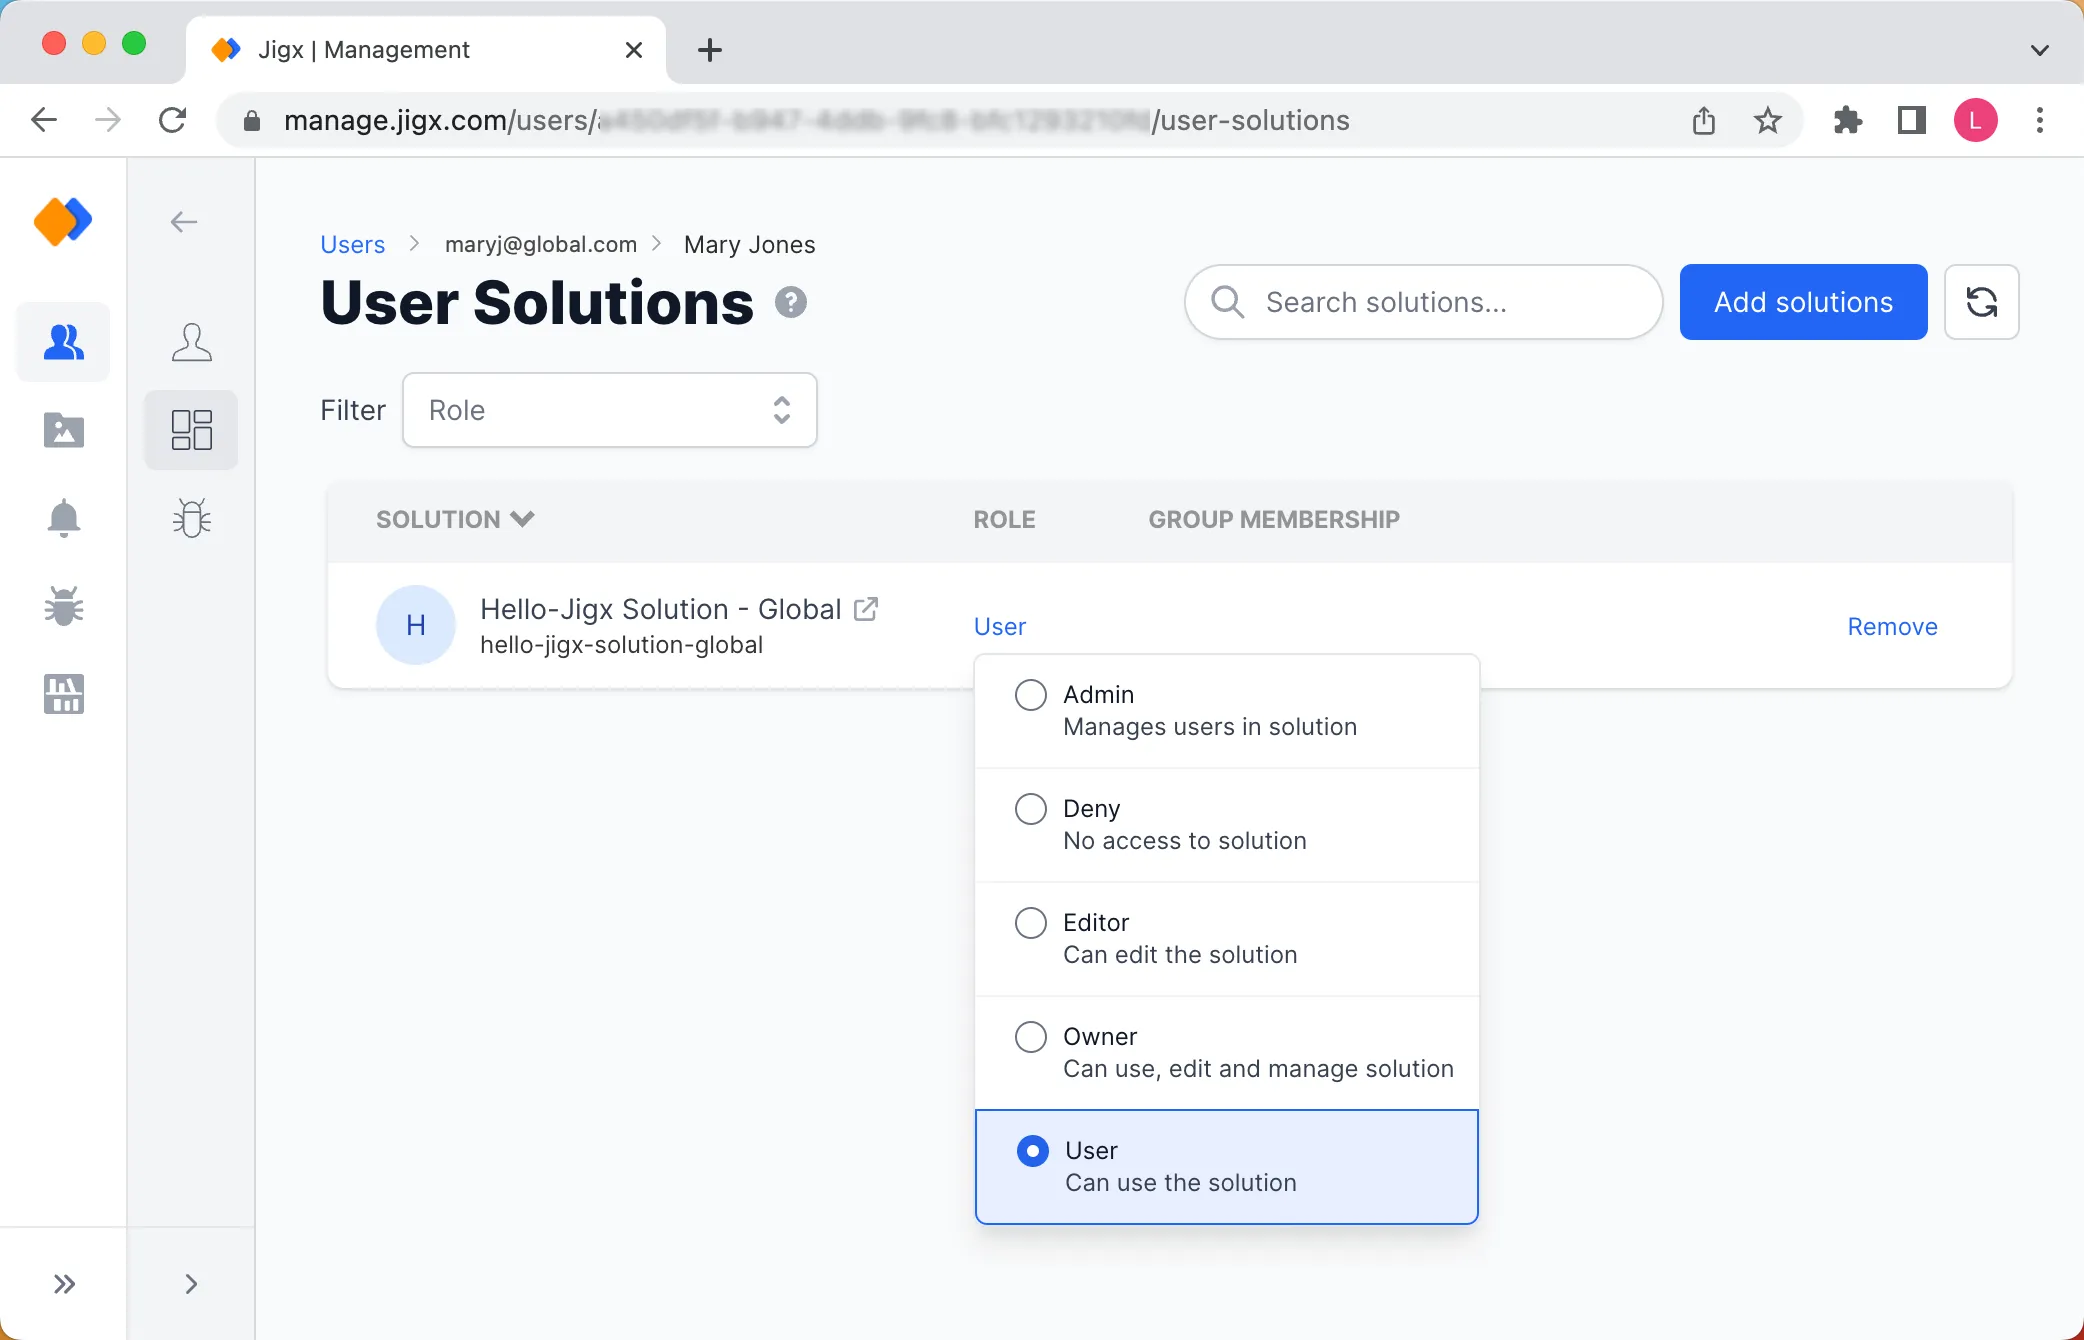
Solution Role Selection
Solution Role selection


Remove a user from the organization

Click on the user's name in the list and click the Remove from organization button at the bottom left of the screen. You need Admin or Owner permissions to be able to remove a user from an organization.
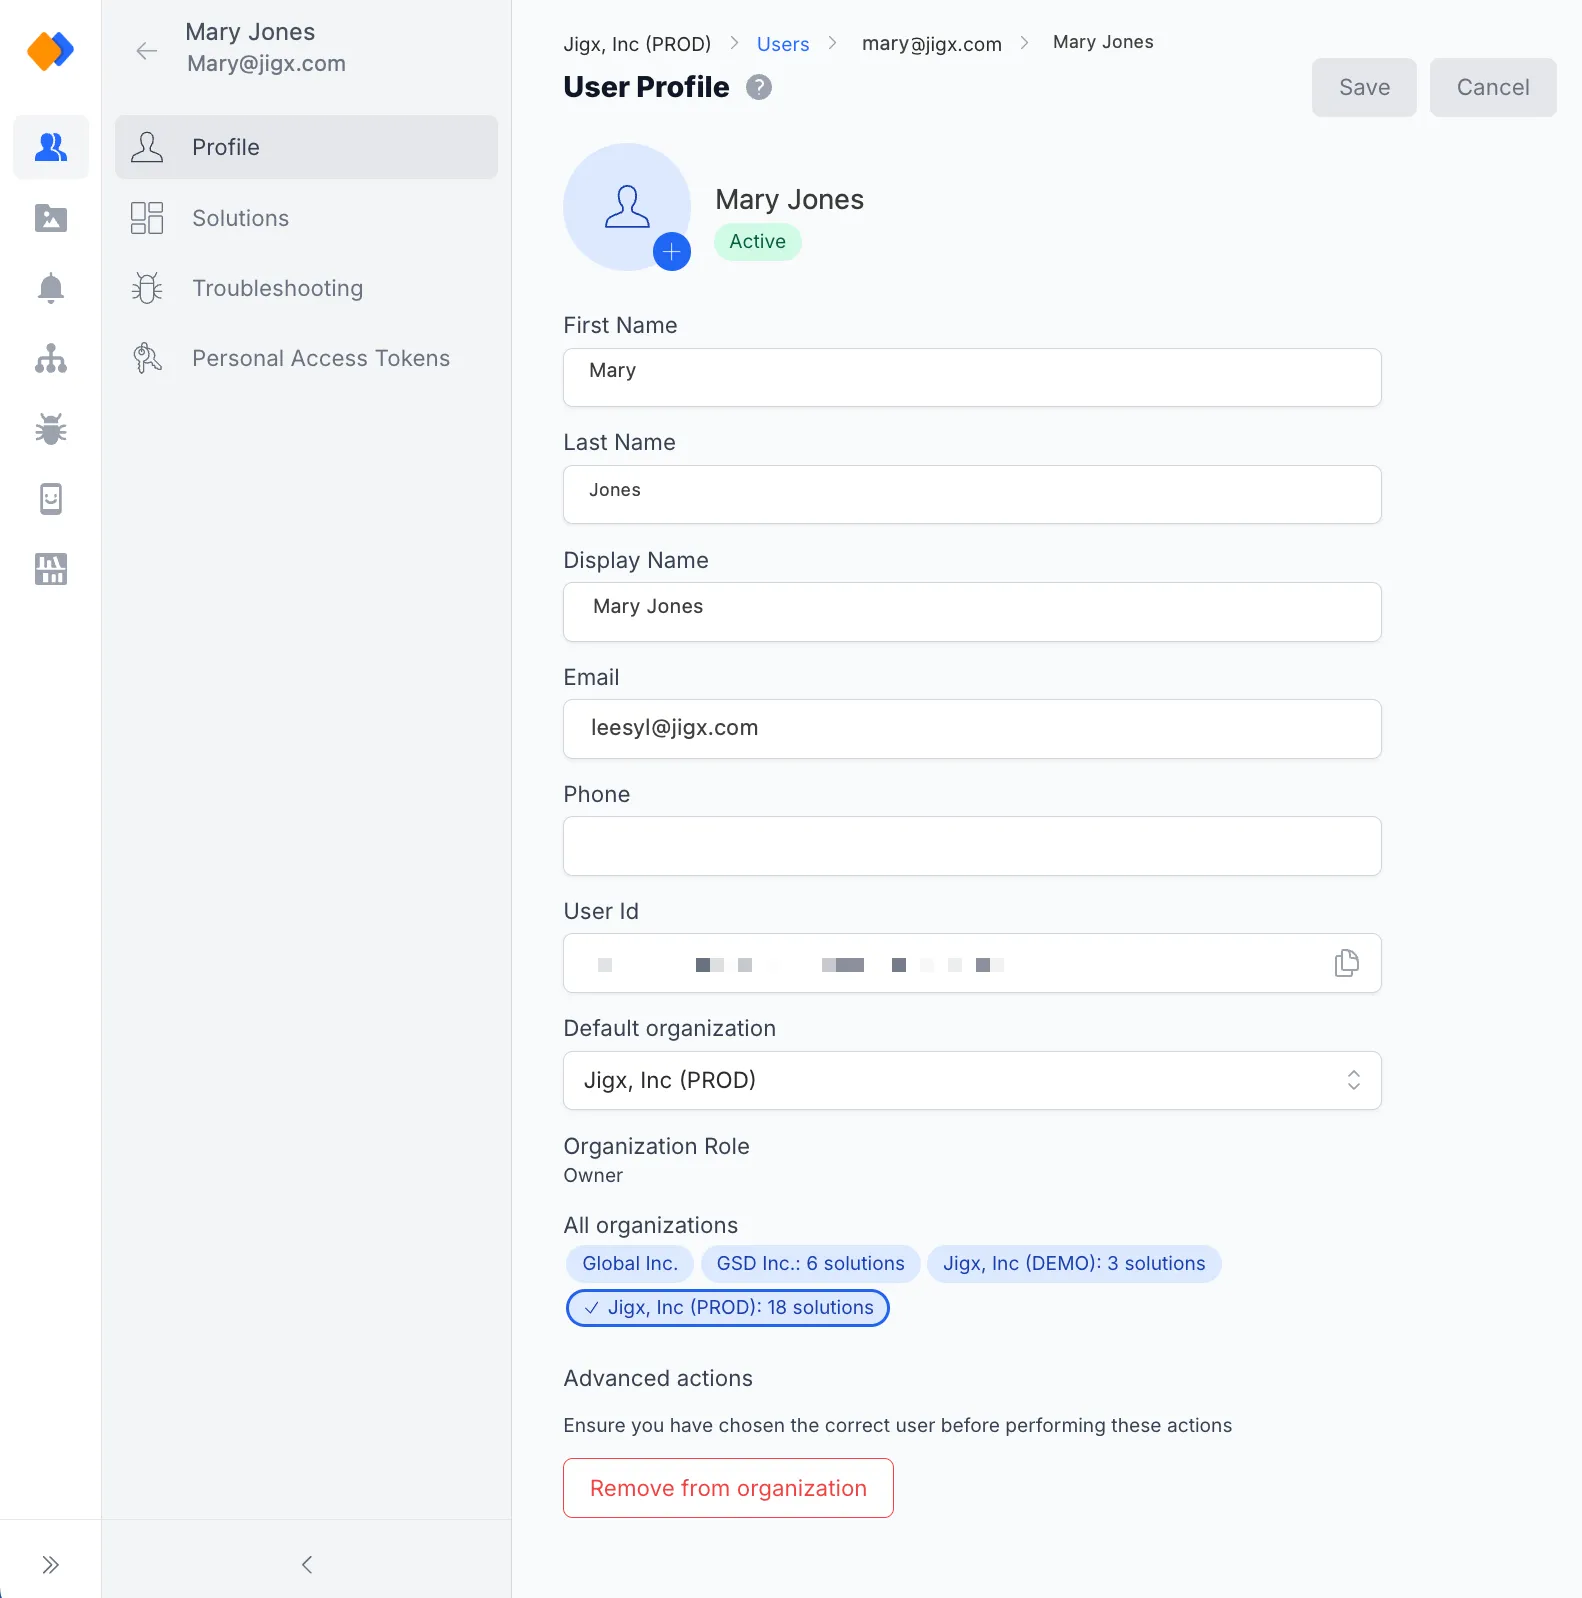
Remove user from Organization


Troubleshooting (User Profile)

Troubleshooting in helps identify problems when an app crashes, or when issues and errors occur while using and running solutions on the . Think of this as runtime troubleshooting performed by support or your organization's administrator versus design time debugging which is available in the for creators who are building solutions.


User troubleshooting


Jigx Management troubleshooting levels

There are three levels of troubleshooting in .

  1. Organization - provides troubleshooting context for all users and solutions in that organization. The exact Correlation ID is required to start troubleshooting.
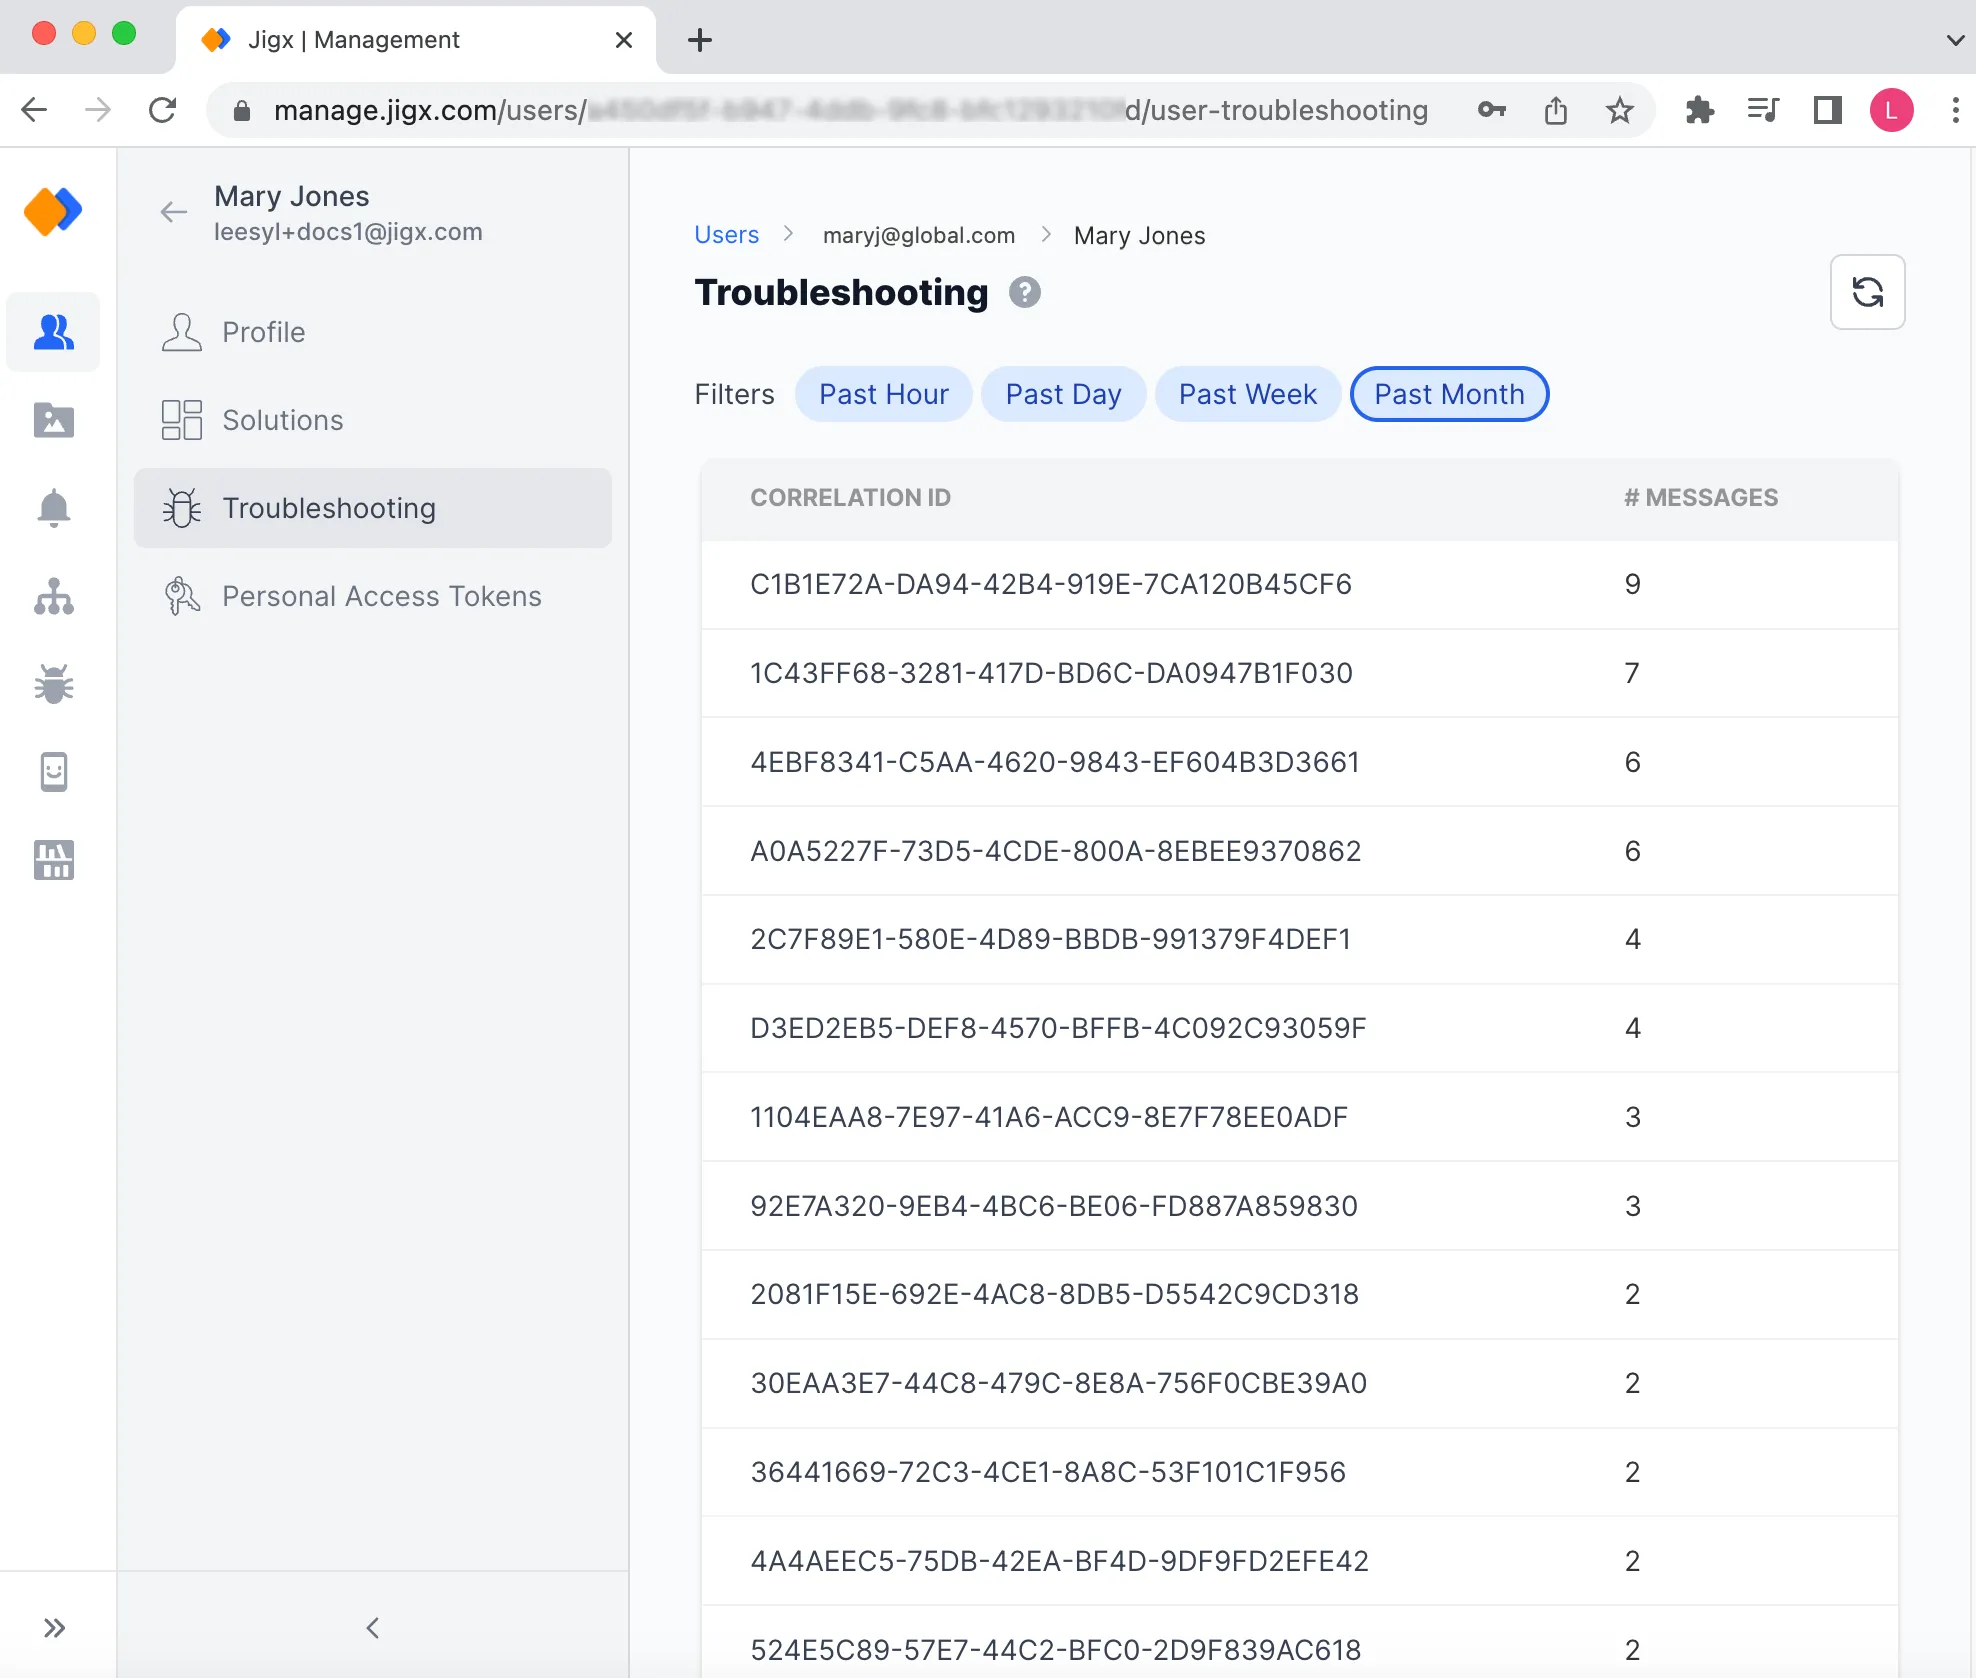
  2. User Profile - provides troubleshooting context only for that specific user, and spans across all solutions assigned to that user
  3. Solution - provides troubleshooting context only for that specific solution, and spans across users using that solution. When clicking on the Correlation ID the next level of detail shows who the user was at the top right of the screen.


Configure logging on the 

Solution troubleshooting


To configure logging on the mobile device perform the following steps:

  1. Open the on your mobile device
  2. Click on your Profile icon in the top right-hand corner of the app
  3. Tap Troubleshooting
  4. The following settings are configurable:
    • Error and crash logging - enabled by default. Logs any errors displayed while using the app and logs when the app crashes
    • Basic logging - logs basic flow when using the solutions in the app
    • Detailed logging - logs errors, app crashes, and flow of the app, and exposes some data. Tap on the field to see the available categories. Enable the categories you require, use the Selected tab to see what is enabled.
      • Debug categories - select from the listed categories
      • Trace Categories - Select from the listed categories


Use troubleshooting information

Troubleshooting allows you to drill down into the detail logged for each Correlation ID.

  1. Click on the Correlation ID to drill down to see the log information.
  2. The following levels are logged depending on the troubleshooting settings enabled on the mobile device: - WARNING - ERROR - DEBUG - INFO
  3. Category - shows the area where the issue occurred such as REST-provider, action.sync.entities, or jig.default.
  4. Message: Provides exact details of the issue such as execute failed, or Failed to sync entity 'user-profile/get-user..'.
  5. Click on a specific level entry in the list to drill down into the log detail. The side pane opens displaying the solution Id, correlation Id, device id, App id, message, and additional parameters.
  6. Use the copy to clipboard icon to use the values elsewhere.


Updated 02 Oct 2024
Doc contributor
Did this page help you?