Creating columns & data records
There are three methods to create columns in tables, and it all depends on where your data comes from if it is pre-existing or new data to be added while the app is in use.
- Create a in with the columns and save data to your table.
- Create your columns and data manually in .
You can create columns in the table by creating a , then define the columns you require in the table by using the provider's create or save method. Here are scenarios commonly used to create columns and data from a .
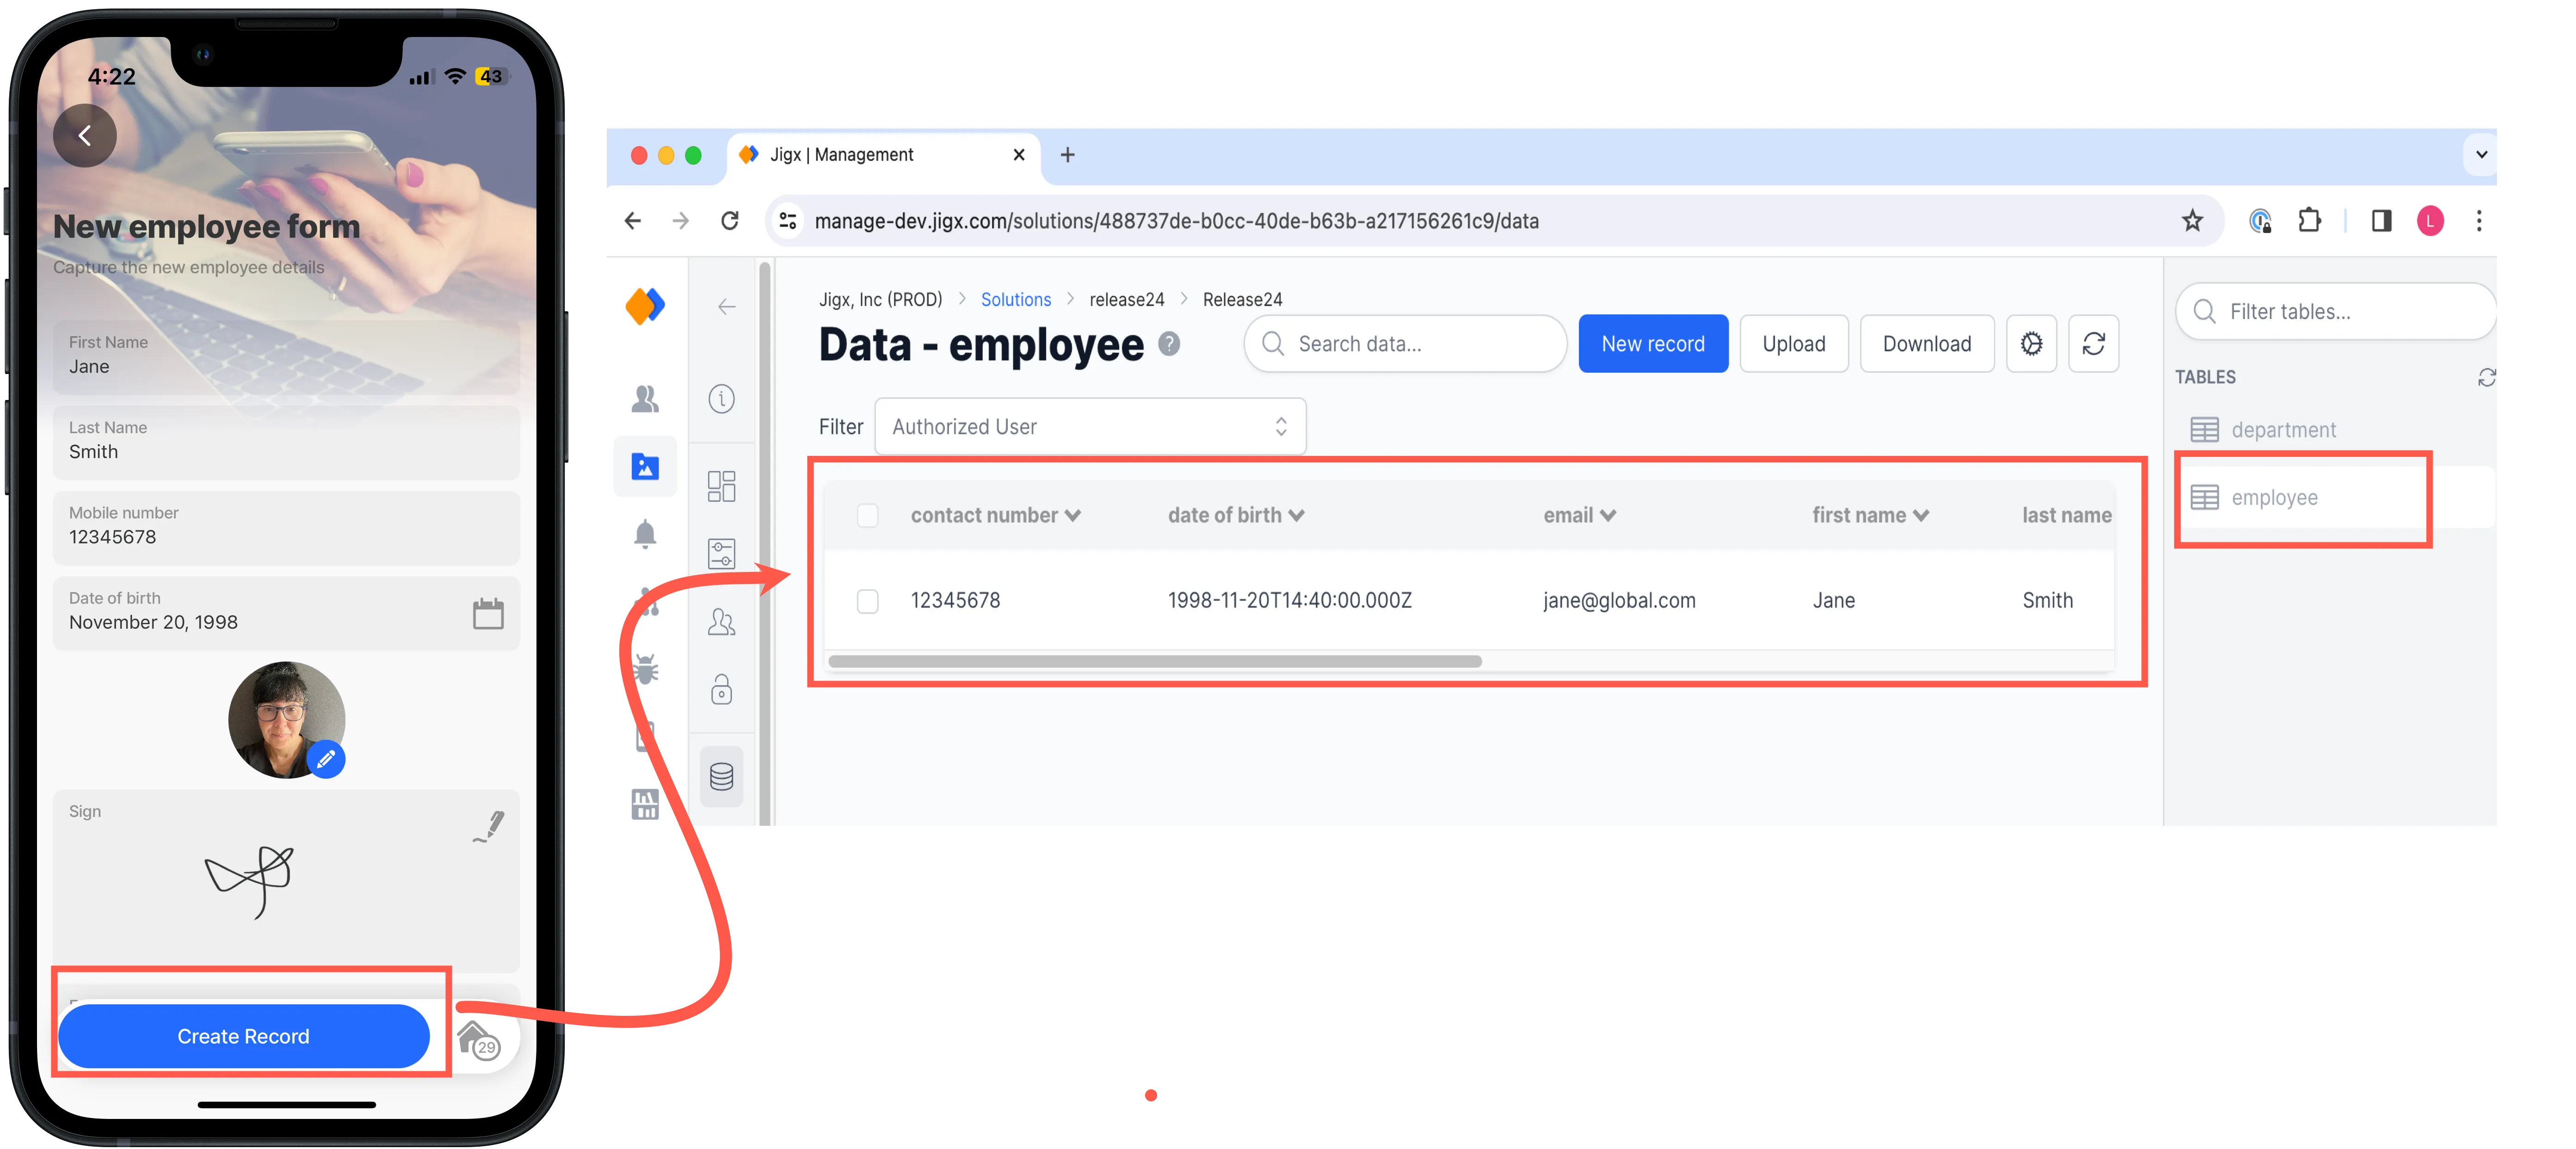
Create a form and use the submit form action
In this scenario the formId in the component.form is used in the submit-form action to get context to the property instanceId. Each value used in the instanceId becomes the column's name in the table. The entity property specifies the table to add the columns and data to.
The columns and data records are created when the form is completed and submitted on the mobile device and not at the time of publishing the solution in .

- Add a component.form to a and give it a formId.
- Give each form property an instanceId.
- Add the submit.form action.
- Specify the same formId used in the component.form.
- Use the DATA_PROVIDER_DYNAMIC with the create or save method.
- In the entity property, specify the table where the columns and data must be added.
- Publish the solution.
- Open the solution in and complete the form, click the submit button.
- Browse to > solution >data> table to see the new record and columns.
Use execute-entity or execute-entities action to create columns and data records
In this scenario you can use actions in a that interact with data to add columns and data records. The columns and data are configured in the data: property the action.Use the following actions with the provider's create and save methods:
- action.execute-entity - used to add a single data record
- action.execute.entities - used to add multiple data records

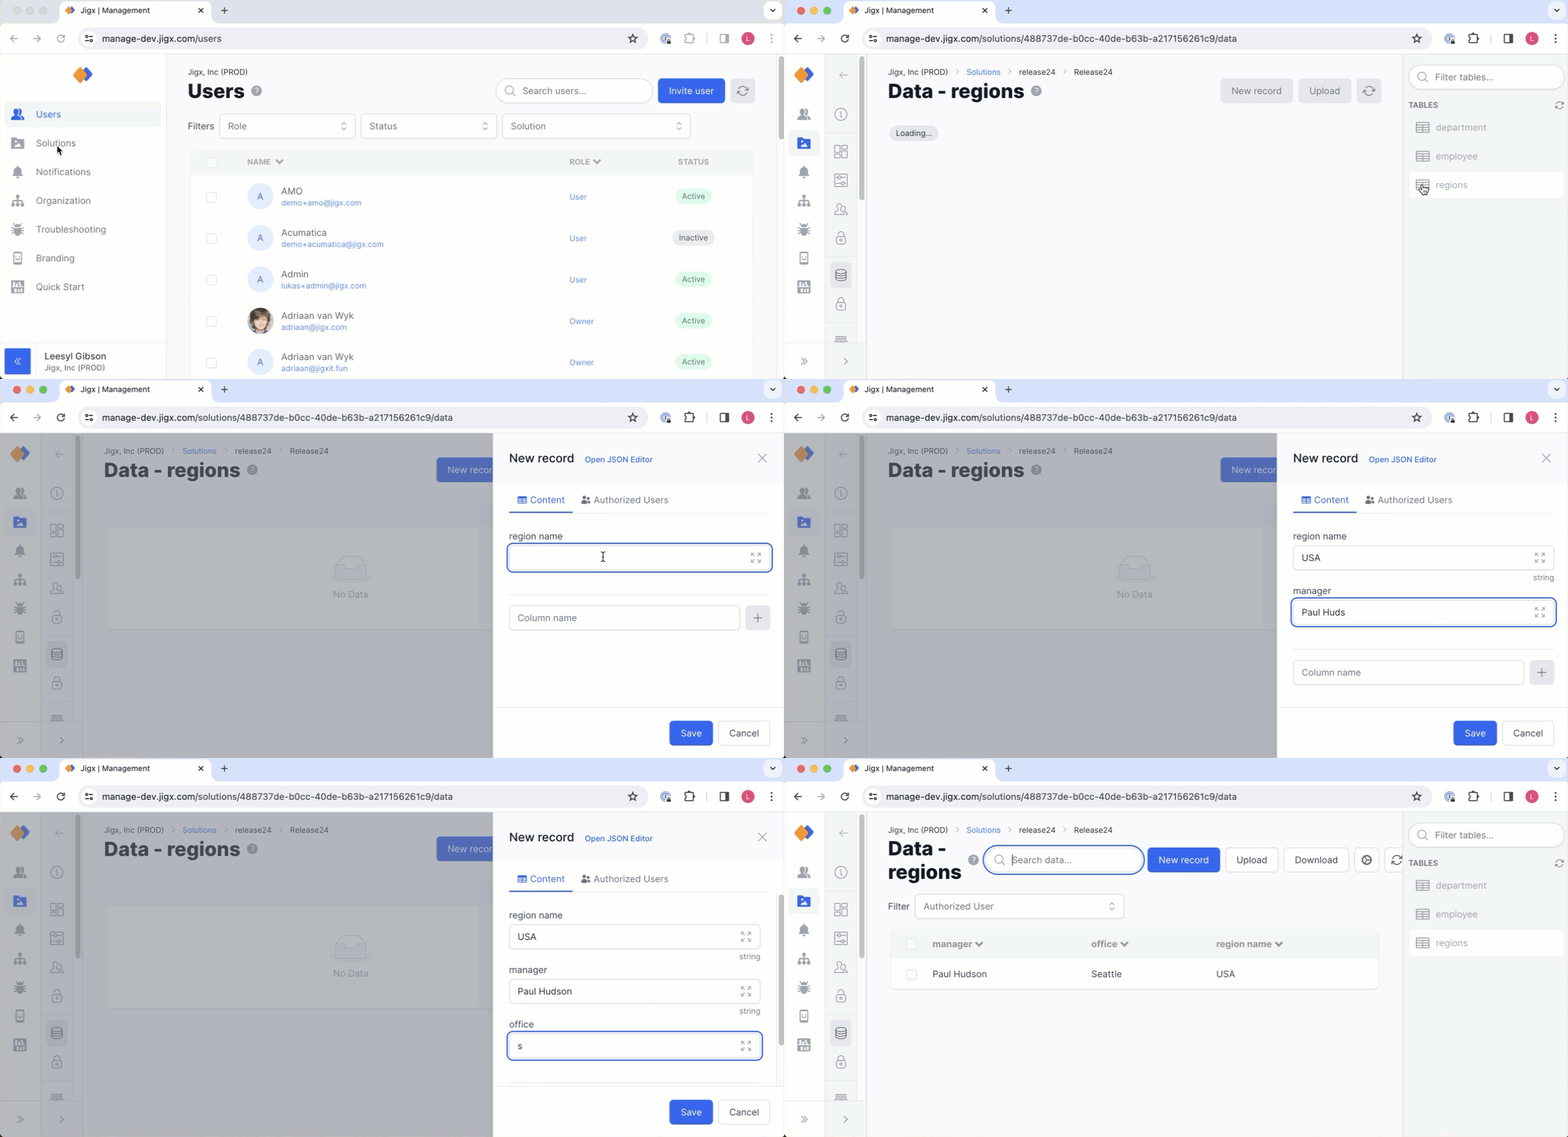
- Click on the table you want to add a record to in the right-hand Tables pane.
- Click on the blue New record button. If you already have records in the table, you will see all existing columns of all records.
- In the New record pane add the data values for each column.
- Add new columns to your record by defining a column name and clicking on the + button next to the new column name. As you add data in the column the field displays the type under the entry, such as number, string or boolean.
- Enter data values in the column fields and click Save.
You do not need to specify an rid column. Dynamic Data will create a GUID based id column for you automatically. You can optionally view the rid column by selecting the settings button and checking the id column as a visible column.
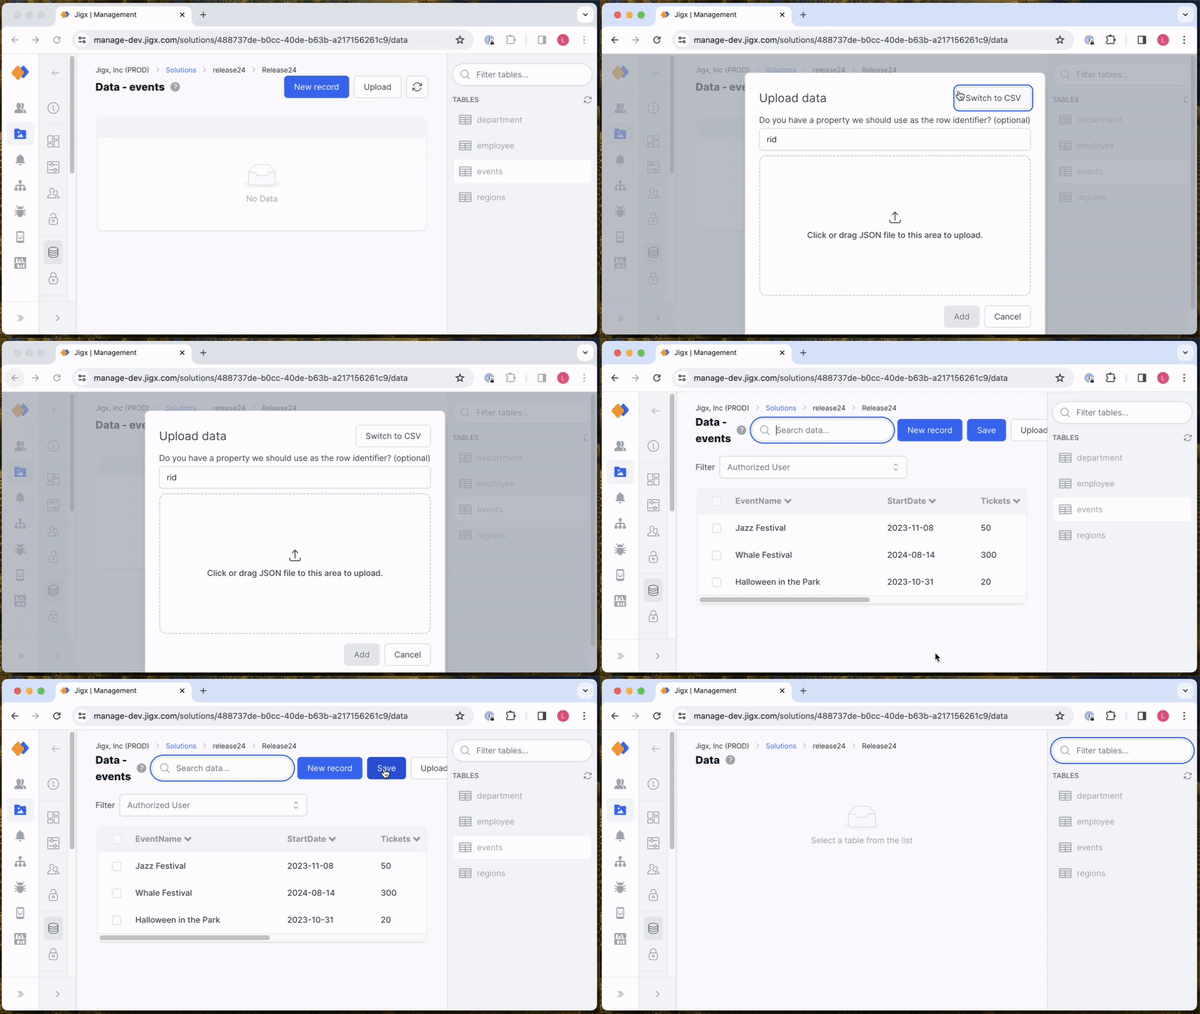
If you have pre-existing data or a large data set with multiple records to add to a table you can import the data by uploading a CSV or JSON file that will create the columns and populate the data records.

- Click on the table you want to add a record to in the right-hand Tables pane.
- Click on the Upload button at the top of the screen.
- By default the JSON upload window is shown. You can toggle to upload CSV using the Switch to CSV button in the top right. Provide the property name for the unique identifier, otherwise by default the rid (GUID based id) property will automatically be created for you. Drag and drop the file in the designated area.
- Click Save.
- For CSV uploads select the type of comma-delimited used in the CSV file. Drag and drop the file in the designated area.
- Click Add.
- Click Save.
The following examples with code snippets are provided:
