Building Apps with Jigx
...
Data Providers
Dynamic Data
Creating tables
4min
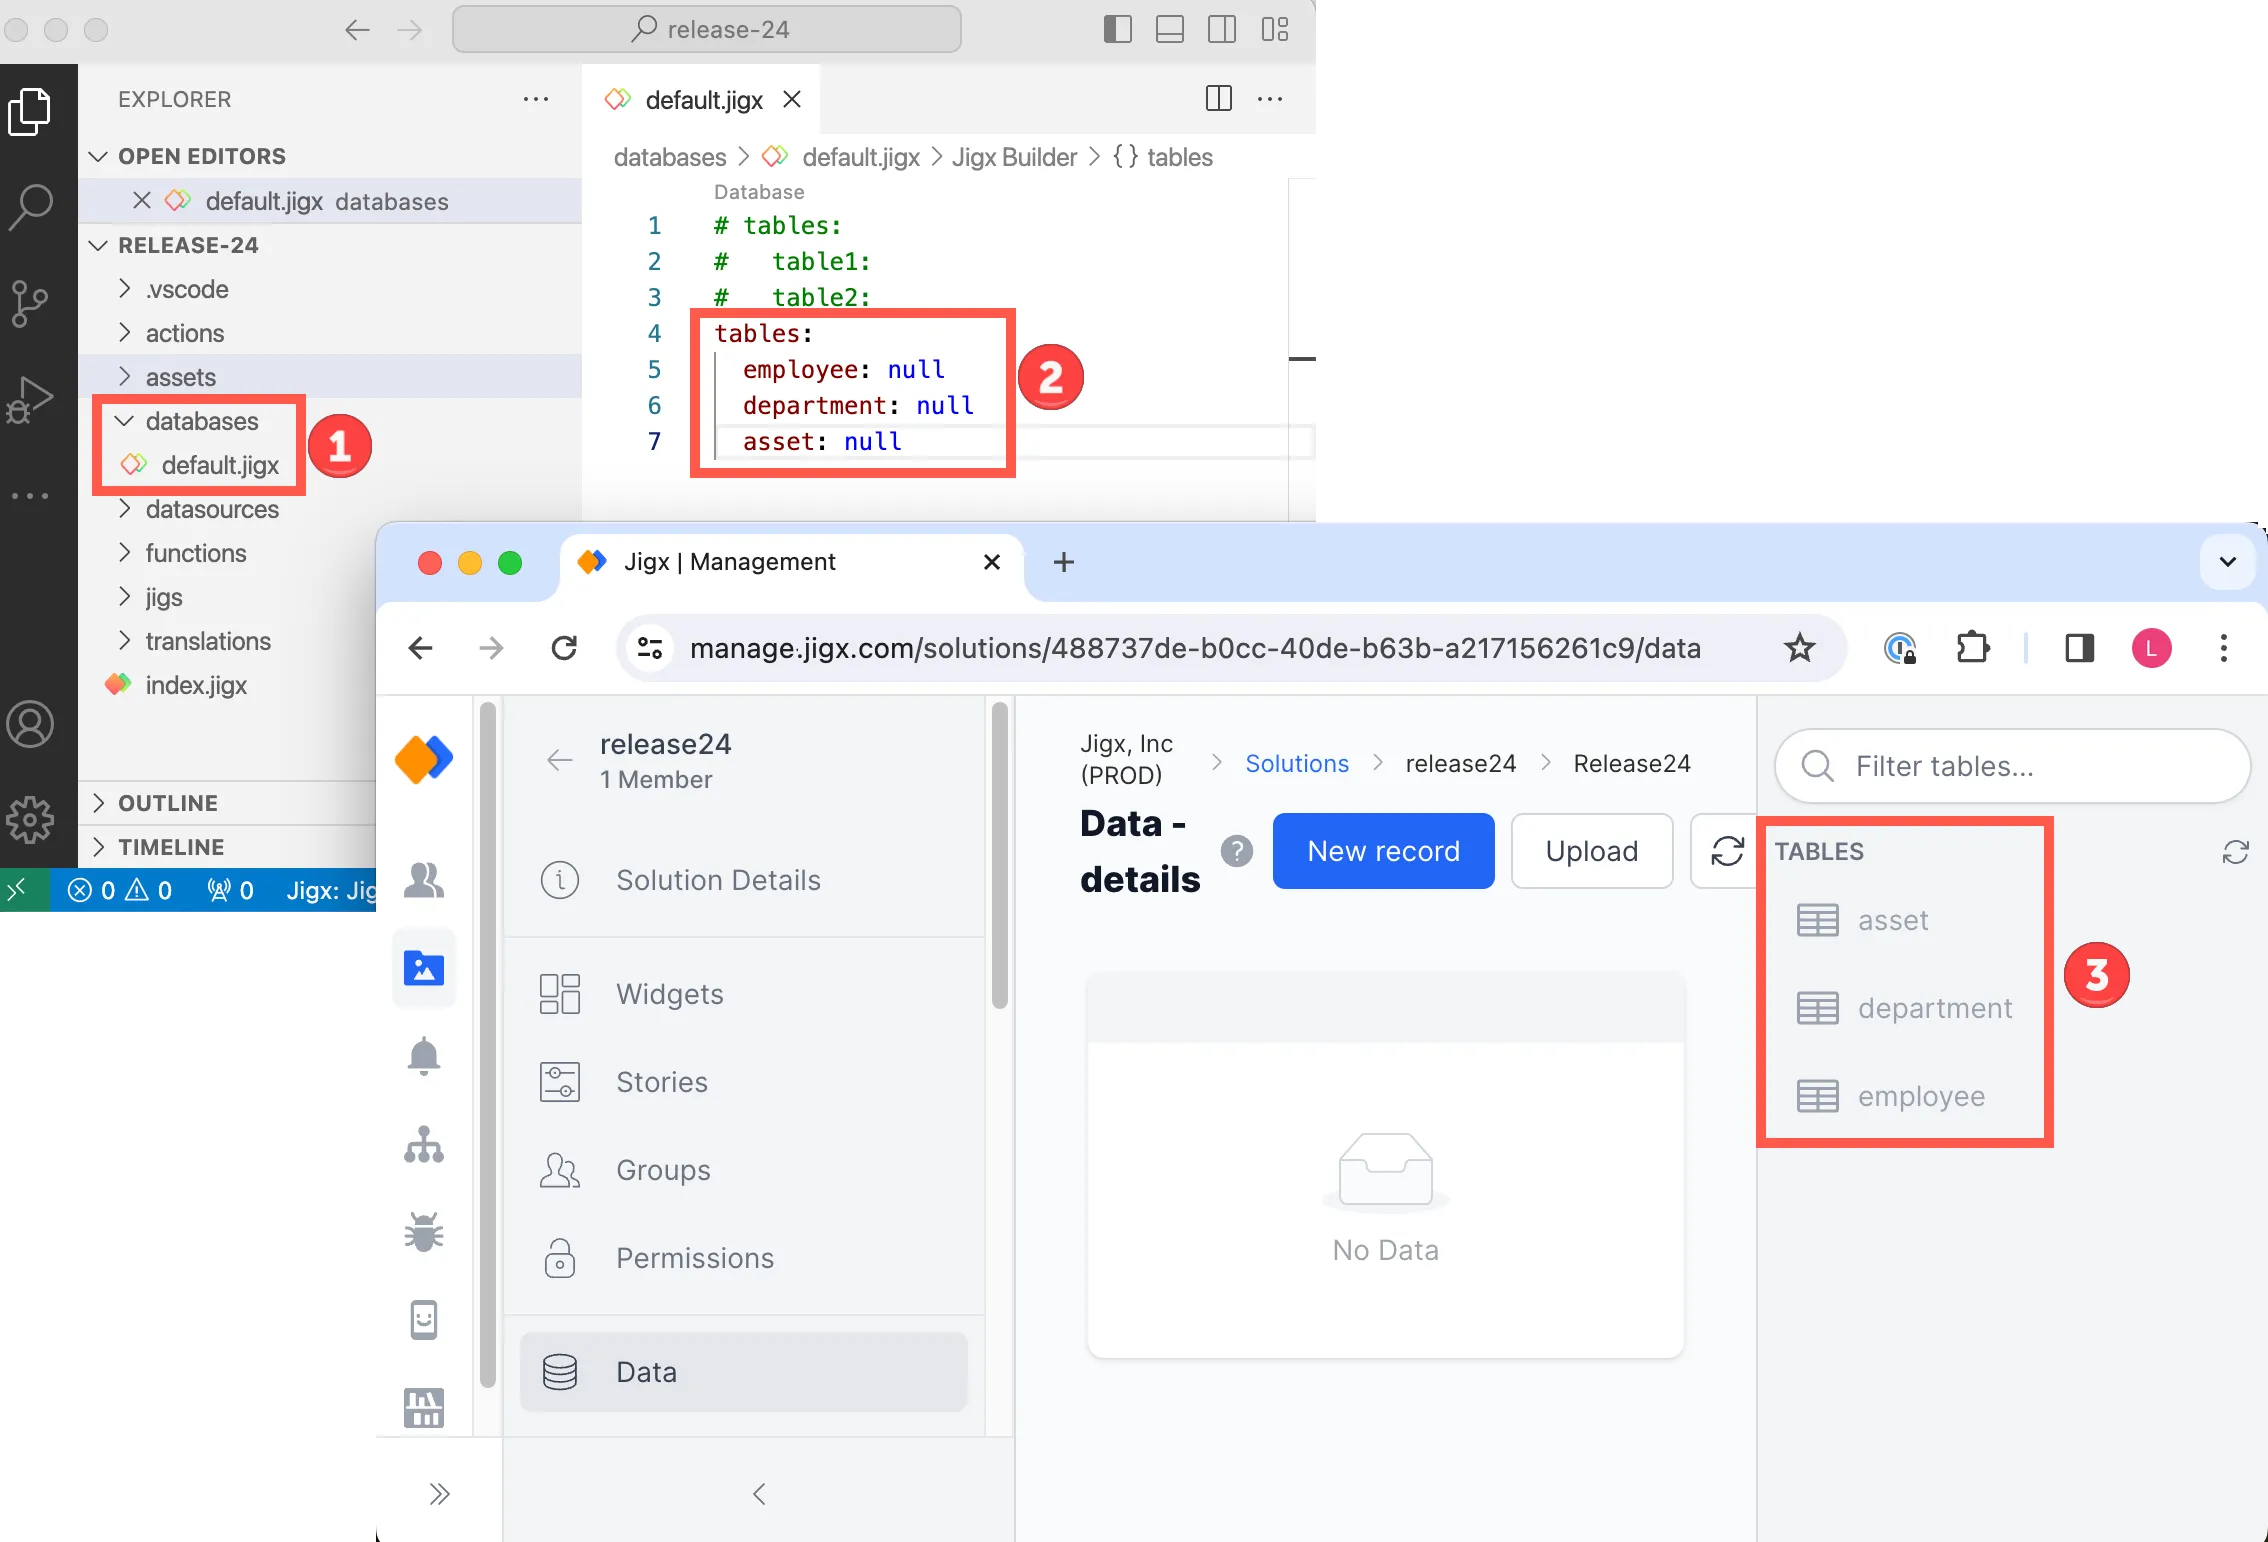
First step in creating for a solution is to create the tables that the solution requires. Tables are created in a solution in in the default.jigx file located in the database folder. All tables are created under the default database. Follow the steps below to create tables:

Tables in Dynamic Data
- Expand the database folder and click on the default.jigx file.
- Use IntelliSense (ctrl+space) in the editor, select tables, and press enter.
- Type the name of your table and provide a null value, for example, employee: null. Take note of the table name formats below:
- Table names must be in lowercase
- The first character must start with a letter
- The name can contain alphanumeric or symbols '-' and '\_'
- You can include "-" dash , "_" underscore and digits as per the regex: "^[a-z][a-z0-9_-]{0,28}[a-z0-9]$"
- The name cannot contain spaces
- The name cannot end with special characters
- The length must be between 2-50 characters
- Add multiple tables by adding the table names under each other in the default.jigx file.
- In Jigx Management browse to your solution and navigate to the Data menu to view your tables. Note that only the tables have been created; next, you must create the columns and data.
- If default.jigx does not exist, simply use the file / new capability to add a new file called default.jigx and place it within a folder called databases as per the folder layout shown in the image at the top of this page.
- If you remove a table in the default.jigx file and publish the solution, the table becomes unused in the solution. To include the table and it's records again in the solution, simply add the table back to the default.jigx file and republish the solution.
The following examples with code snippets are provided:
Updated 29 Nov 2023

Did this page help you?