media-field
This component uploads files, images, videos, or a combination of them. You can use saved files from your device or your camera to take pictures and videos.

- The media-field requires a data source to store the files, you can configure one of the Data Providers for this.
- does not recommend storing images in (via any conversion), as the max file size per record is 350K.
Some properties are common to all components, see Common component properties for a list and their configuration options.
Core structure | |
|---|---|
instanceId | Provide an id for the media-field component. |
label | Label is displayed as a placeholder if there is no value provided. Use this property to provide a value that will guide the user to identify what must be uploaded, such as Upload file or Upload a video. |
mediaType | By default the value is set to image. The following options are available for selection:
|
Other options | |
|---|---|
intialValue | The initialValue loads and displays the configured media in the media-field when the form is initially loaded. You can use this property to preset the field with default media so that you do not have to manually select it. To change the intialValue simply tap the media-field and upload a new set of media. Using the reset-state action with initialValues does not clear the media-field, it resets the field back to it's initialValue. |
imageCropping | You can set any of the following with imageCropping : isEnabled - allows you to crop an image. height - maximum allowed is 5000px. width- maximum allowed is 5000px. isFreeStyleCropEnabled - when set to true it supports custom cropping to change the size or aspect ratio of an image. |
imageQuality | Image quality after compression (from 0 to 100, where 100 is the best quality). On iOS, values larger than 80 don't produce a noticeable quality increase in most images, while a value of 80 will reduce the file size by about half or less compared to a value of 100. Default: 100 (Android)/ 80 (iOS). |
isMultiple | Set to true allows for multiple file to be added. Set to false allows for a single file. |
maximumFileSize | maximumFileSize =6 * 1024 * 1024 by default. Set the value to none if no size evaluations must be performed. File size format is in bytes. Applies to images and videos. |
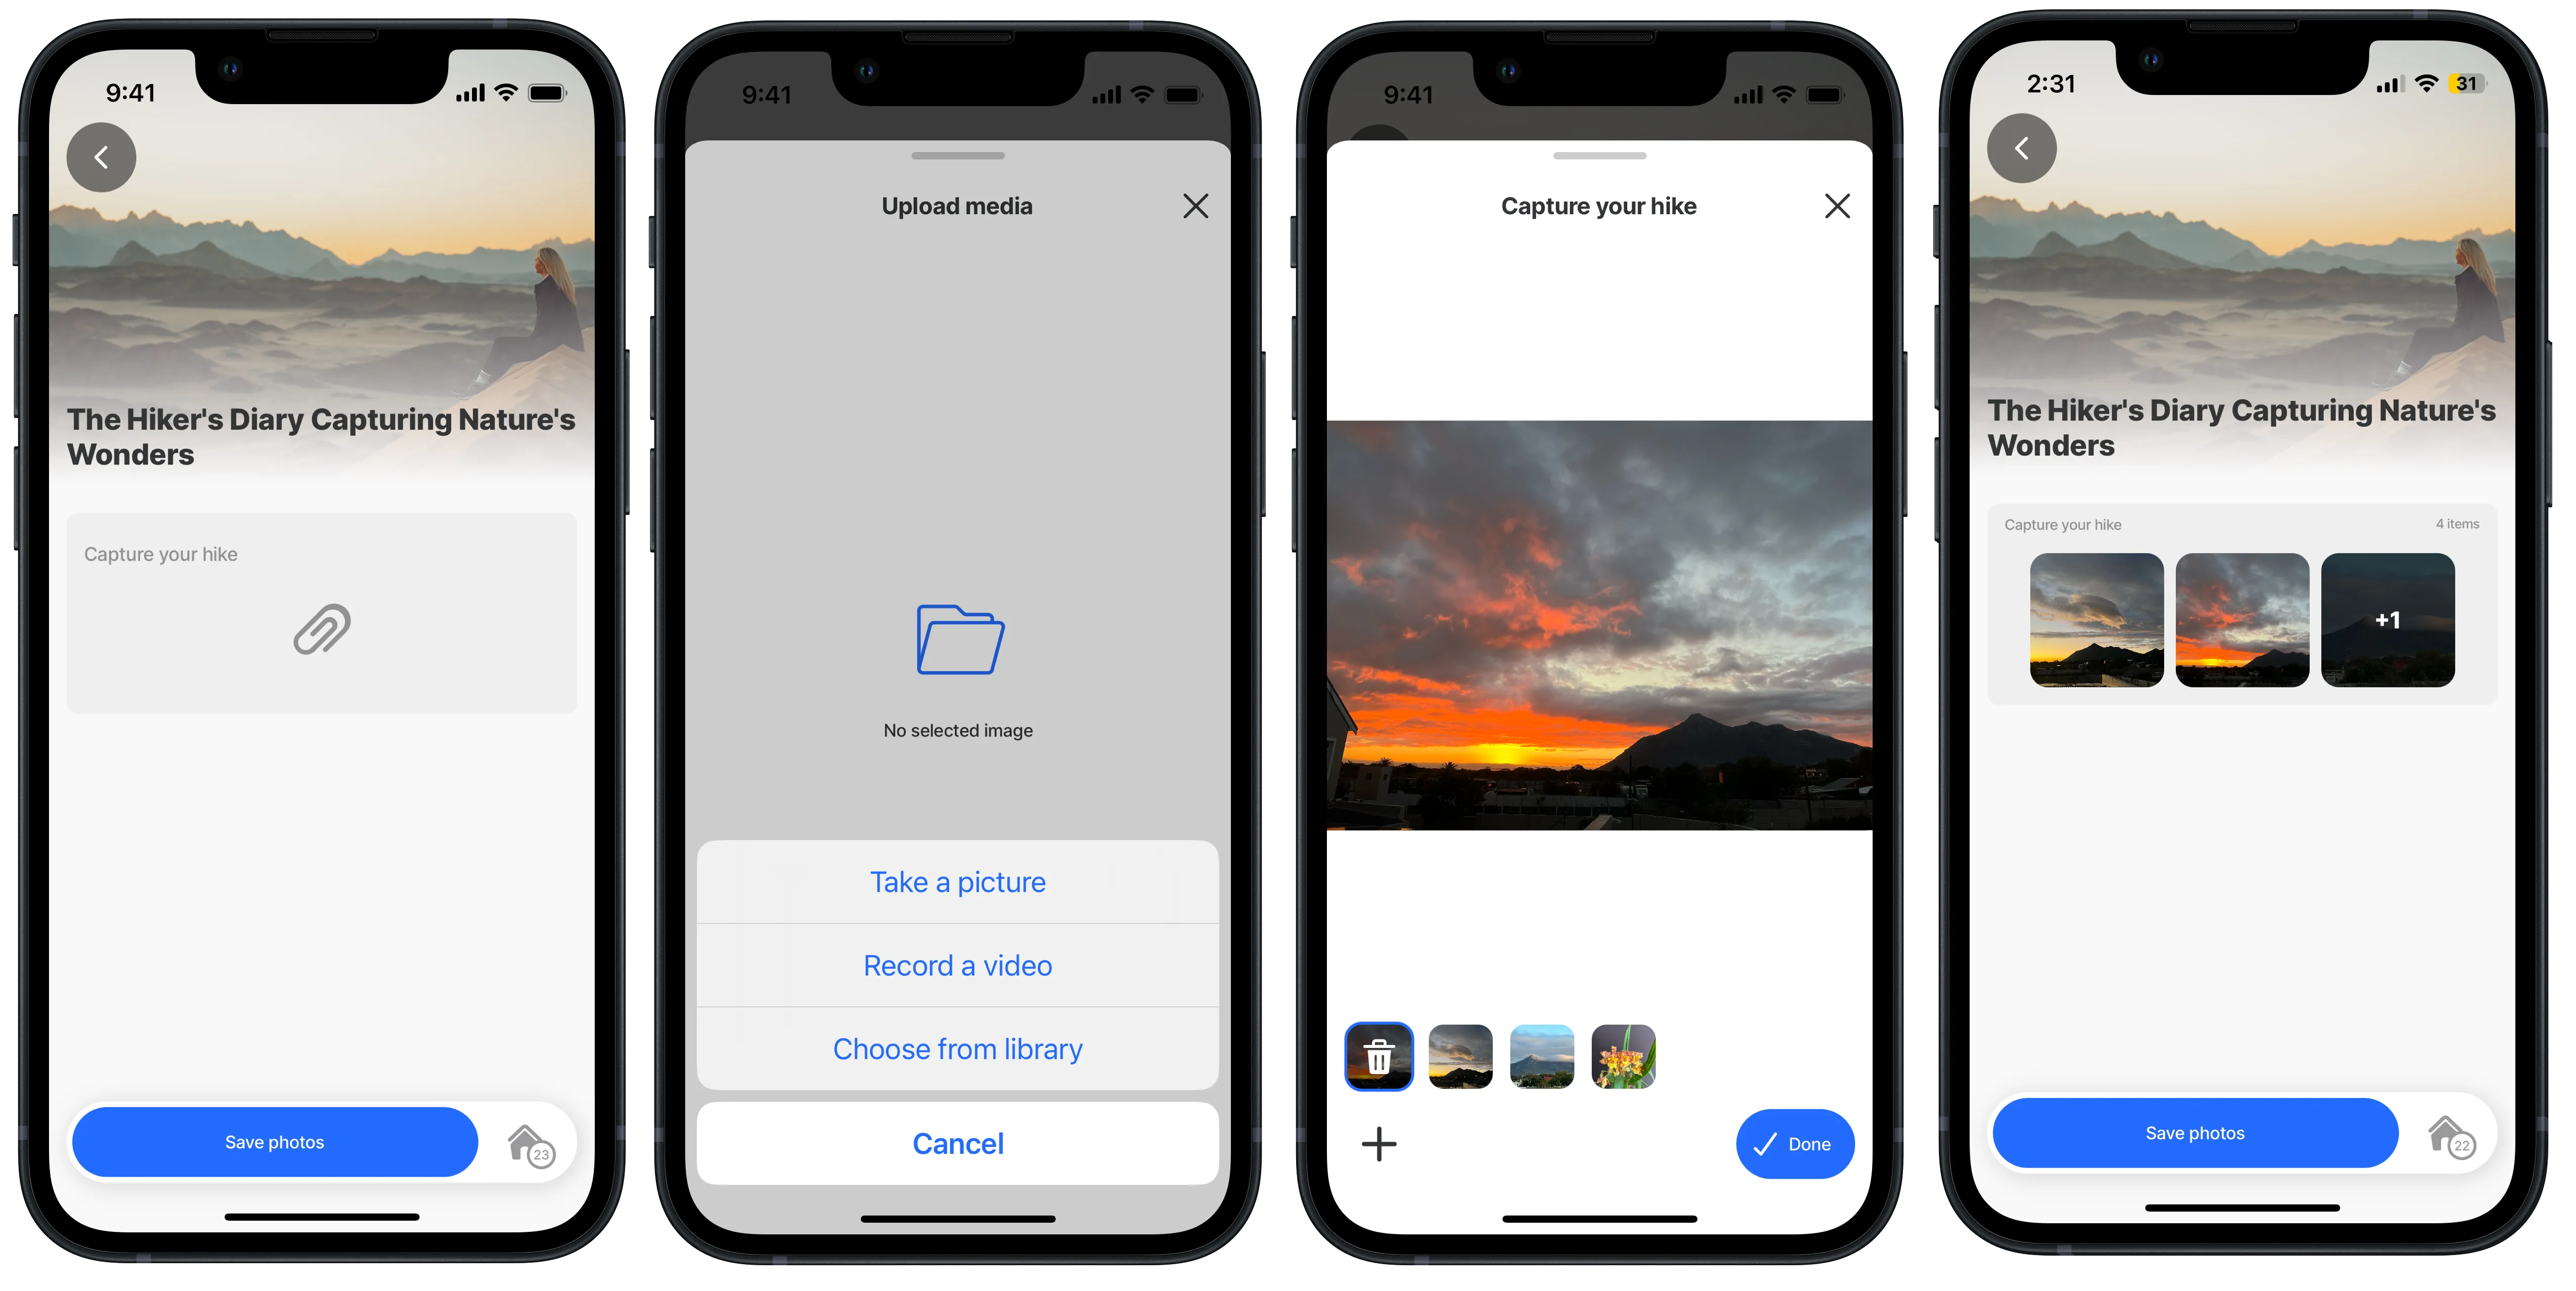
- To delete a media file, click on the trash icon shown on the media thumbnail at the bottom of the selection screen.
- When multiple files are selected the first thumbnail displays the trash icon. Tap on the image thumbnail you want to delete, the trash icon will display, tap on the icon, the image is deleted.
- An image, video, or file can be reference for upload from a data source.
- When using the intialValue property to display a media file be aware that uploading media from Andriod and trying to read it in iOS and vice versus is not possible as it cannot display the image due to the local-uri path. When a media-file cannot be viewed an icon with the file's title is displayed. Use conversions to base64 to store files.
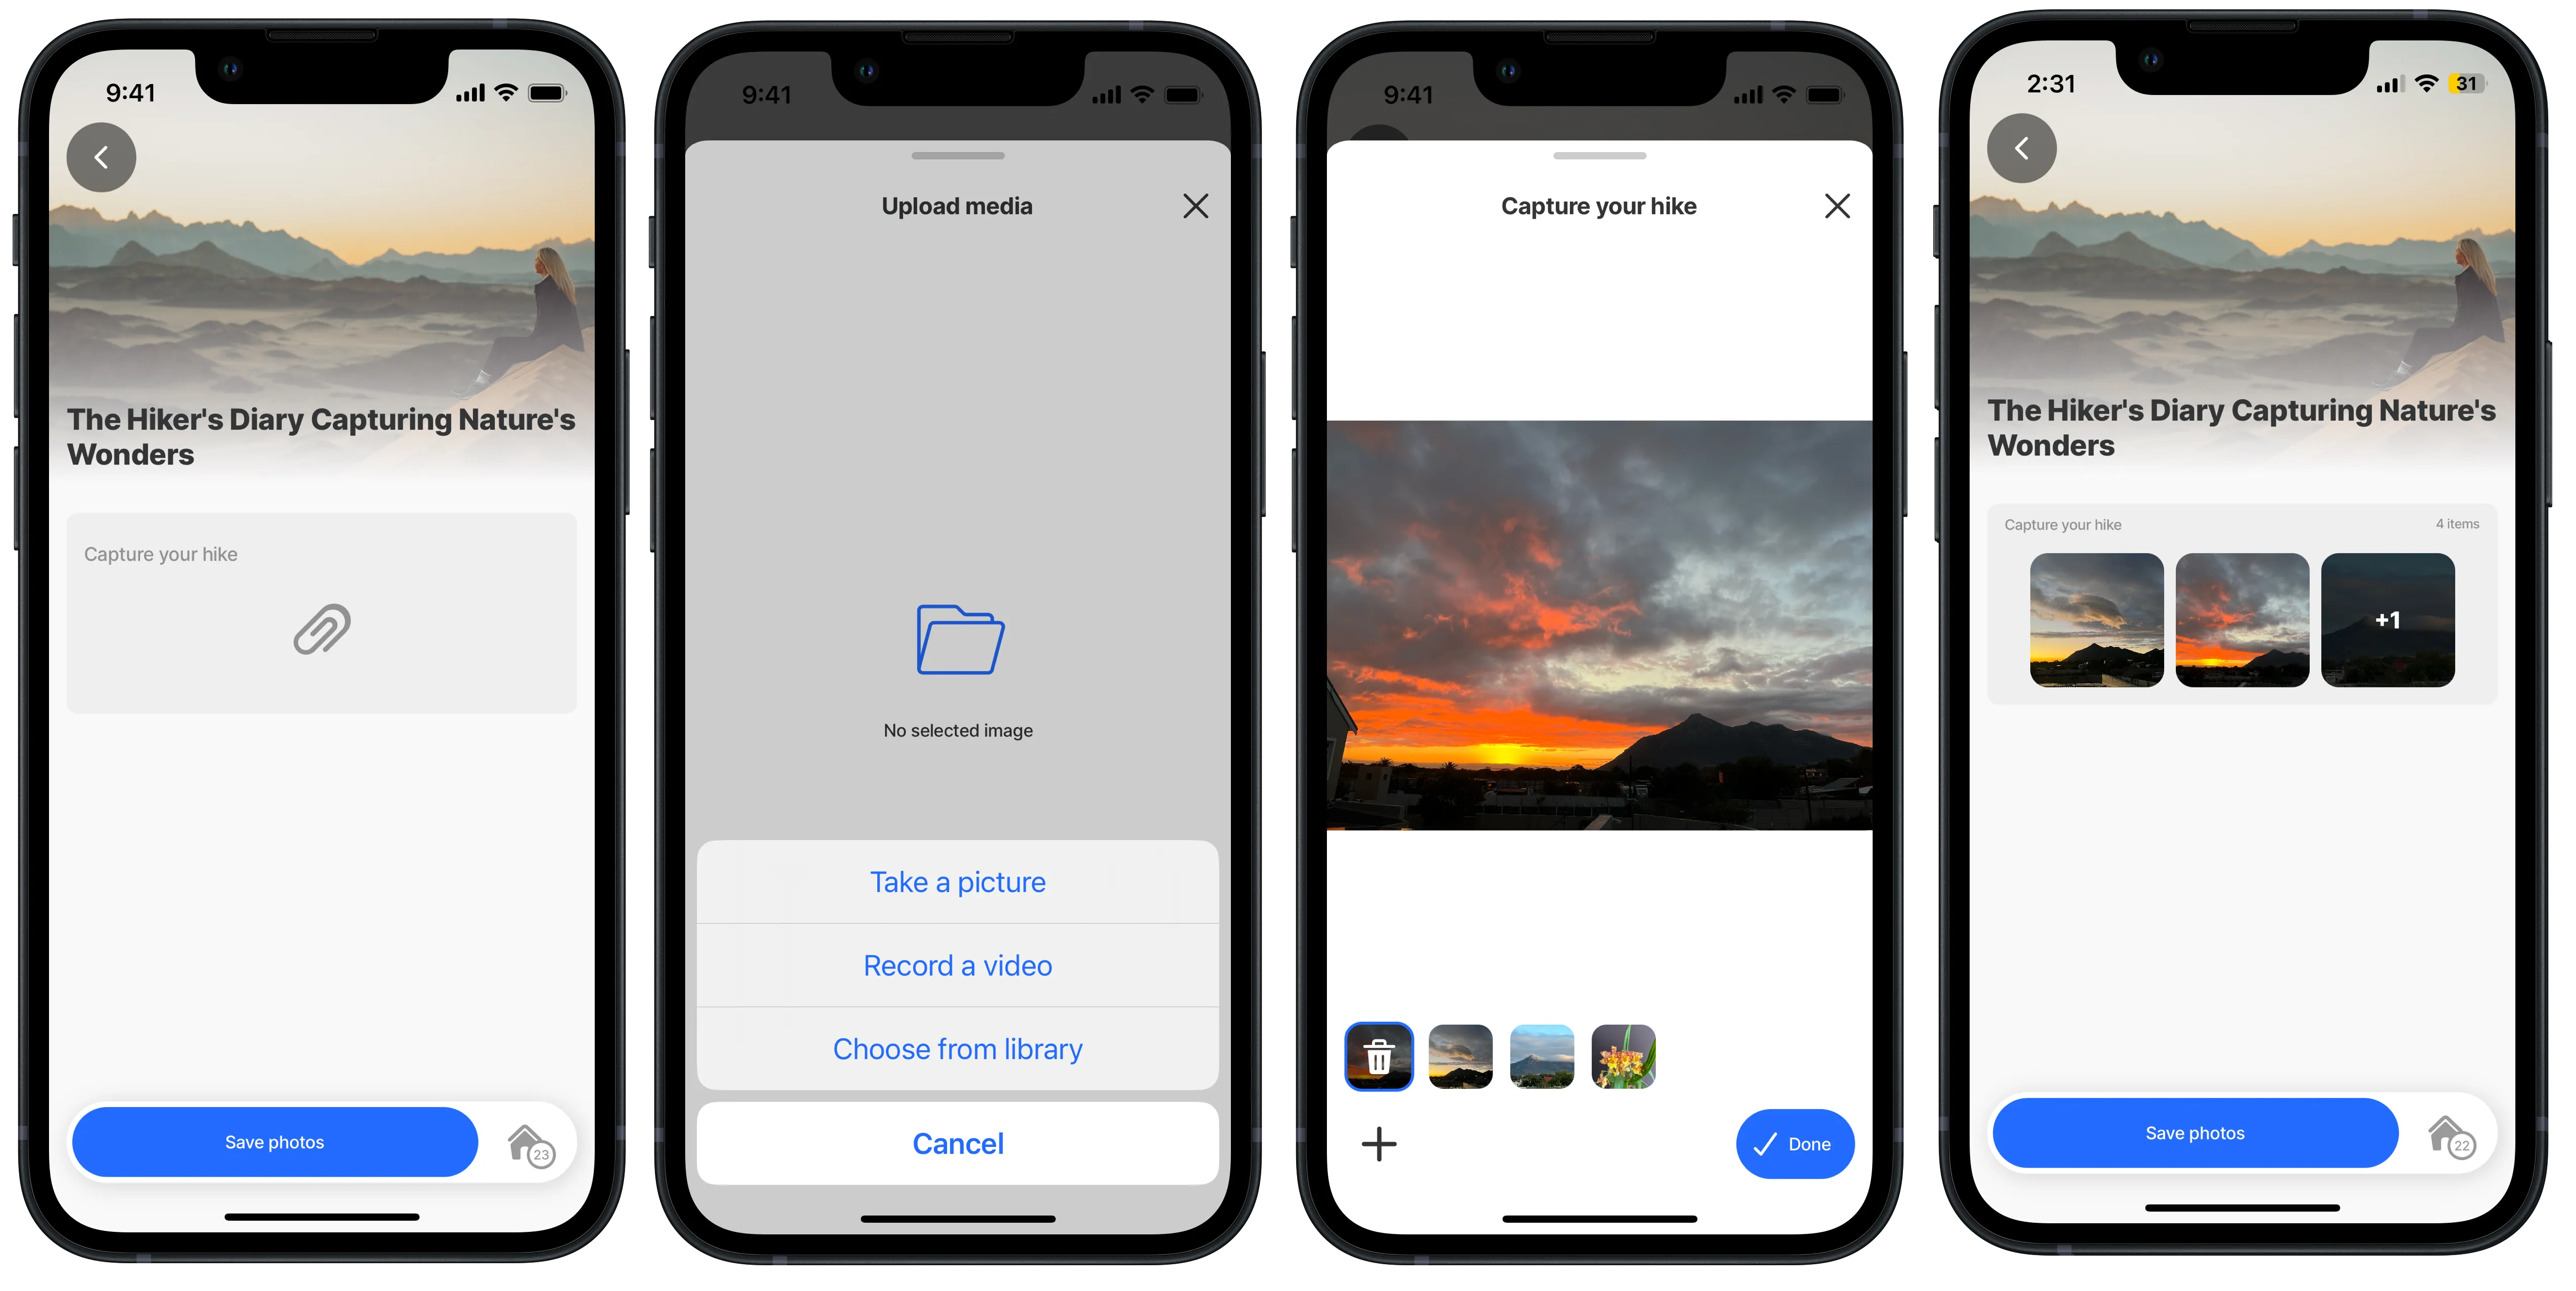
- When uploading multiple files, by default only three files are displayed in the media-field. If there are more than three files for upload the third file is overlayed with a + and the number of files, e.g. +2 and the number of items displays in the top right-hand corner of the media-field.
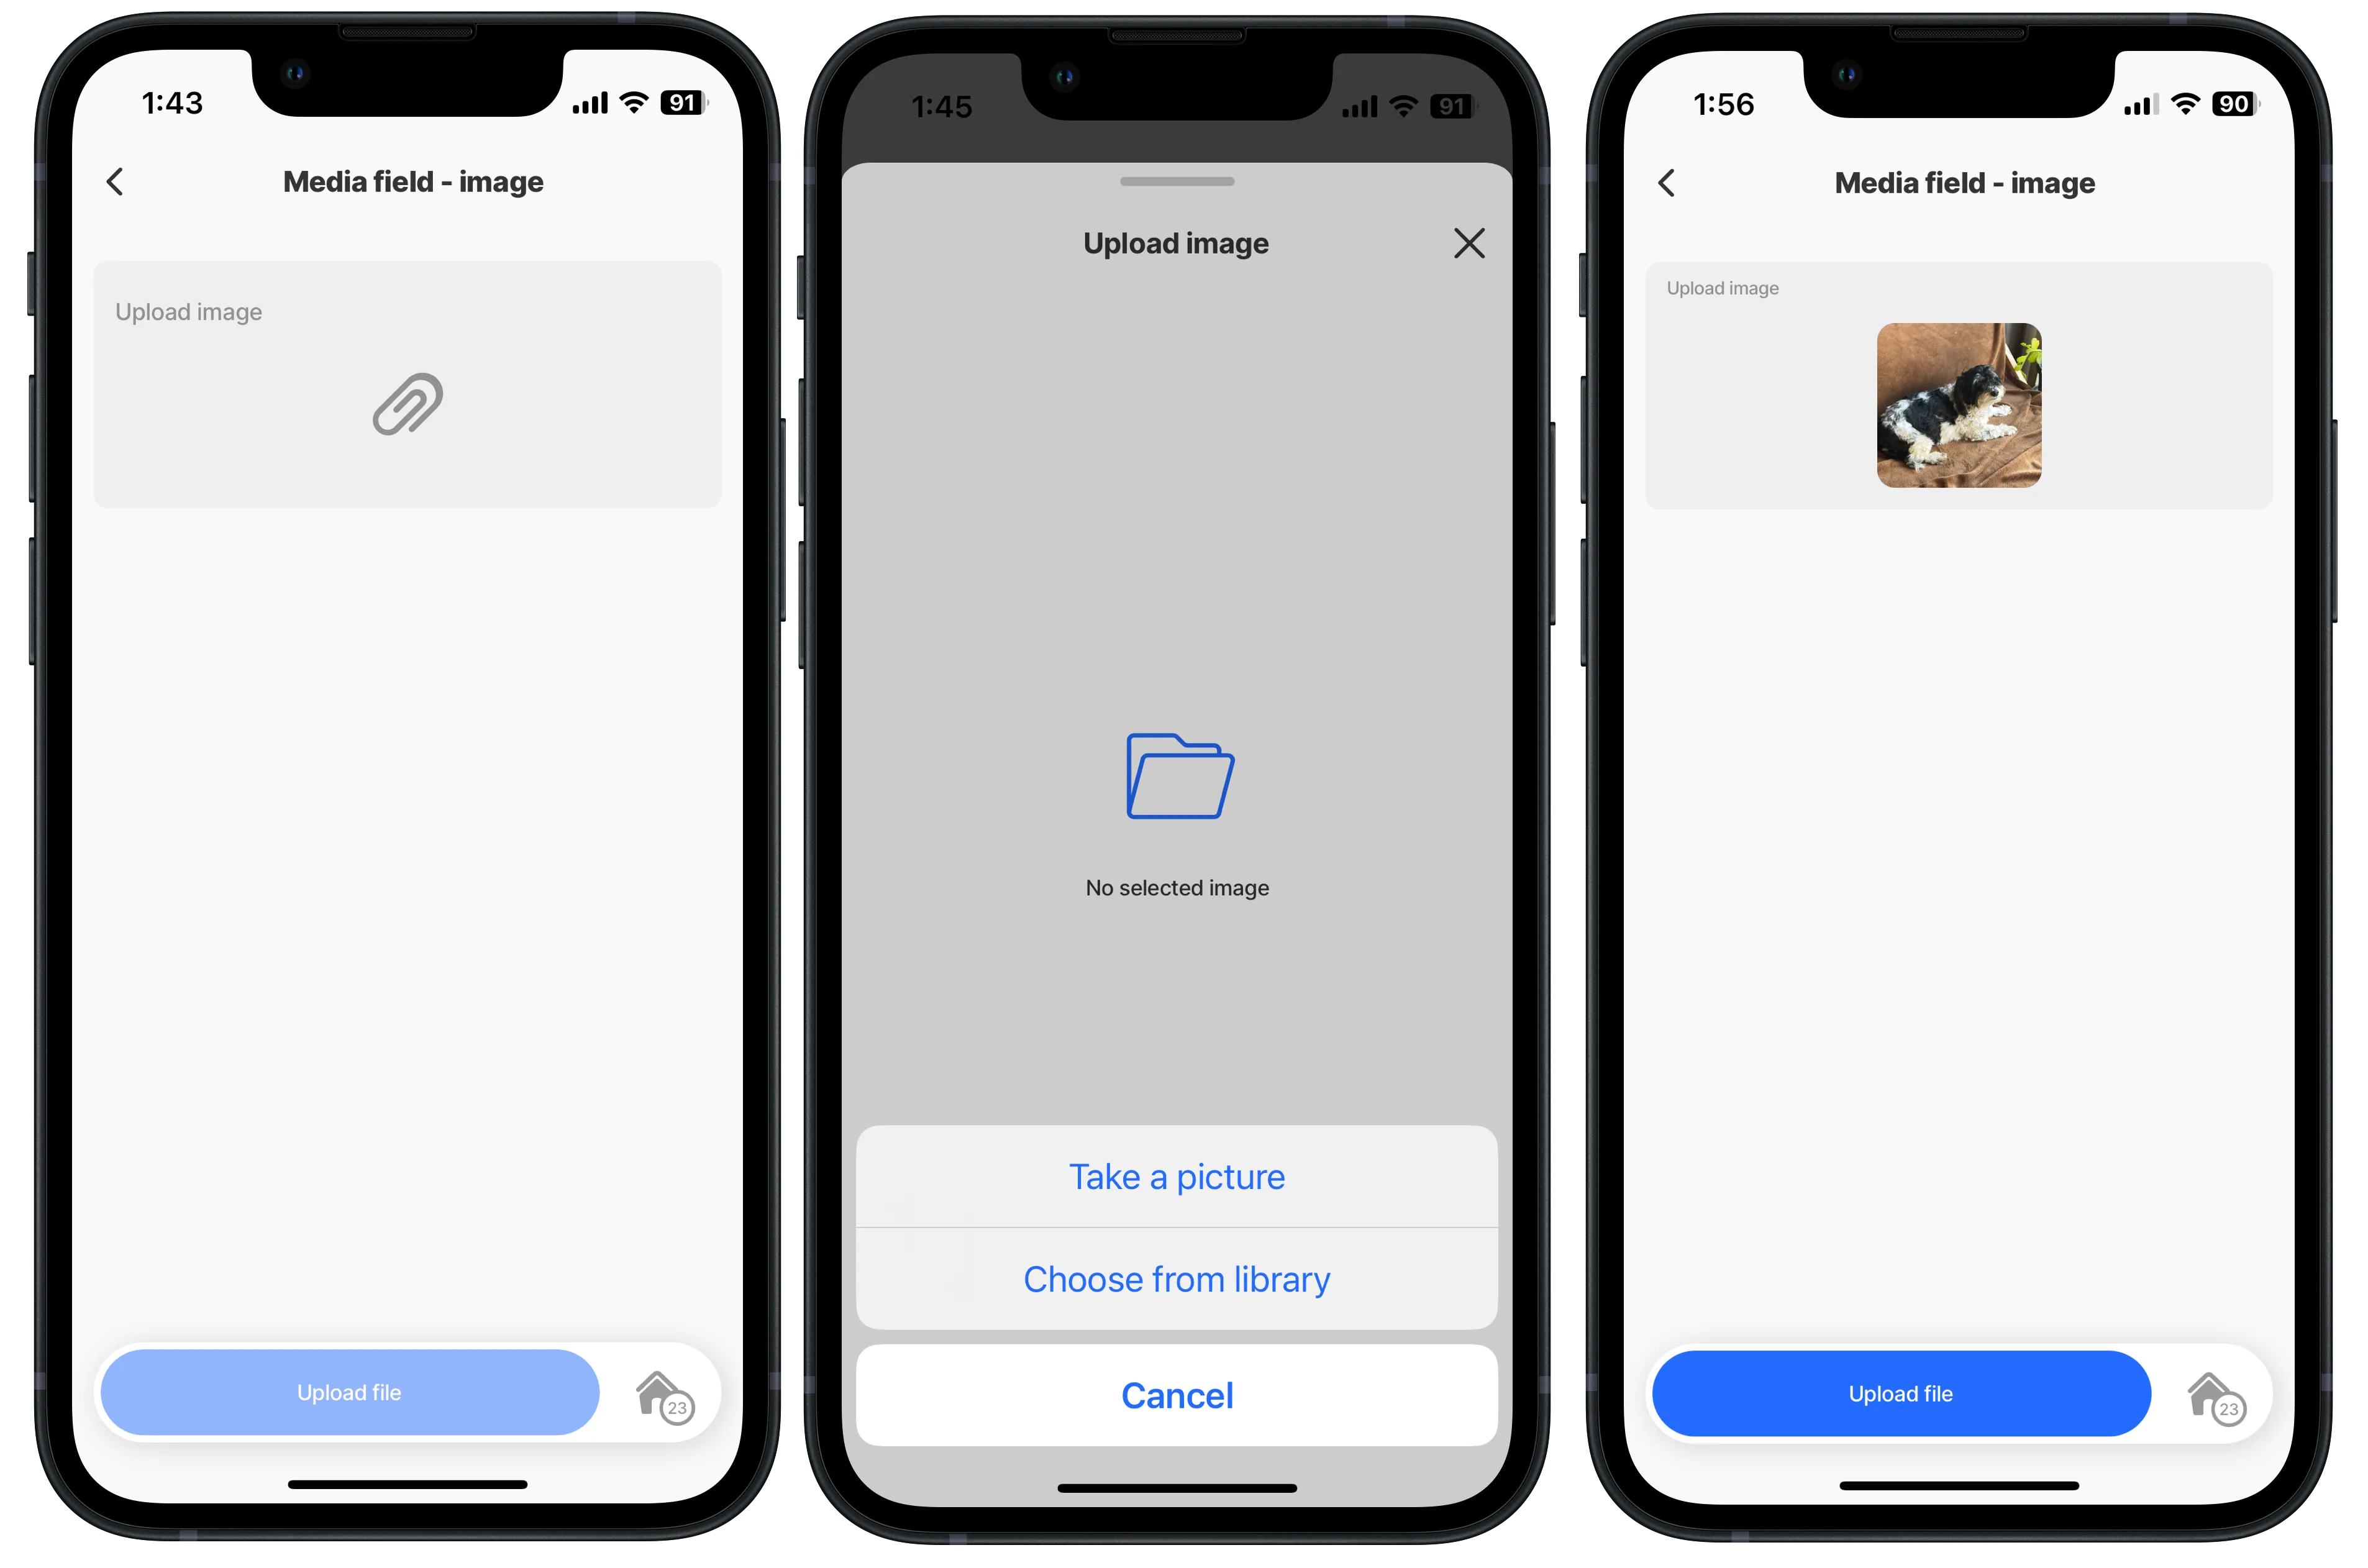
This component uploads an image using the mediaType: image property. Clicking on the paperclip icon will display a menu where you can choose to upload an existing file from your device or use the camera to take a new image. After selecting the file, or loading and cropping the image to the specified size, the file is first validated, then the upload button becomes enabled. Press the Upload file button at the bottom, which will trigger an action to create the file.
Examples: See the full example using dynamic data in GitHub.

In this example we set the isMultiple property to true which allows for the selection of multiple files to be uploaded and MediaType to any which caters for images, videos and documents. The selected images display thumbnails at the bottom of the screen. Delete an image by pressing on the thumbnail until the trash icon appears then tap the icon and the image is deleted.

In this example multiple videos are uploaded, using the mediaType: video and isMultiple: true properties. Select videos from the library or record videos to be uploaded. Tap the + icon in the bottom left corner to add multiple videos. The execute-enitity action uploads the videos and the metadata configured under data to the required data source.
Example: See the example in GitHub.

In this example multiple images and videos are uploaded, using the mediaType: imageAndVideo and isMultiple: true properties. Select images and videos from the library, take a picture or record videos to be uploaded. Tap the + icon in the bottom left corner to add multiple images and videos. The execute-enitity action uploads the videos and metadata to the required data source.
Example: See the example in GitHub.

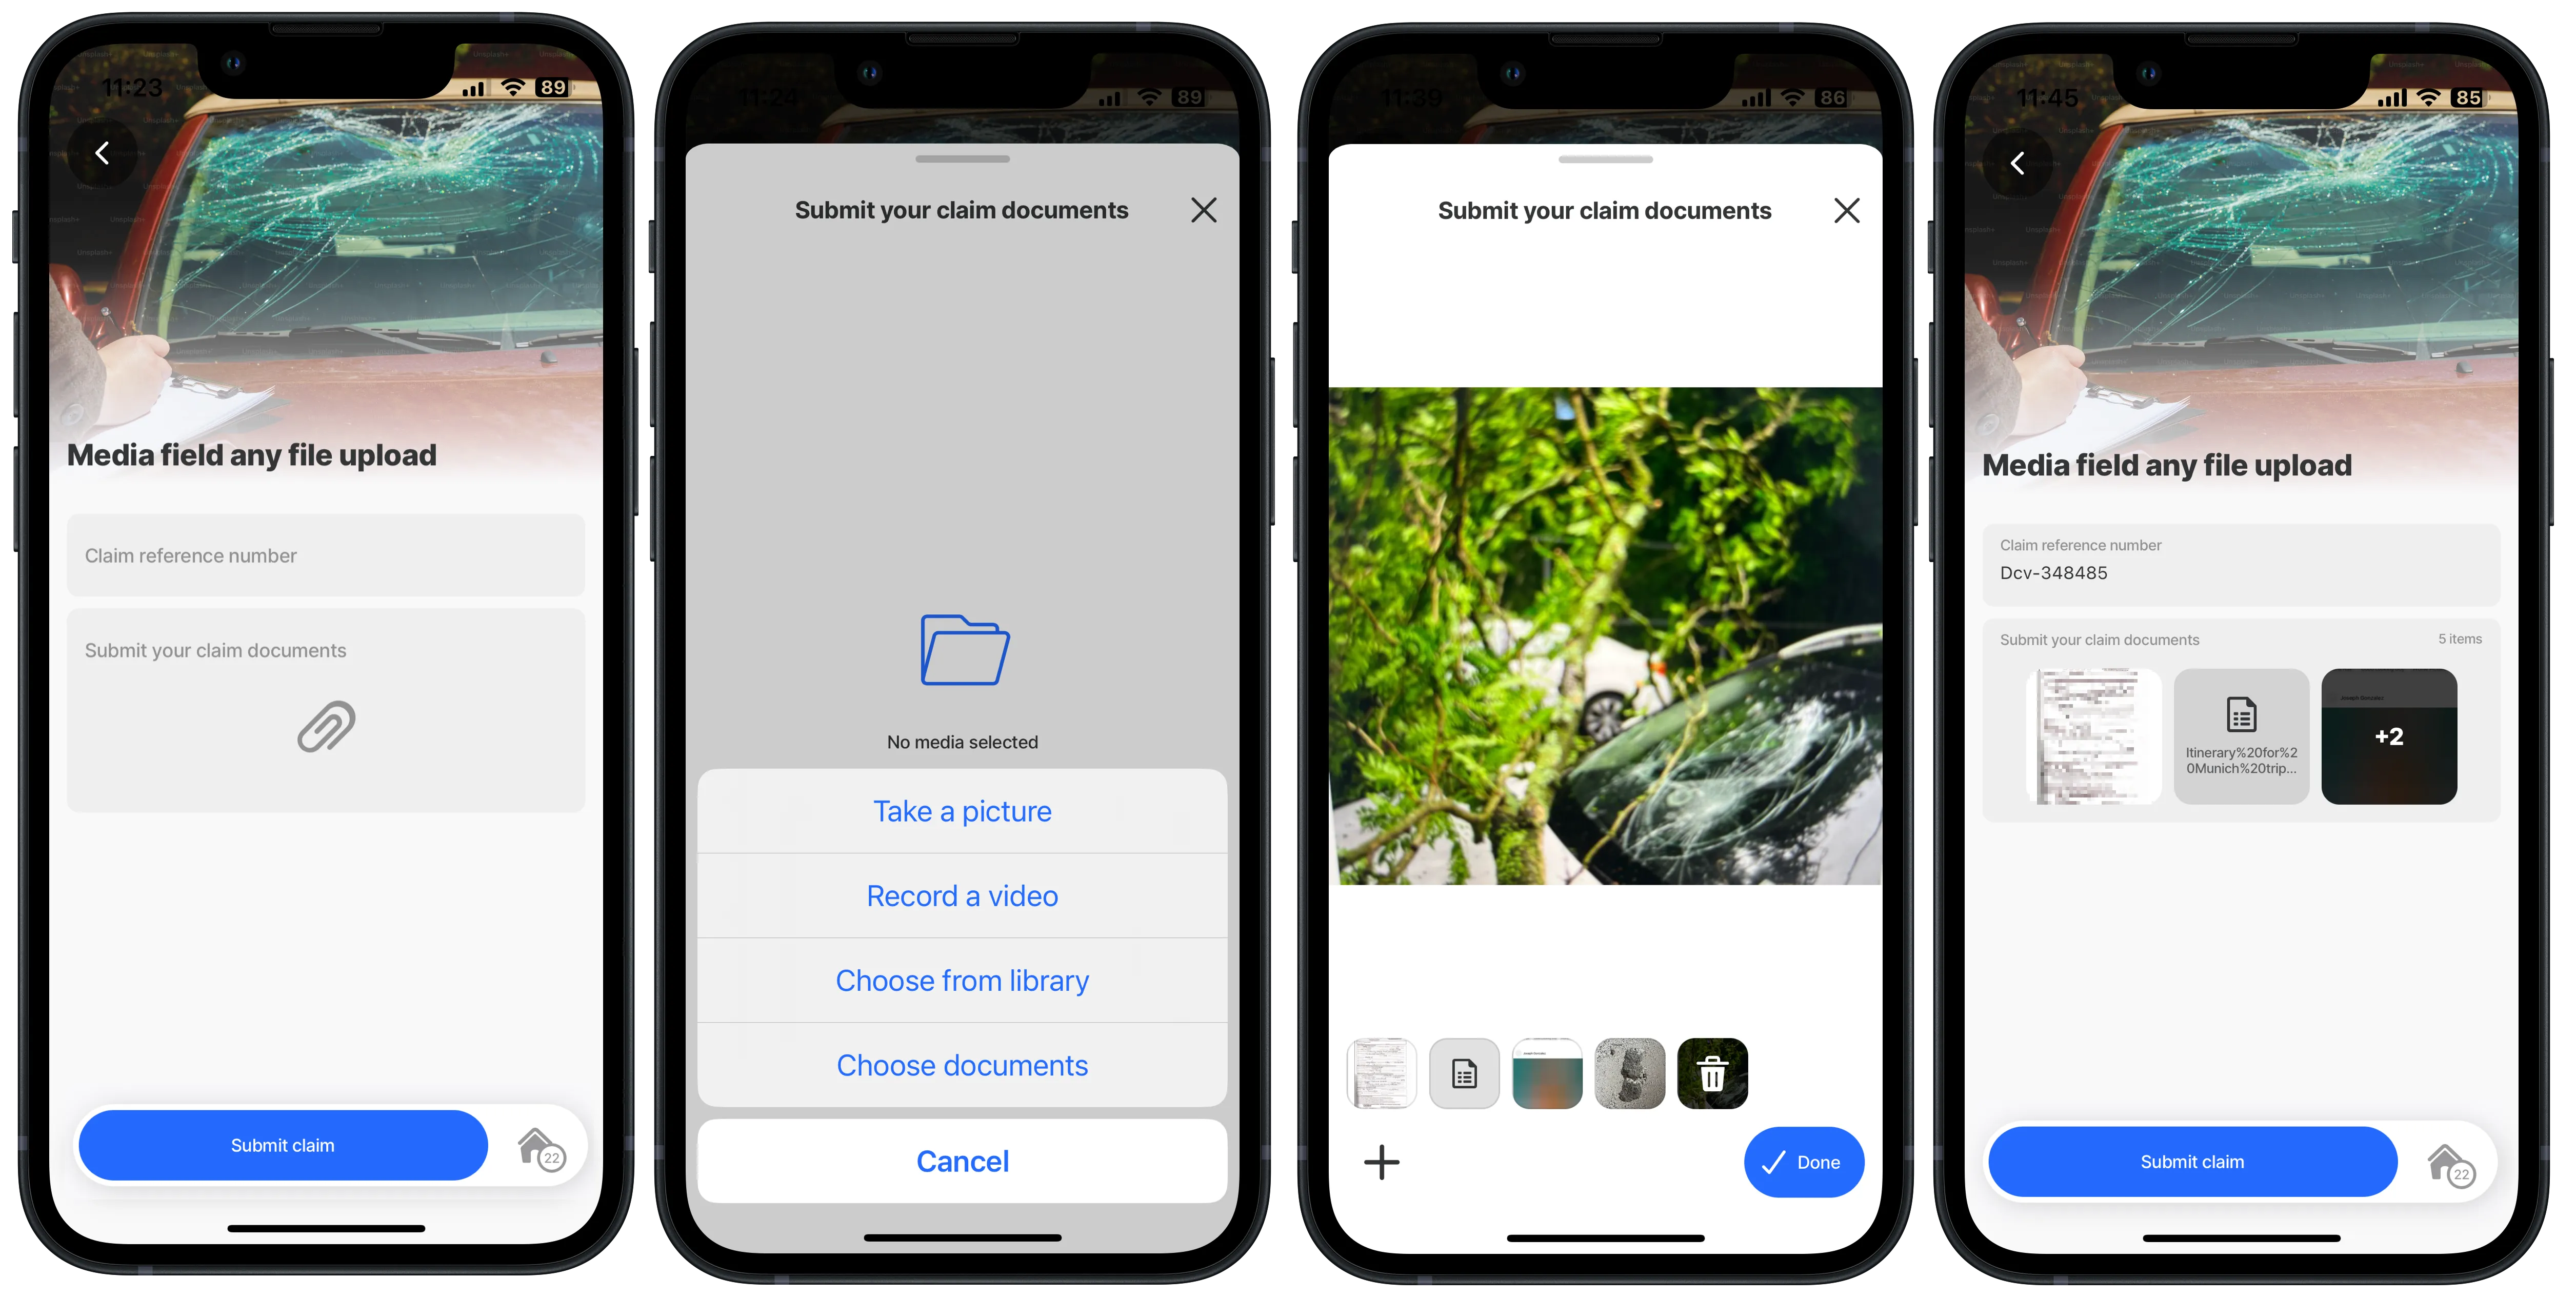
In this example multiple files are uploaded for a claim, using the mediaType: any and isMultiple: true properties. Select images, videos or documents from the library, take a picture or record videos related to the claim. Tap the + icon in the bottom left corner to add multiple files. The execute-entity action uploads the files and metadata to the required data source.
Example: See the example in GitHub.

In this example the REST APIs POST operator is used to store images. A function with an inputTransform is used to capture the image metadata. Configuring the conversion property ensures that the images are uploaded in the correct format to the REST service.
See the example in Upload product images (POST) topic to understand how to upload files using the REST data provider.

This example shows how multiple images can be loaded in the media-field using the intialValue property. Take note of the following configuration:
- The initialValue uses a datasource to return all the existing images. A local datasource ensures the images from the REST enpoint are stored locally on the device, for offline and performance reasons. The local datasource has a queryParameter restricting the images returned to be for the specific customer.
- To store images in the correct format a conversion is set on the REST POST function, converting the file from local-uri to base64. Added to this the convertHeicToJpg property is set to true, which allows the image to be viewable on iOS and Android.
- The media-field requires images to be in local-uri format, a conversion is set in the REST GET function, converting the file from base64 to local-uri.
- When clicking on the media-field to add additional images the intial images are loaded in the field. Depending on the function used, for example POST, if the images are not cleared or removed using the trash icon, the initial images will be uploaded as new images, creating duplicates. Using a PATCH or PUT function could avoid duplicates.

stores files as local files on the device and returns the file's URI as the default value. When saving these files to a data source, you must convert files from the local-uri to base64, data-uri, or buffer. The opposite is true when handling the files returned from the data source, you need to convert them from their saved state (base64, data-uri, or buffer) to a local-uri. In this example we upload a profile photo and convert from local-uri on the device to buffer for storage in SQL and then get the photo back from SQL and convert it from buffer to local-uri to display the photo as an avatar in a list. See File handling for more information.

